Durchsuchen nach
Category: Painting

First things done in 2021!

First things done in 2021!

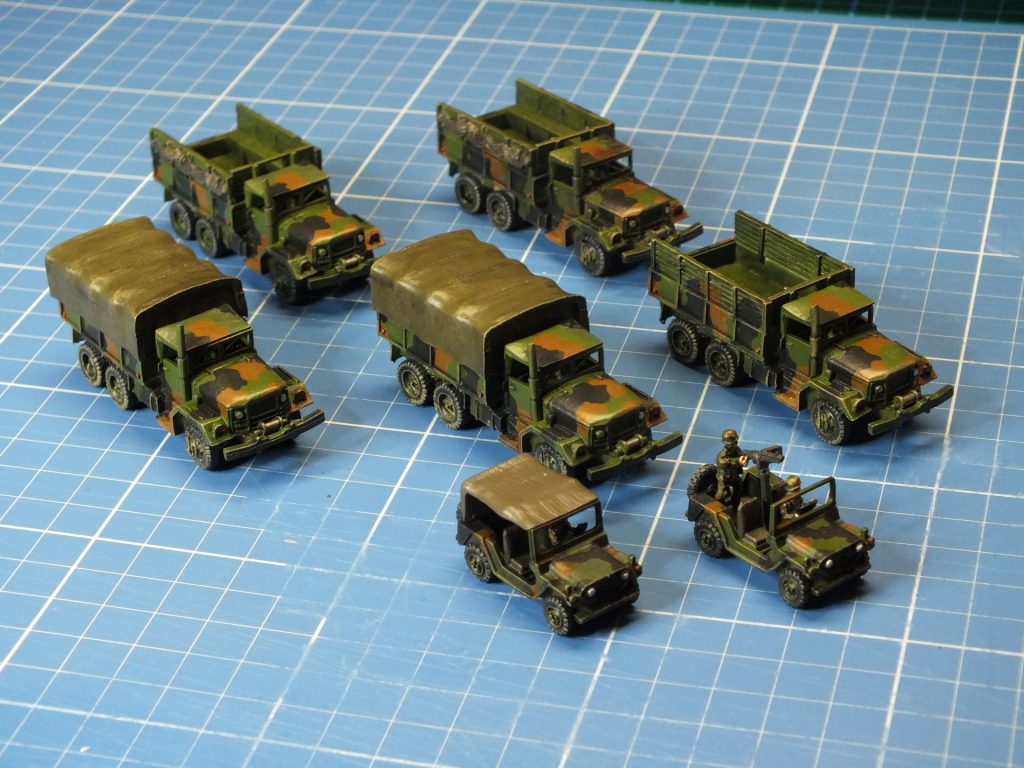
Today I finished painting four cargo loads for the Zvezda Ural 4320 Truck in 15mm. Not really much to do on them but it’s a good feeling to get something done this early in the year.

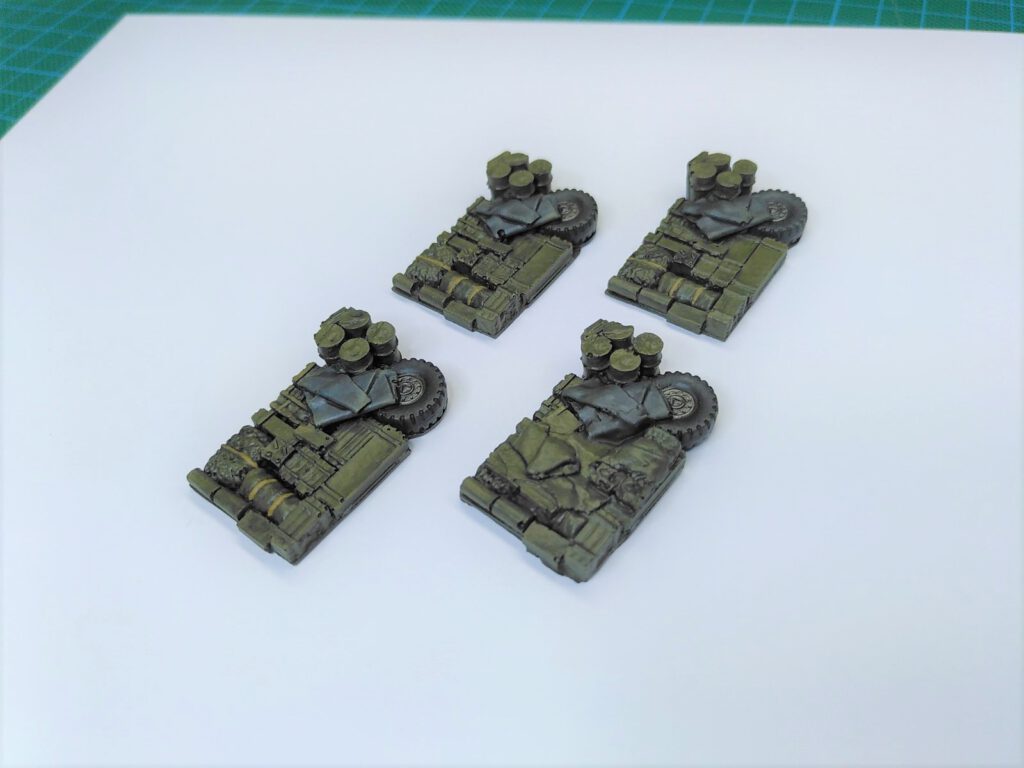
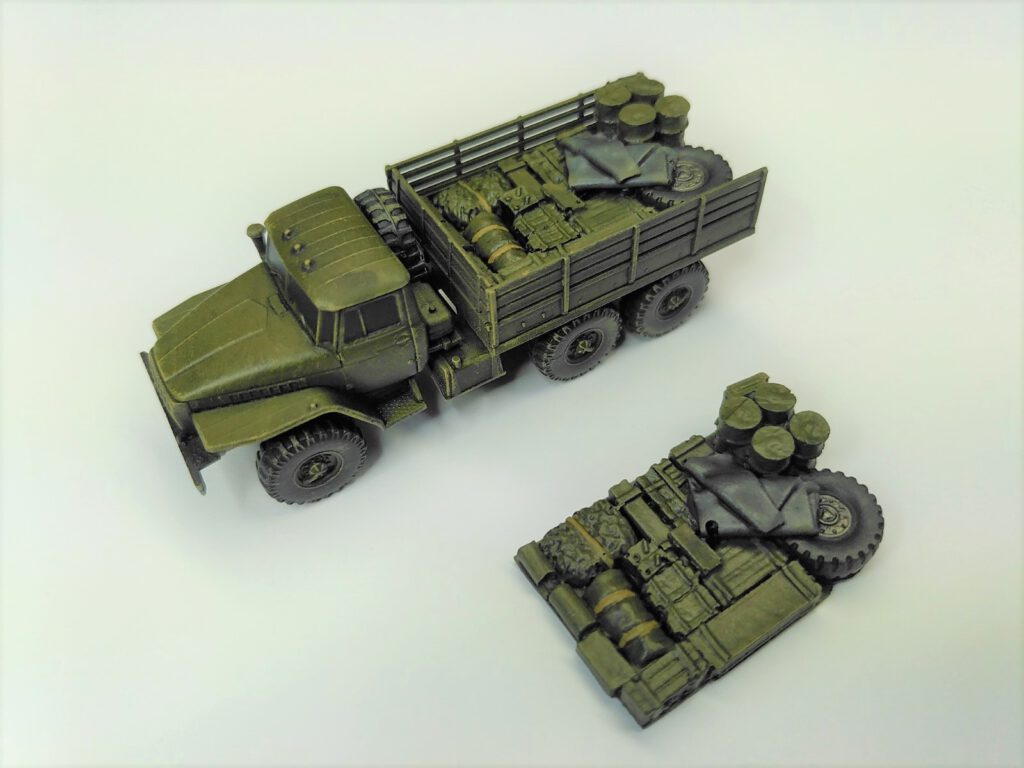
These pieces are a very nice addition to an already great model suitable for many different settings.

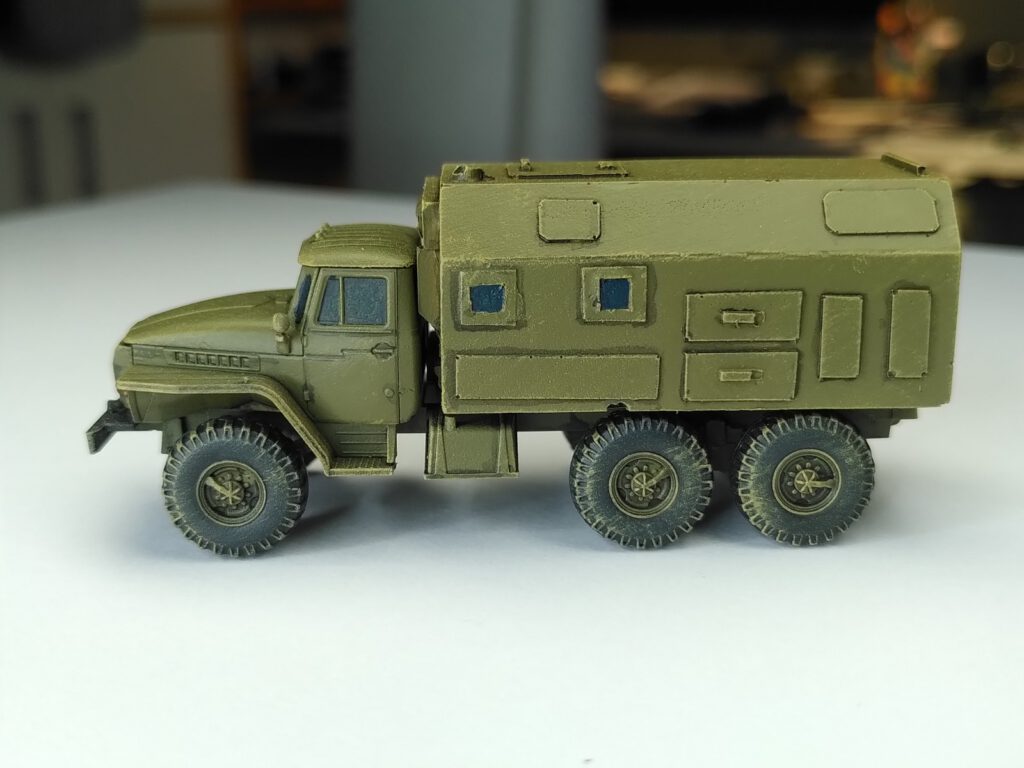
I already had four of the truck models, ordered in around 2015, when I found these loads on sandsmodels.com. In addition they offer a conversion kit for an office body which makes a very nice comand vehicle. At that time, in 2017 or 18 maybe, they also sold models of the Ural and so I snatched four loads, the office body and a fifth Ural in one order.
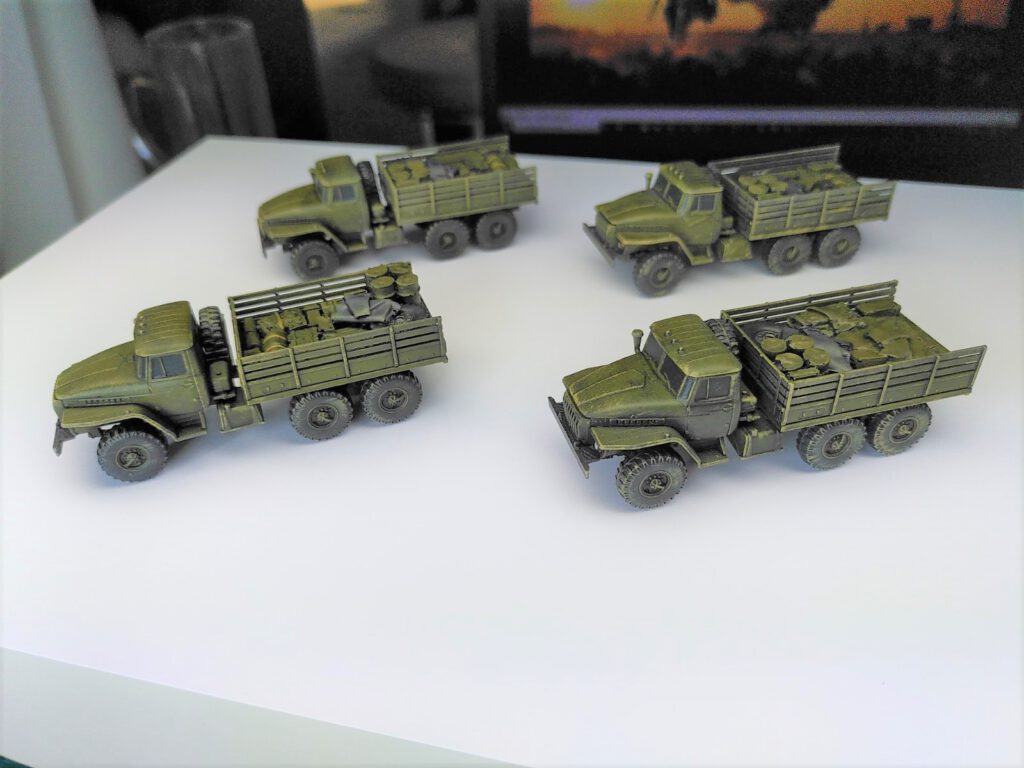
The four cargo trucks and the comand truck were already finished one or two years ago.

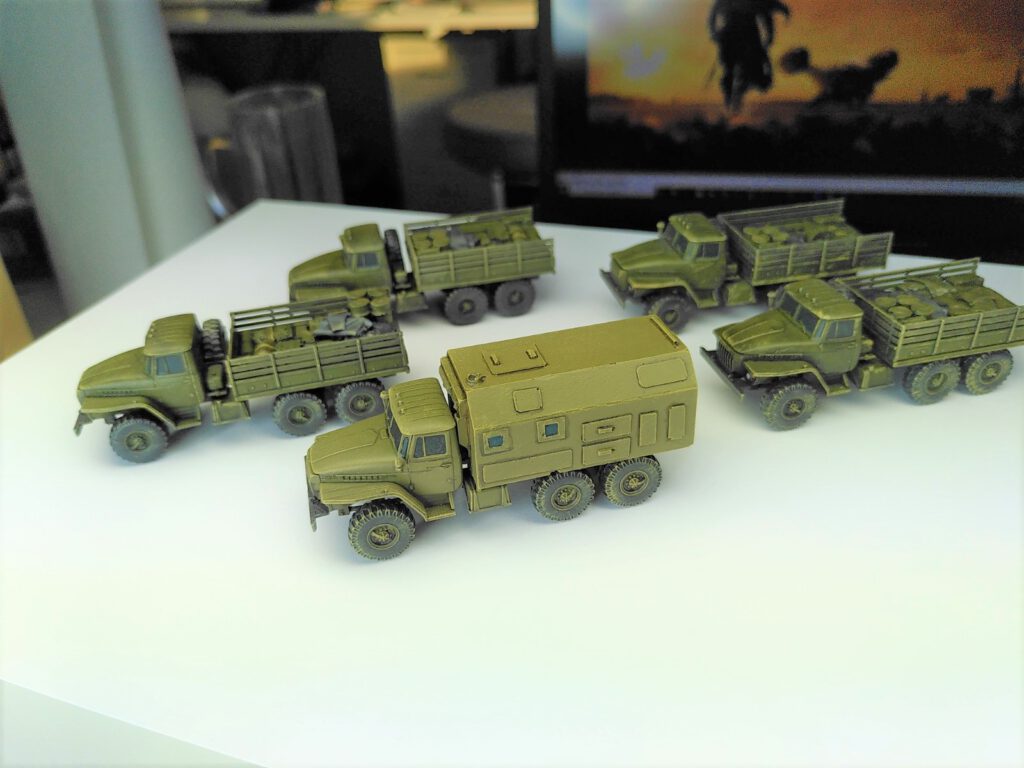
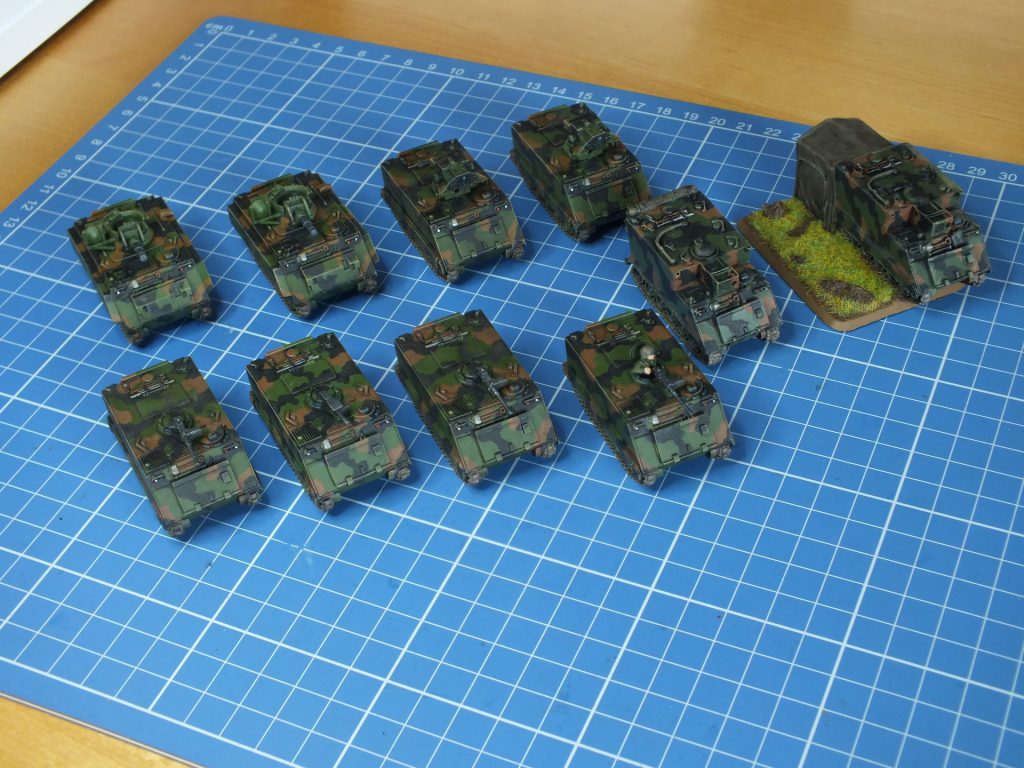
A very nice convoy ready to get ambushed by some partisans or special forces teams! 🙂

2020 Old year’s clean up

2020 Old year’s clean up

The last few weeks I managed to finish four units of 40k minis, 34 figures as a whole. That was only possible due to the extensive use of Citadel Contrast paints. Otherwise that would have taken me years!

These 12 Hormagaunts are my first Tyranids ever and were completely done with Contrast paints – with a very good result considering the effort. I have no intention of collecting a ’nid army which is my least favourite of all 40k factions. My plan is to use them for Space Hulk-like scenarios in Kill Team. Maybe some Tyranid warriors will join their ranks later.

The next three units are all Orks that I wanted for KT.

I really like the idea of a big bunch of Snotlings as a kill team. These 10 were painted up nearly in zero time so I might add some more in the future if they turn out to be fun in the game. Most was done with Contrast paints. The Runtherd is a mixture of contrast and traditional method.

Burna Boyz is what I wanted most for KT Arena. Their area effect fire template should do good use in the narrow passages. Only the skin was done with contrast paints, the rest is traditional method.

These Nobz were painted the same way as the Burnas. Painting Ork skin the contrast way gives very nice results. Until now I only had Nobz with sluggas and choppas. Now I also have options for kombi-weapons but what I really wanted was the boss with the big choppa… Good noone can hear me talking! 😉

A good and healthy 2021!!!

Kill Team Scenery

Kill Team Scenery

Hobby time during the last three days was spent completely on Kill Team scenery. Everything I own, besides of the items from the Kill Team Arena box, was still on sprue, left to build and paint in the boxes: buildings and ruins from the Sector Fronteris box, the Servo Haulers from the Ork starter box, Krogskull’s Boys, and (Surprise! Surprise!) a Wall of Martyrs from the Tau starter box, Advance Team Starpulse.

The Sector Fronteris worked out quite nicely and will also be useful in Star Wars: Legion games. I like especially the rusty main colour, originally Army Painter Fur Brown spray.

The Servo Haulers are not finished yet. They were given only a black primer with another basecoat of Team Yankee Chieftain Green. I guess I will take my time to paint these because I really started to like them while building. With some special rules they can bring a lot of fun in scenarios. But why did I use this colour?

Unfortunately I had two cans of the Chieftain Green and both are leaky as you can see from the pictures.

I already had this problem with other brands and it’s not a question of age. I have much older cans which are still tight. Whatever, I have to use them up as quickly as possible and so I used the spray on the haulers and the wall. In the end, I think, the colour is not bad at all as it brings a dirty look of decay with it

The Wall of Martyrs is not a piece that I fancy at all. Too many skeletons and awkward iconography that are so… well, 40K! But someone left that literally at my door step and ran away. I thought about selling or just dumping it but in the end I decided otherwise. Let see what I can make of it.

Oorah!!! It is done!

Oorah!!! It is done!

And so it ended yesterday without much ado and applause. Not even from my girl-friend! 😉 I finished the last of the vehicles for my US Cold War army, including all the gunner and commander figures. For today spraying varnish was the last thing to be done.

Waiting for their turn to get varnished.

And then to arrange them a nice little box until it’s time for action.

Only the ground forces.

After seeing this, I guess, I will need some more infantry later. How did evil Lord Merrick say: „I’m not that easily defeated!“ I guess, this is also true for most painting projects.

The last pieces yesterday were the M35 trucks and M151 jeeps.

All metal models from Skytrex from their Vietnam range.

During a night shift I also finished all the gunner and commander figures for all of the vehicles – another 13 figures. Some were easily done with plain NATO olive. Others needed the woodland camouflage pattern, like the gunners in the Humvees and the ones in the MUTTs.

With this the main force of my American 15mm Cold War army is done. Helicopters and planes did I already finish last year. I still have two platoons of infantry and a few helicopters on the pile but these are for a later date. With this ends one of my biggest painting projects ever!

Abrams finished!

Abrams finished!

There wasn’t much work to do on this one. This was only a single M1 from the Tanks Modern Age starter box, which I bought last year to play some tank skirmishes with quick to learn rules while I was on holiday on Crete with some friends.

I already have eight Abrams completely painted and ready packed in boxes but I used the opportunity to add some details to all of the models. Two of them belong to the Zvezda Hot War range and two others still need a commander figure, as I found out by the way.

Unfortuantely I used another painting method on the older M1s. They were all primed in black and you can clearly see the difference between old and new.

The contrast between the camouflage colours on the new one (front) is much brighter. The overall look of the older version is much darker and even a stronger drybrush couldn’t fix that. Nevertheless, all models are ok for my liking. Important experience points gained!

We need more elephant shoes!!!

We need more elephant shoes!!!

At least in the Bundeswehr, the M113 was nicknamed „Elephant Shoe“. I guess, in a Cold War setting of the 60s, 70s or 80s you can never have enough of this versatile APCs and its variants.

In this phase of my US army project I had to finish ten M113 of different sorts And one is rather an objective or scenery item with a base.

The two M577s were lready mostly done and I only added some minor details like head- and backlights. Both models are older pieces from Battlefront’s Vietnam range.

The standard M113s were also nearly complete, even with the commander figure. So only some detailing and drybrushing with Zandri Dust here.

Finally, the support variants of the M113 family.

On the M901s and M163s only the camouflage pattern was done and, firstly, I used the infamous MIG-filter on them, as on the LAVs and other models before.

The turrets of the M163s were harmed the most by the filter but could easily be fixed with some Revell BronzegrĂźn.

These M163s also still need some figures for gunners.

This is another ten tanks off the list! I’m really coming to an end here.

M2 Bradley ready for action

M2 Bradley ready for action

The Bradleys were mostly done and I only added some minor details like some red for backlights and blue for window slits.

The battle ready M2.

All in all, I think, due to the black primer these models became too dark. That’s why I stopped using black primer on all later models. Fortunately there are enough colour primers around nowadays.

This model is another one from Zvezda, the only Bradley available in 15mm, as far as I know. However, as it seems, Battlefront will release its own Bradley model for Team Yankee with the next wave of US verhicles.

The Zvezda model shows the deficiency of some of their 1/100 modern vehicles: The sculpt seems to be unfinished! Here you can see it on the headlights.

All the details for the headlights were omitted. This is strange because Zvezda usually produces highly regarded scale models and the rest of the model is well detailed.
For me, I decided not to paint headlights on but to keep camouflage pattern to do exactly this, to camouflage it! Battlefront’s kit will hopefully be better!
I already took some pictures of the model a few years ago, along with some minis I had painted at that time.

Another three off the list!

„The Roof, the Roof…!“

„The Roof, the Roof…!“

Michael Moore coined my image of the M109 in „Fahrenheit 9/11“. In one scene you see crews firing their 155mm guns during the Iraq War to the music of the Blood Hound Gang’s iconic song „Fire Water Burn“. One of the moments in life when you feel fascinated and disgusted at the same time.

The M109

Nevertheless, yesterday I did the last brush stroke on these. In addition to painting details, wash and drybrush, I also added some jerry cans on each side of the turrets.
These are the plastic models from Zvezda, originally for their own tactics game Hot War: Battle for Oil. A game I never played but some of the models for this game are really great. And the M109 is one of them.

I already had some of the older Battlefront M109s made of resin and metal parts for their Vietnam range. But I don’t like that old model which is rather chunky, in my opinion. But I used these models for my West German army later as you can see in the pictures.

The Zvezda model shows much more detail and was much easier to build. Superb fitting with no glue required! The only major disadvantage is that it can’t be built open-hatched. So no model with a commander on this one.
Comparing the Zvezda M109 with the new plastic M109 from Battlefront, derived from pictures on their homepage, the similiarities between both models are so big that I’m wondering if there was a cooperation between both companies. Only some details on the wheels and the back of the turret seem to be more elaborated.

Another four off the list!!!

„Buckle up!“

„Buckle up!“

Last night I finished the six Humvees. The sight of these and having some more time during quasi-quarantine brings me in the mood of replaying some C&C Generals. 🙂

Hah! This should be fun!“

The Team Yankee HMMWV Platoon box contains six models which can be built with all important weapons options for the basic M998: M2, Mk19 and TOW launcher. In the end, I decided to built two of each. First I thought about not to glue the pintle mounts to change weaponry according to scenario requirements but then decided not to bother around with small parts flying around.

„Hey, check out our new TOW Missile!

Painting was fairly easy. Here I used the Team Yankee NATO spray as a primer without any other basecoat, brushed on the camouflage scheme and used the same filter as on the LAVs (MIG-1506, Brown for Dark Green). Here again some spots turned whitish and I had to fix that up with some camouflage green by brush. The rest was Nuln Oil and some details.

„Come on in!“

As for the LAVs, I had a 1/72 counterpart, from Dragon this time, which I finished about one or two years ago.

„Got room for five!“

The comparison between the two models shows that the M2 on the 15mm Humvee is ridiculously long. I hope to find some better scaled M2s in the future and will change them then.
The storage equipment on the 1/72th is from the same set as the LAV-25’s. I also changed the original wheels from the box for some rubber tyres from a company called Calibre72. This was the first time I ever used products from the second market for scale models. Until back then I had no idea how big this market is. Hobby indulgence without end! 😀

„Let’s go!“

This LAV-25 and Humvee share the same fate. Bought, built and primed in 2013 they rested in a cupboard for more than five years. When the Shame in ‚Pile of Shame‘ became just too big, these were about the first models to be finished.
Most of my 20mm stuff that was intended for wargamining I sold some years ago but I kept these for a diorama on my mind.

Oorah!!!

Oorah!!!

The first group of vehicles is finished: 4 LAV-25 and 1 LAV-AT. They only still need some varnish but I will do this when everthing is finished. And one of LAV-25s still needs a commander figure and a MG.

Family LAV ready for battle.

This was the first time I ever used a filter on models to smoothen the contrast between the colours of the three colour camouflage scheme. Generally the result was really good and much better than expected but in some spots and lines (Where the filter pooled, I guess!) the NATO green faded to white. The black and brown colours were not affected. I fixed that with the shade of Nuln Oil but some areas still look off colour. The final touch was a drybrush with Zandri Dust.

One of the 15mm LAVs in detail.

Last year I already finished a Trumpeter LAV-25 in 1/72th which now served as an example for the scheme and details. This one was a nemesis of mine which rested in my shelf unfinished for years.

1/72 LAV-25 from Trumpeter. Packed up with equipment from Black Dog.

This model is a relict from pre-Team Yankee times when I planned Cold War tabletop with models in 20mm scale. Now this one is supposed to become part of a diorama set in the Twilight:2000 universe. Another project waiting to happen! But for now, five (good as) finished LAVs is a fine result to finish an evening.