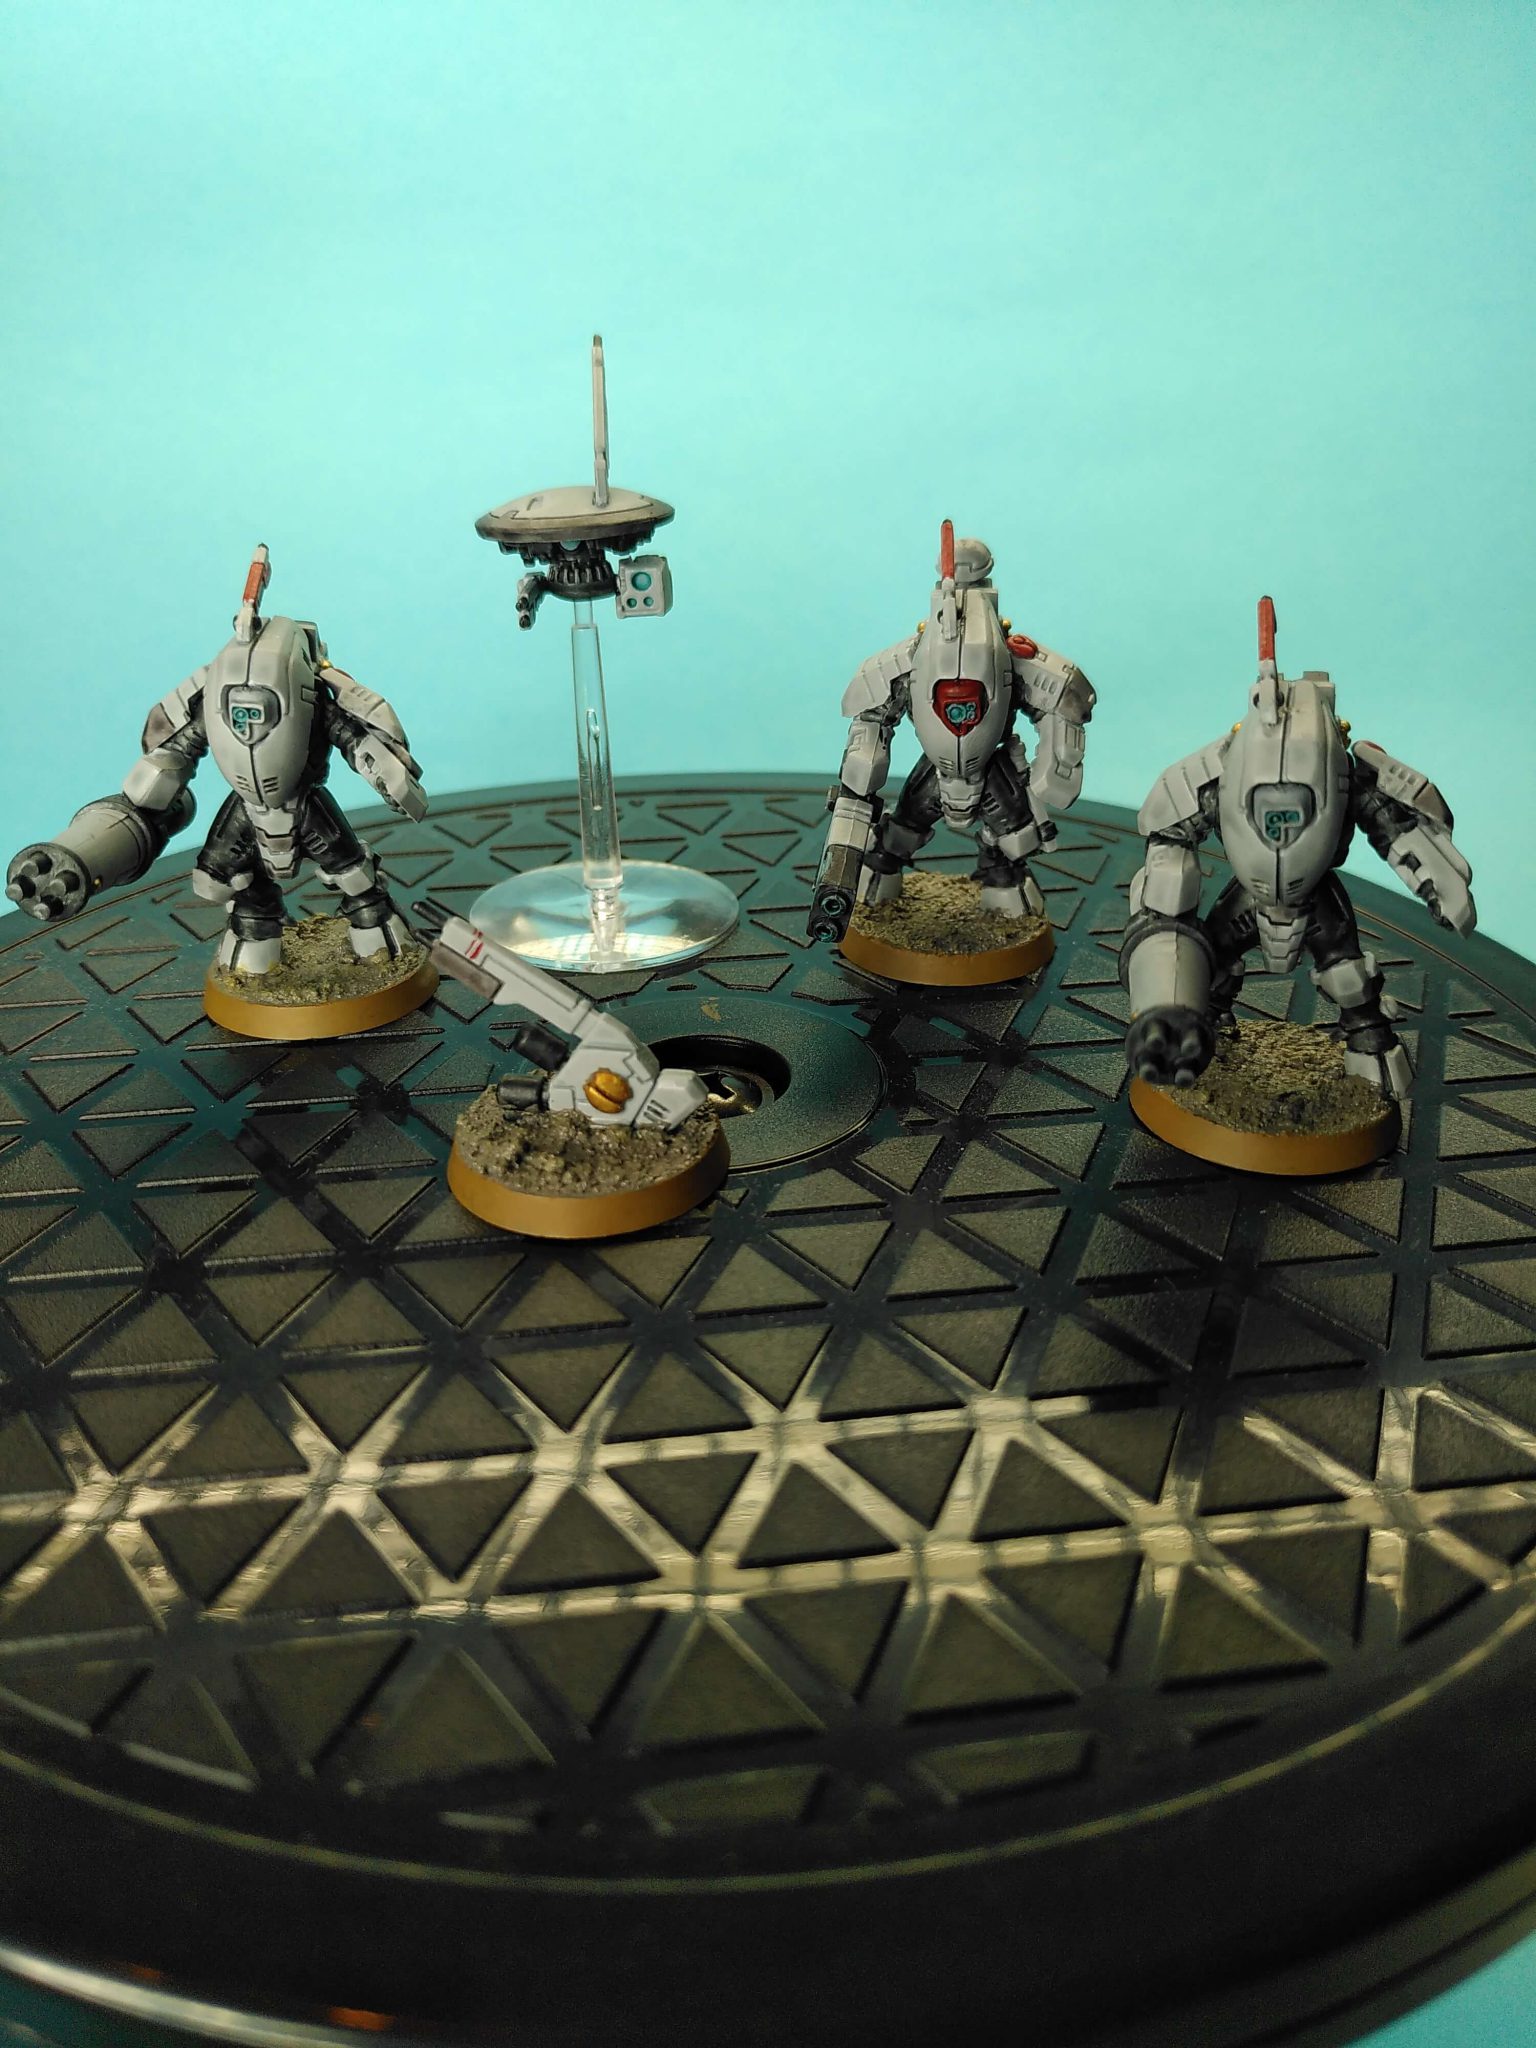
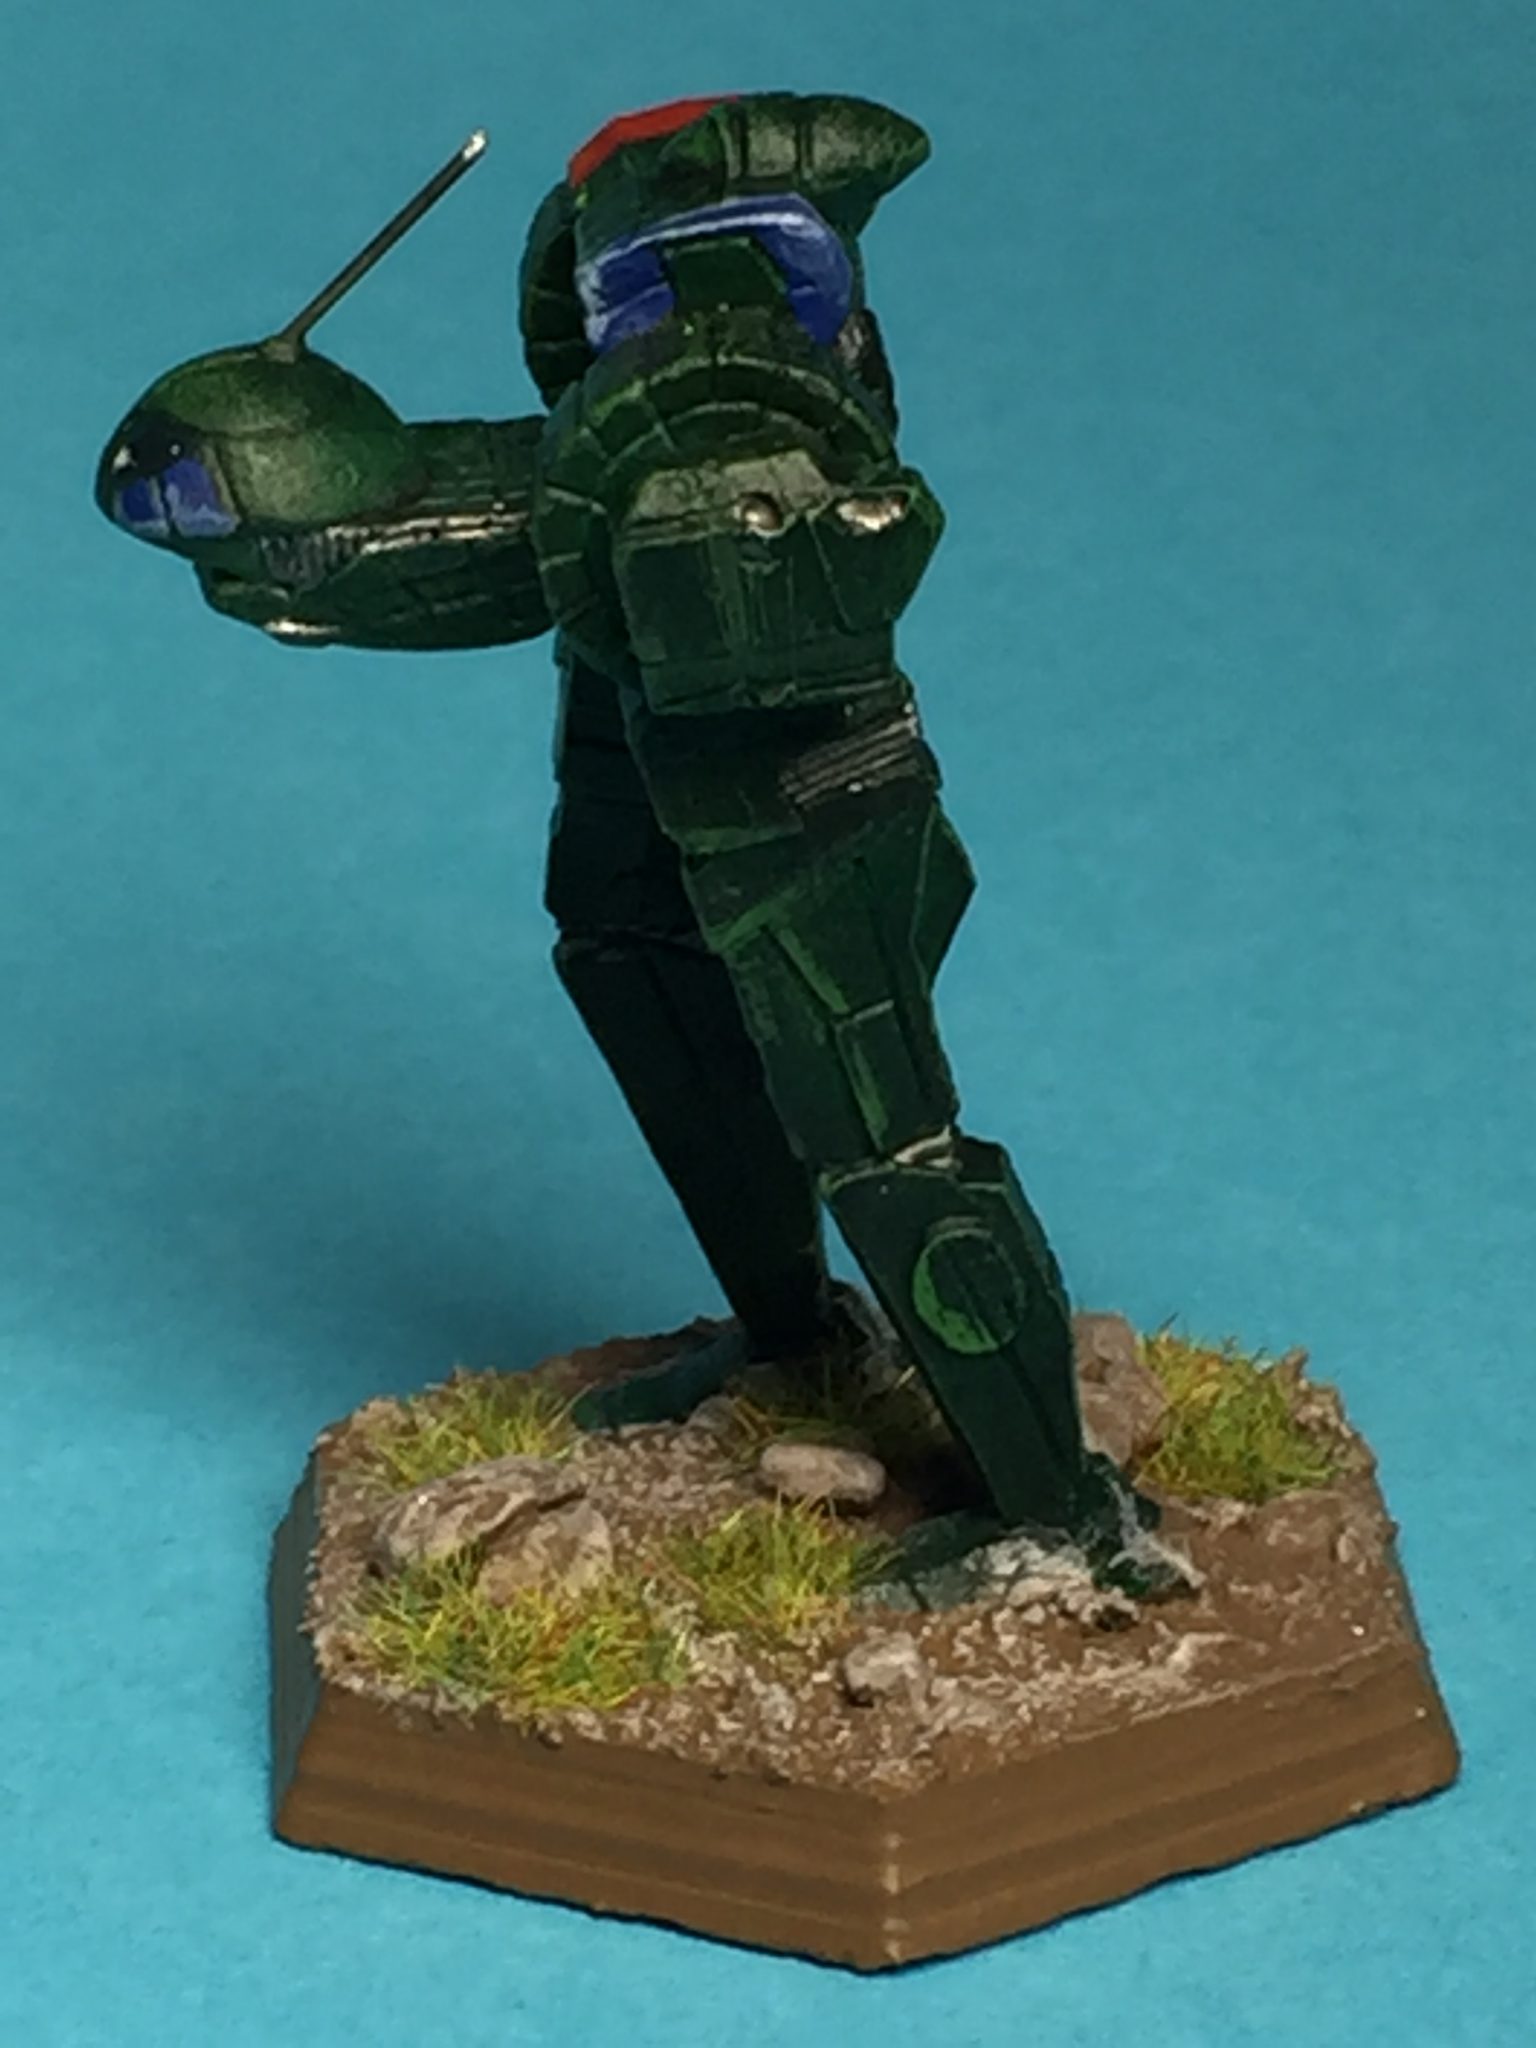
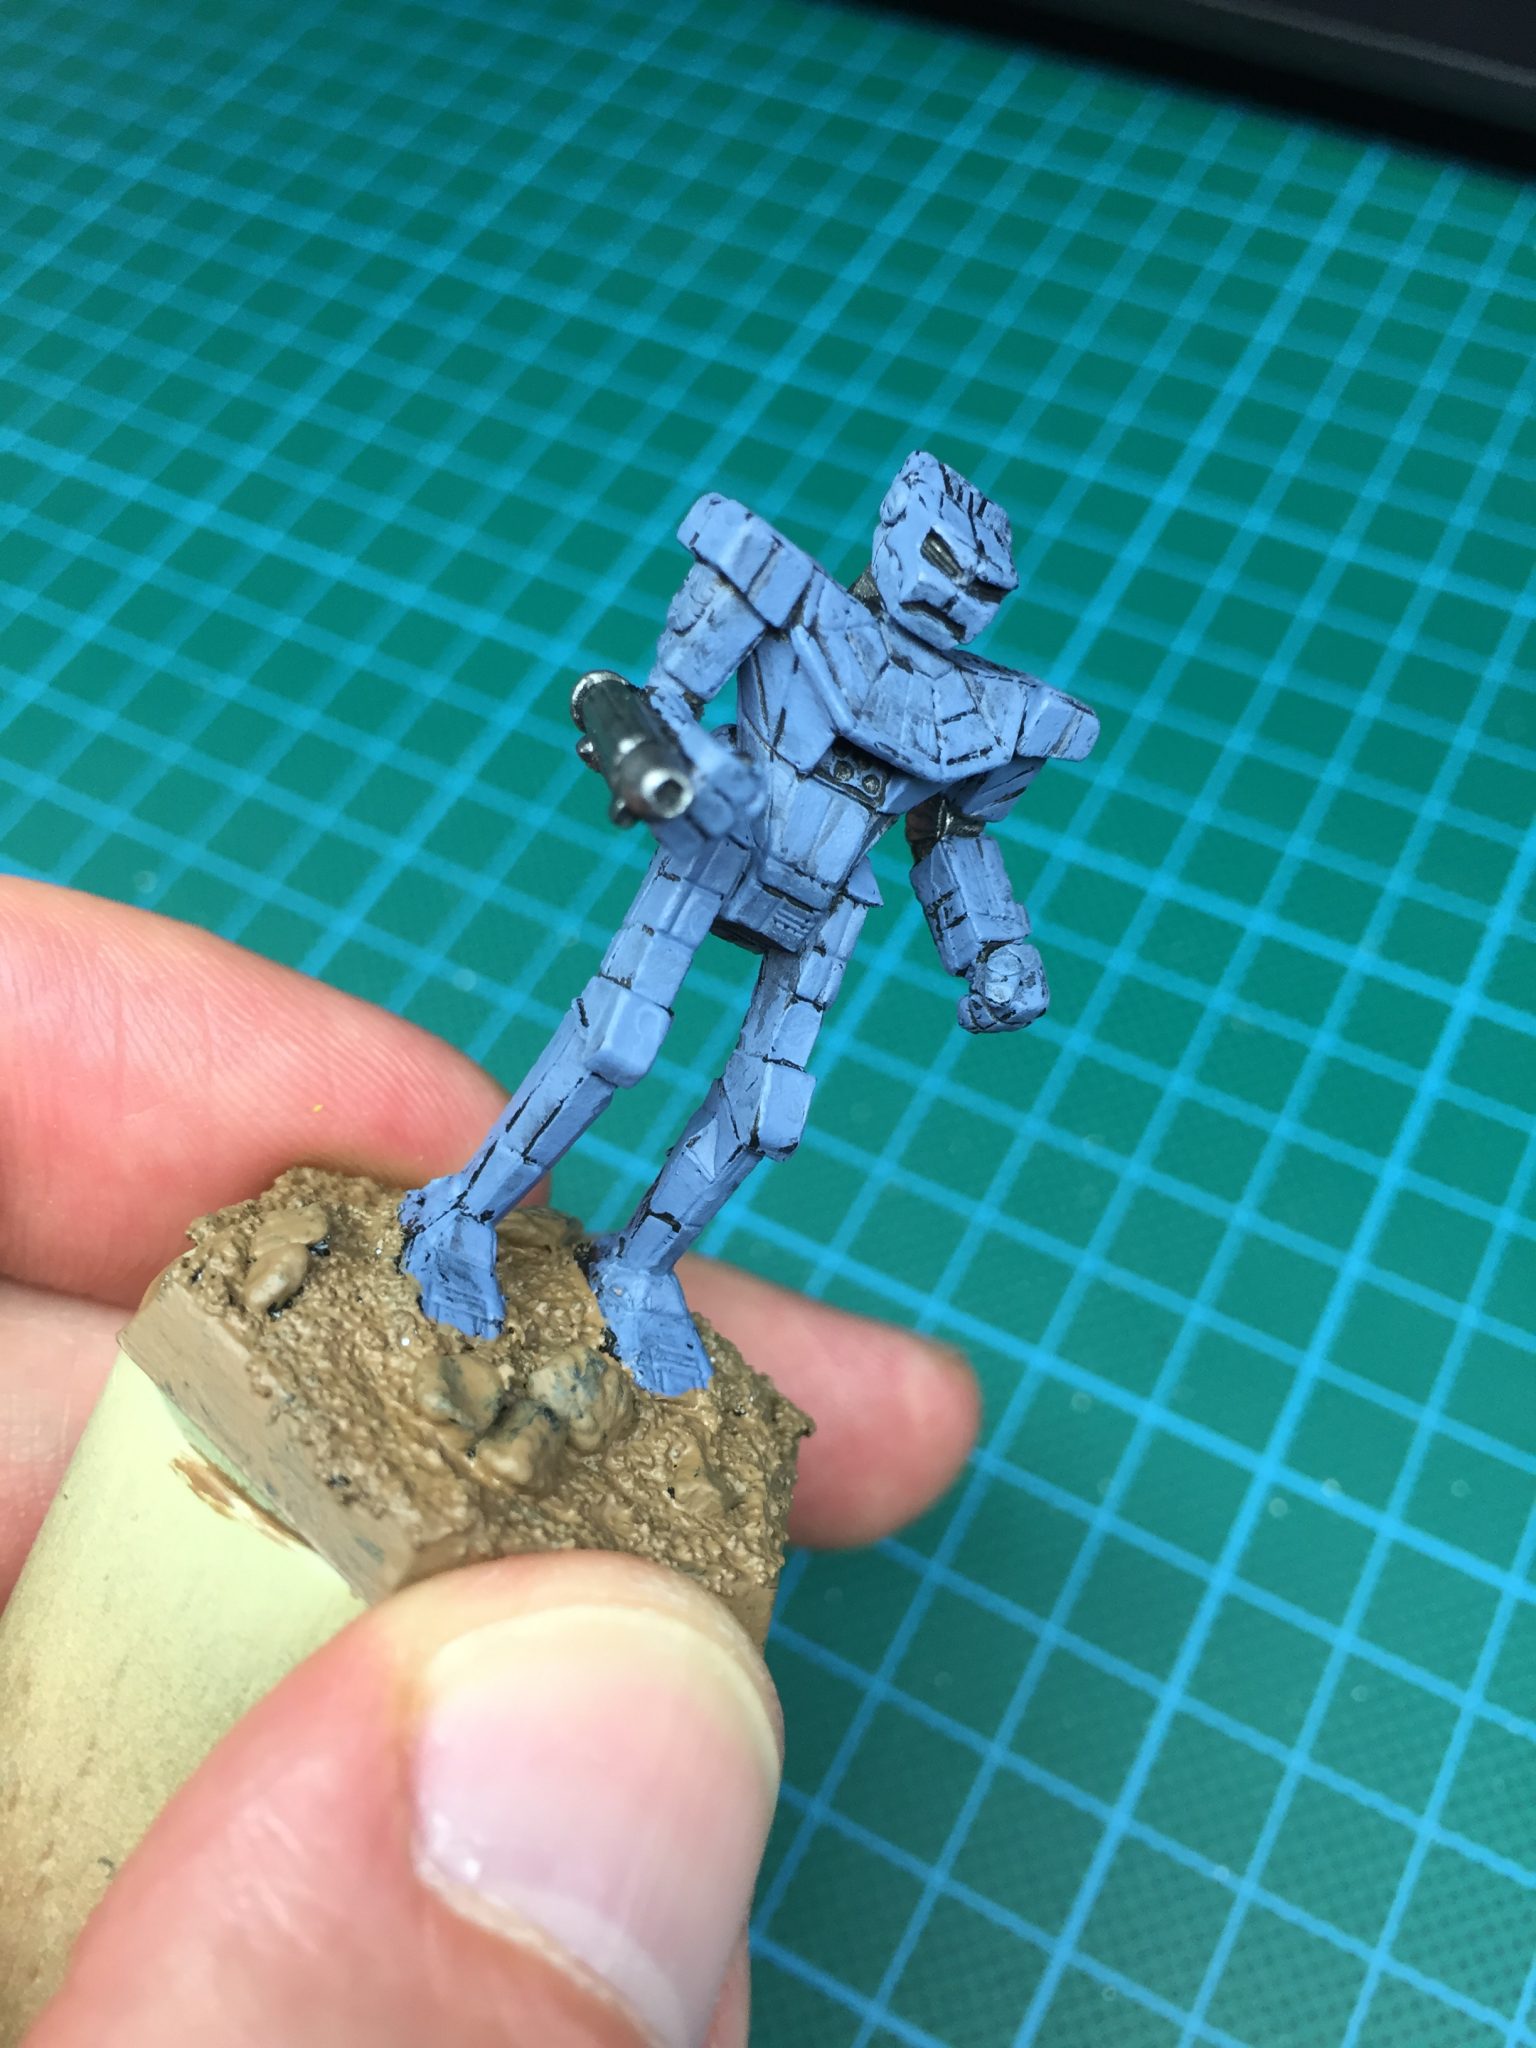
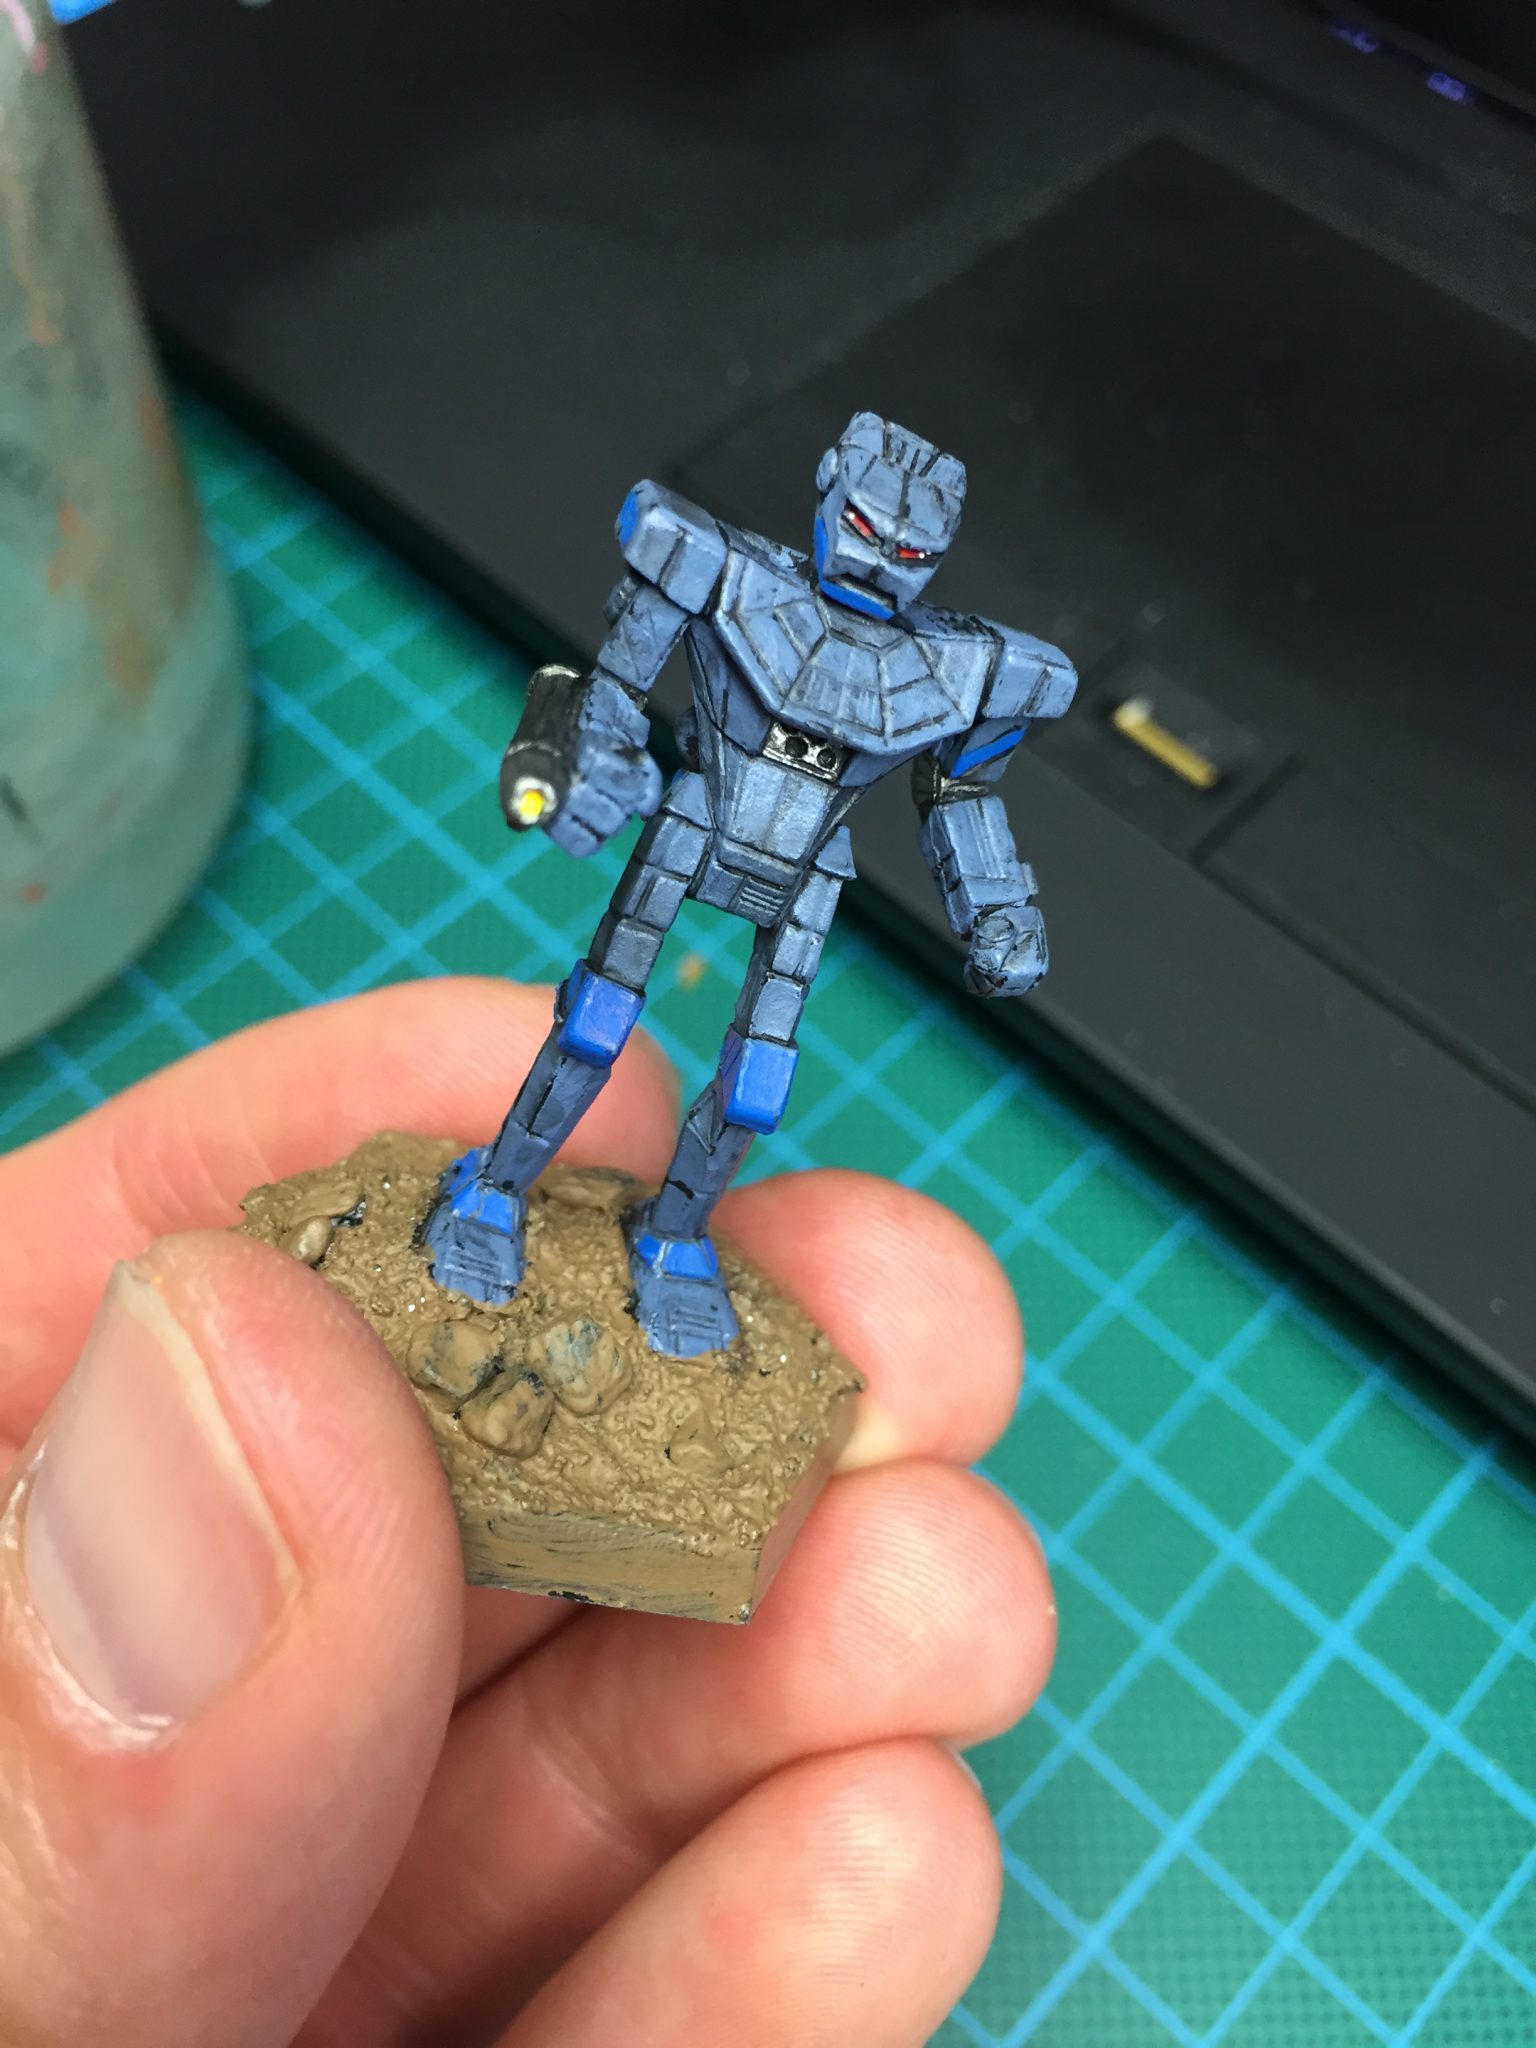
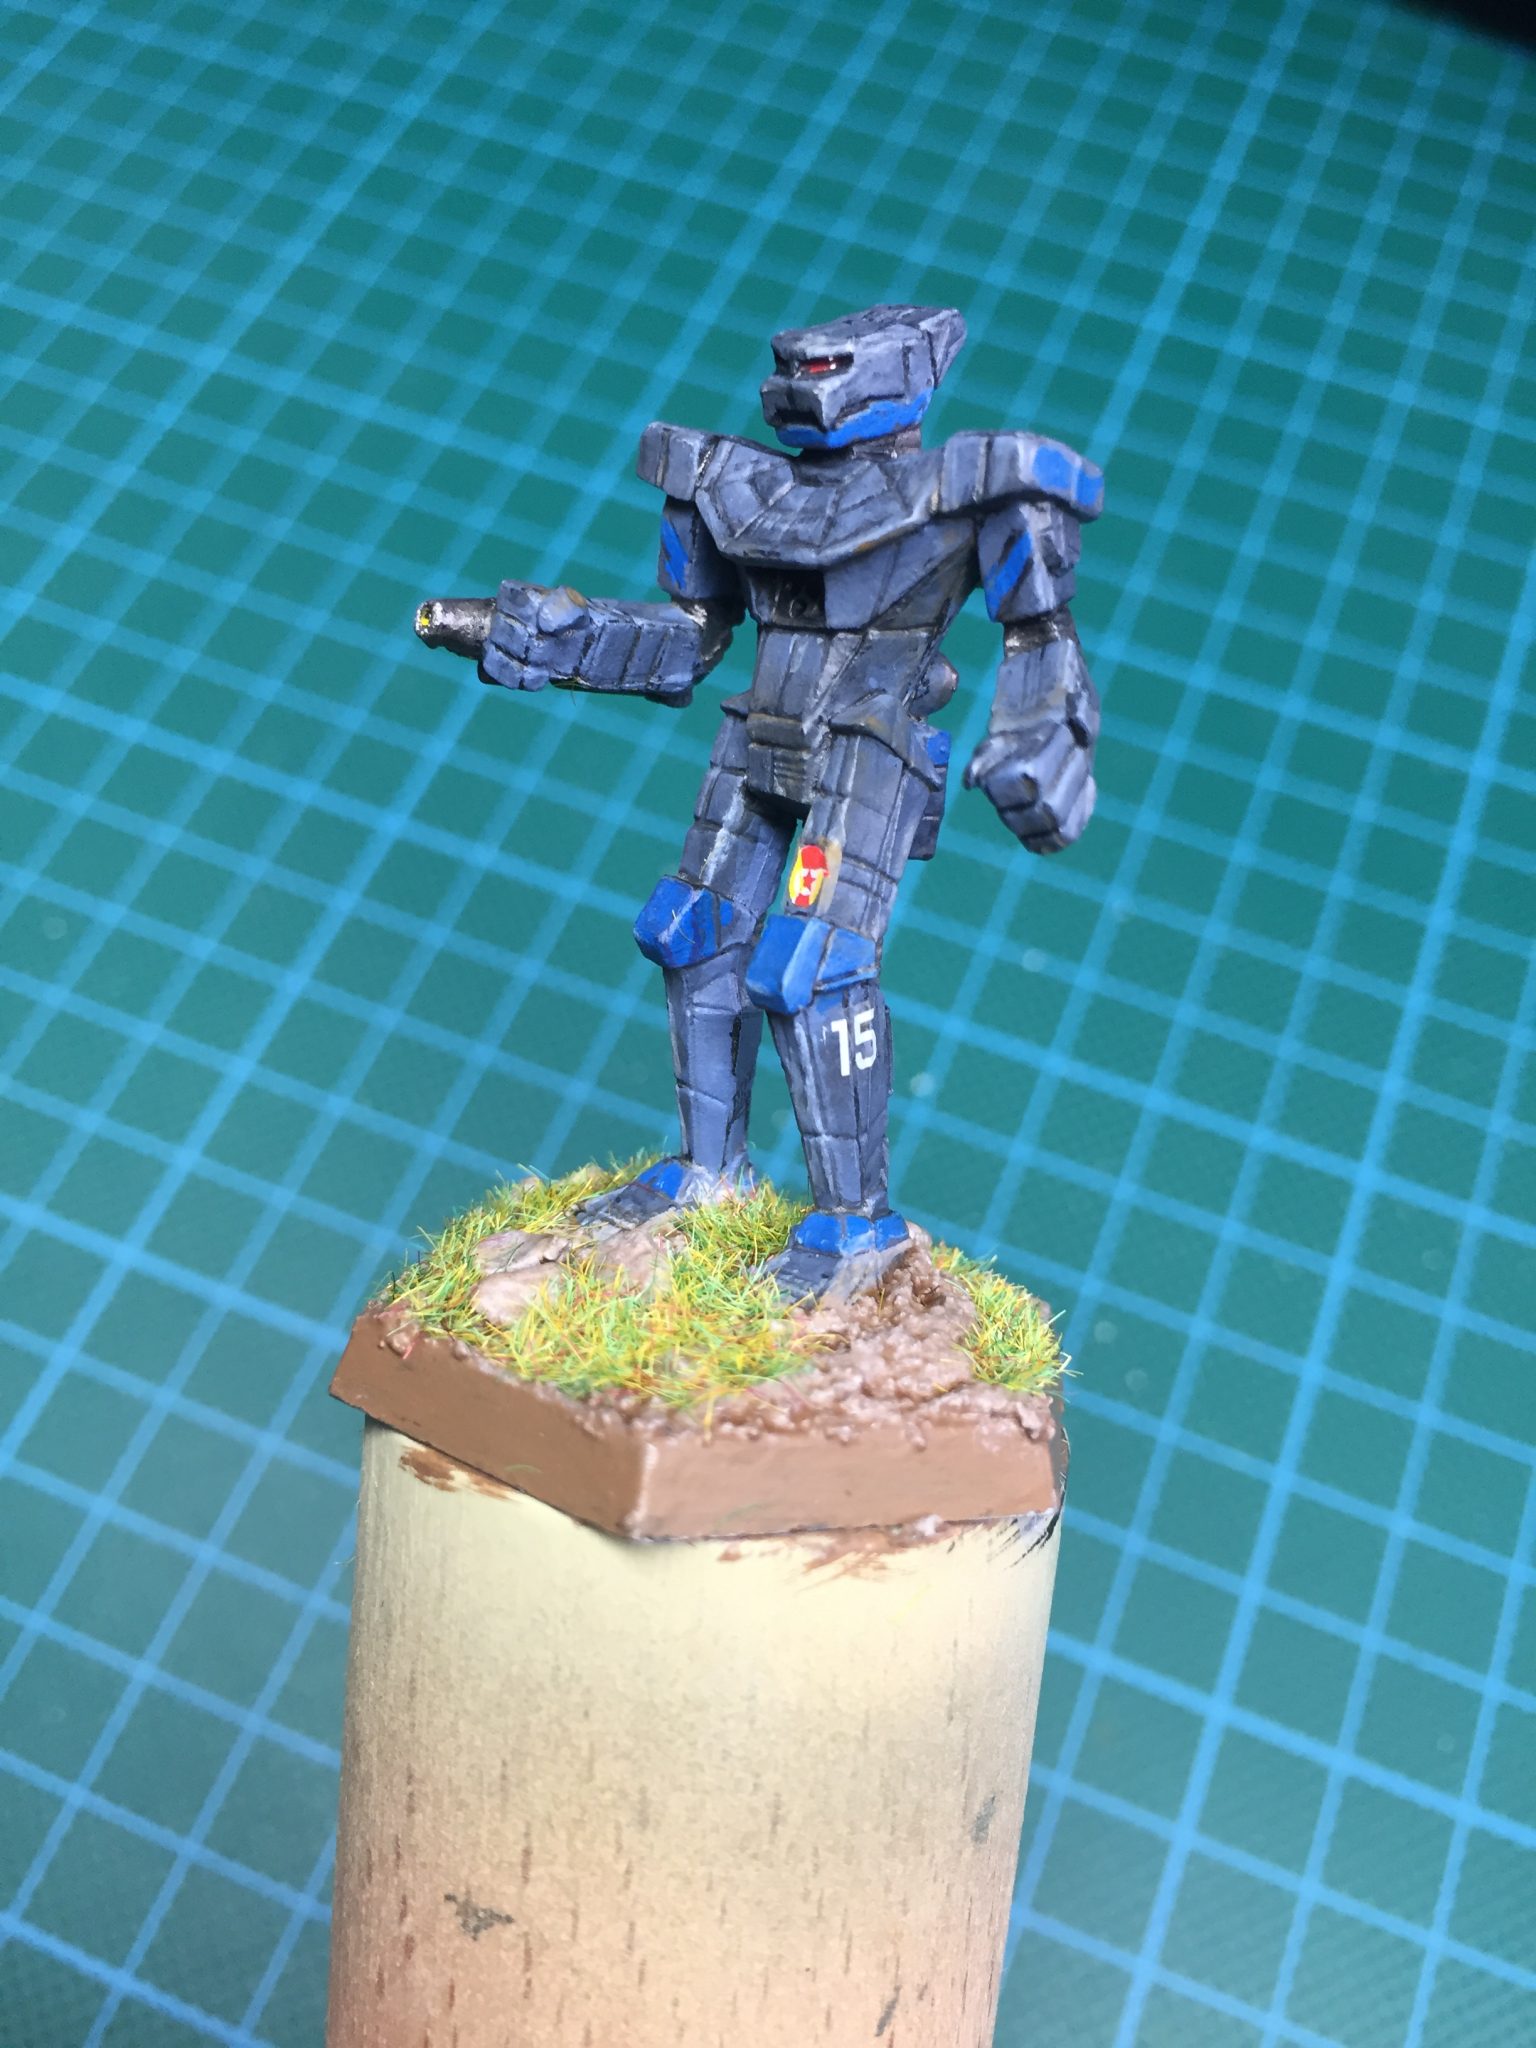
Some years ago I promised myself not to paint any more miniatures for other people. Now this promise was broken. The reason I promised this anyway was that it took me too much time to paint other people’s stuff while my own projects accumulated on the pile of shame. Nevertheless, now I painted these XV25s for a friend of mine. So, why did I do this:
He is one of my best friends and it’s for his birthday.
It gave me the opportunity to try out GW’s new Contrast paints.
I hope I can convince my mate that it is so easy to paint Vior’la Taus with Contrast paints that he starts to paint them for Kill Team himself. (Canny little ba…d, I am!)
I don’t really know what to think about the result. On the one hand it’s very easy to do in a short amount of time on the other hand the standard method produces much better results. Maybe it’s better not to look at individual figures but to imagine them as a whole unit on table top. For now it’s ok and maybe I will add some details and highlights later. Another ‚first‘ is the bases. Here I used one of the „Acrylic muds“ from MIG. The result is really good but I don’t know why it should be any better than the one’s from Vallejo or GW.
Nice story about how I got hand on these figures. At the end of last year I took part in my first scale modelling exhibition as a participant (Maple Leaf Bühl, Baden-Württemberg) where I met a Canadian guy who also was in 40k. There he sold some of his stuff along with the XV25s in a battered box but everything on sprue… for 10€. Happy with the deal I took it as a later present for my friend. Now I decided to paint them up as I already had all the necessary paints on my shelf.
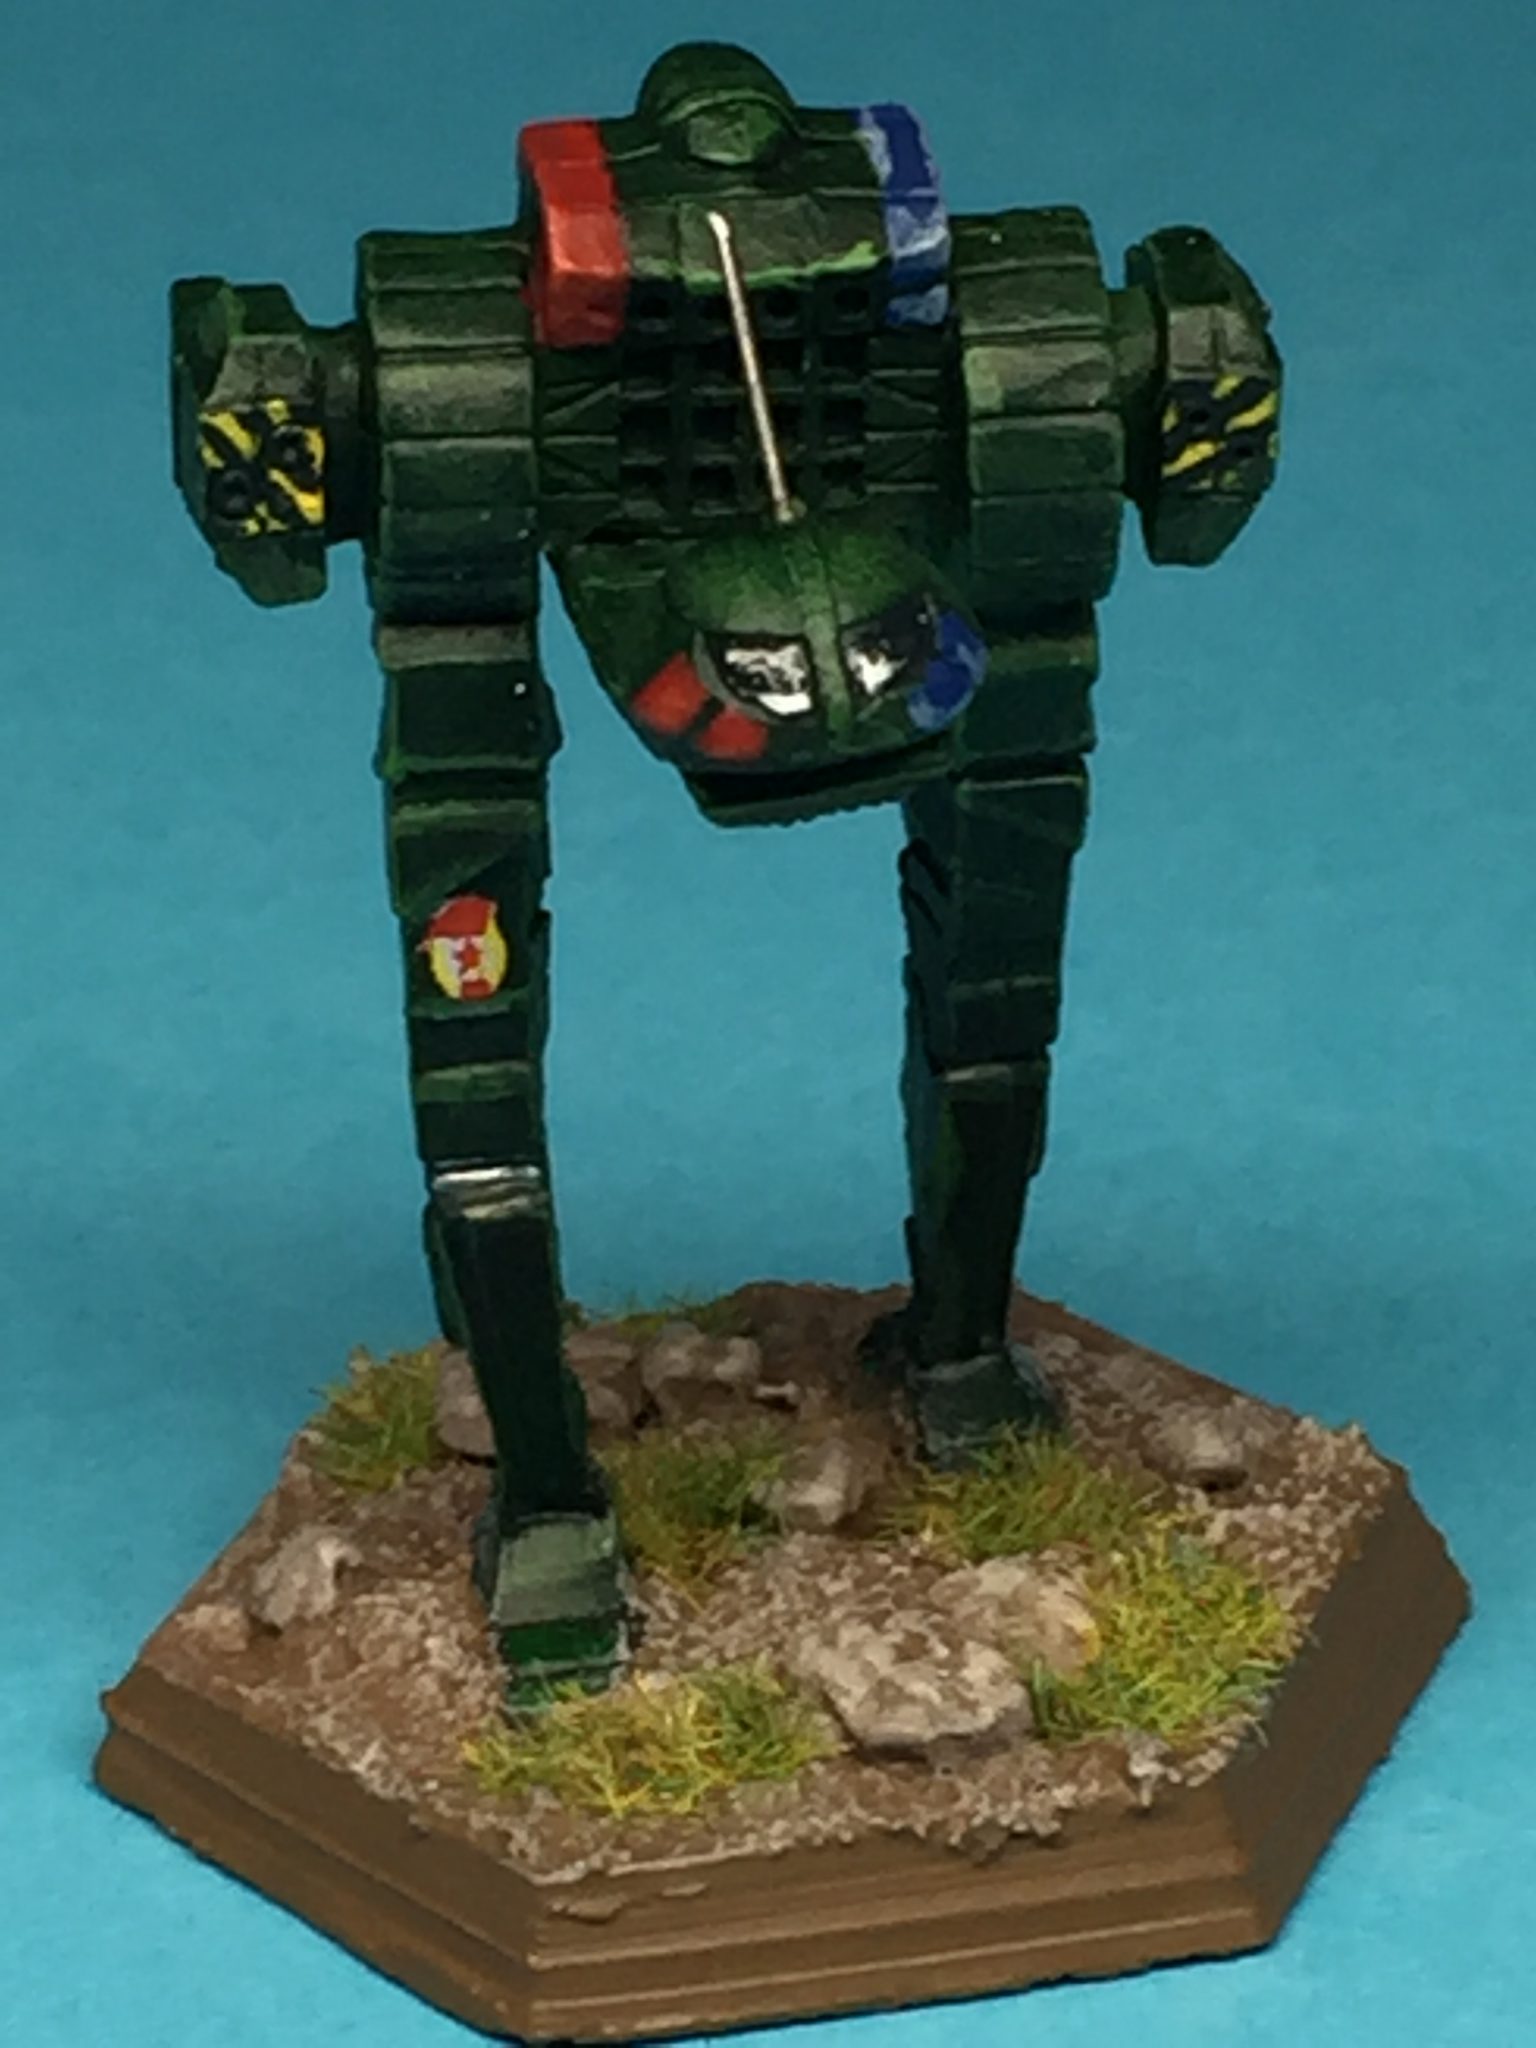
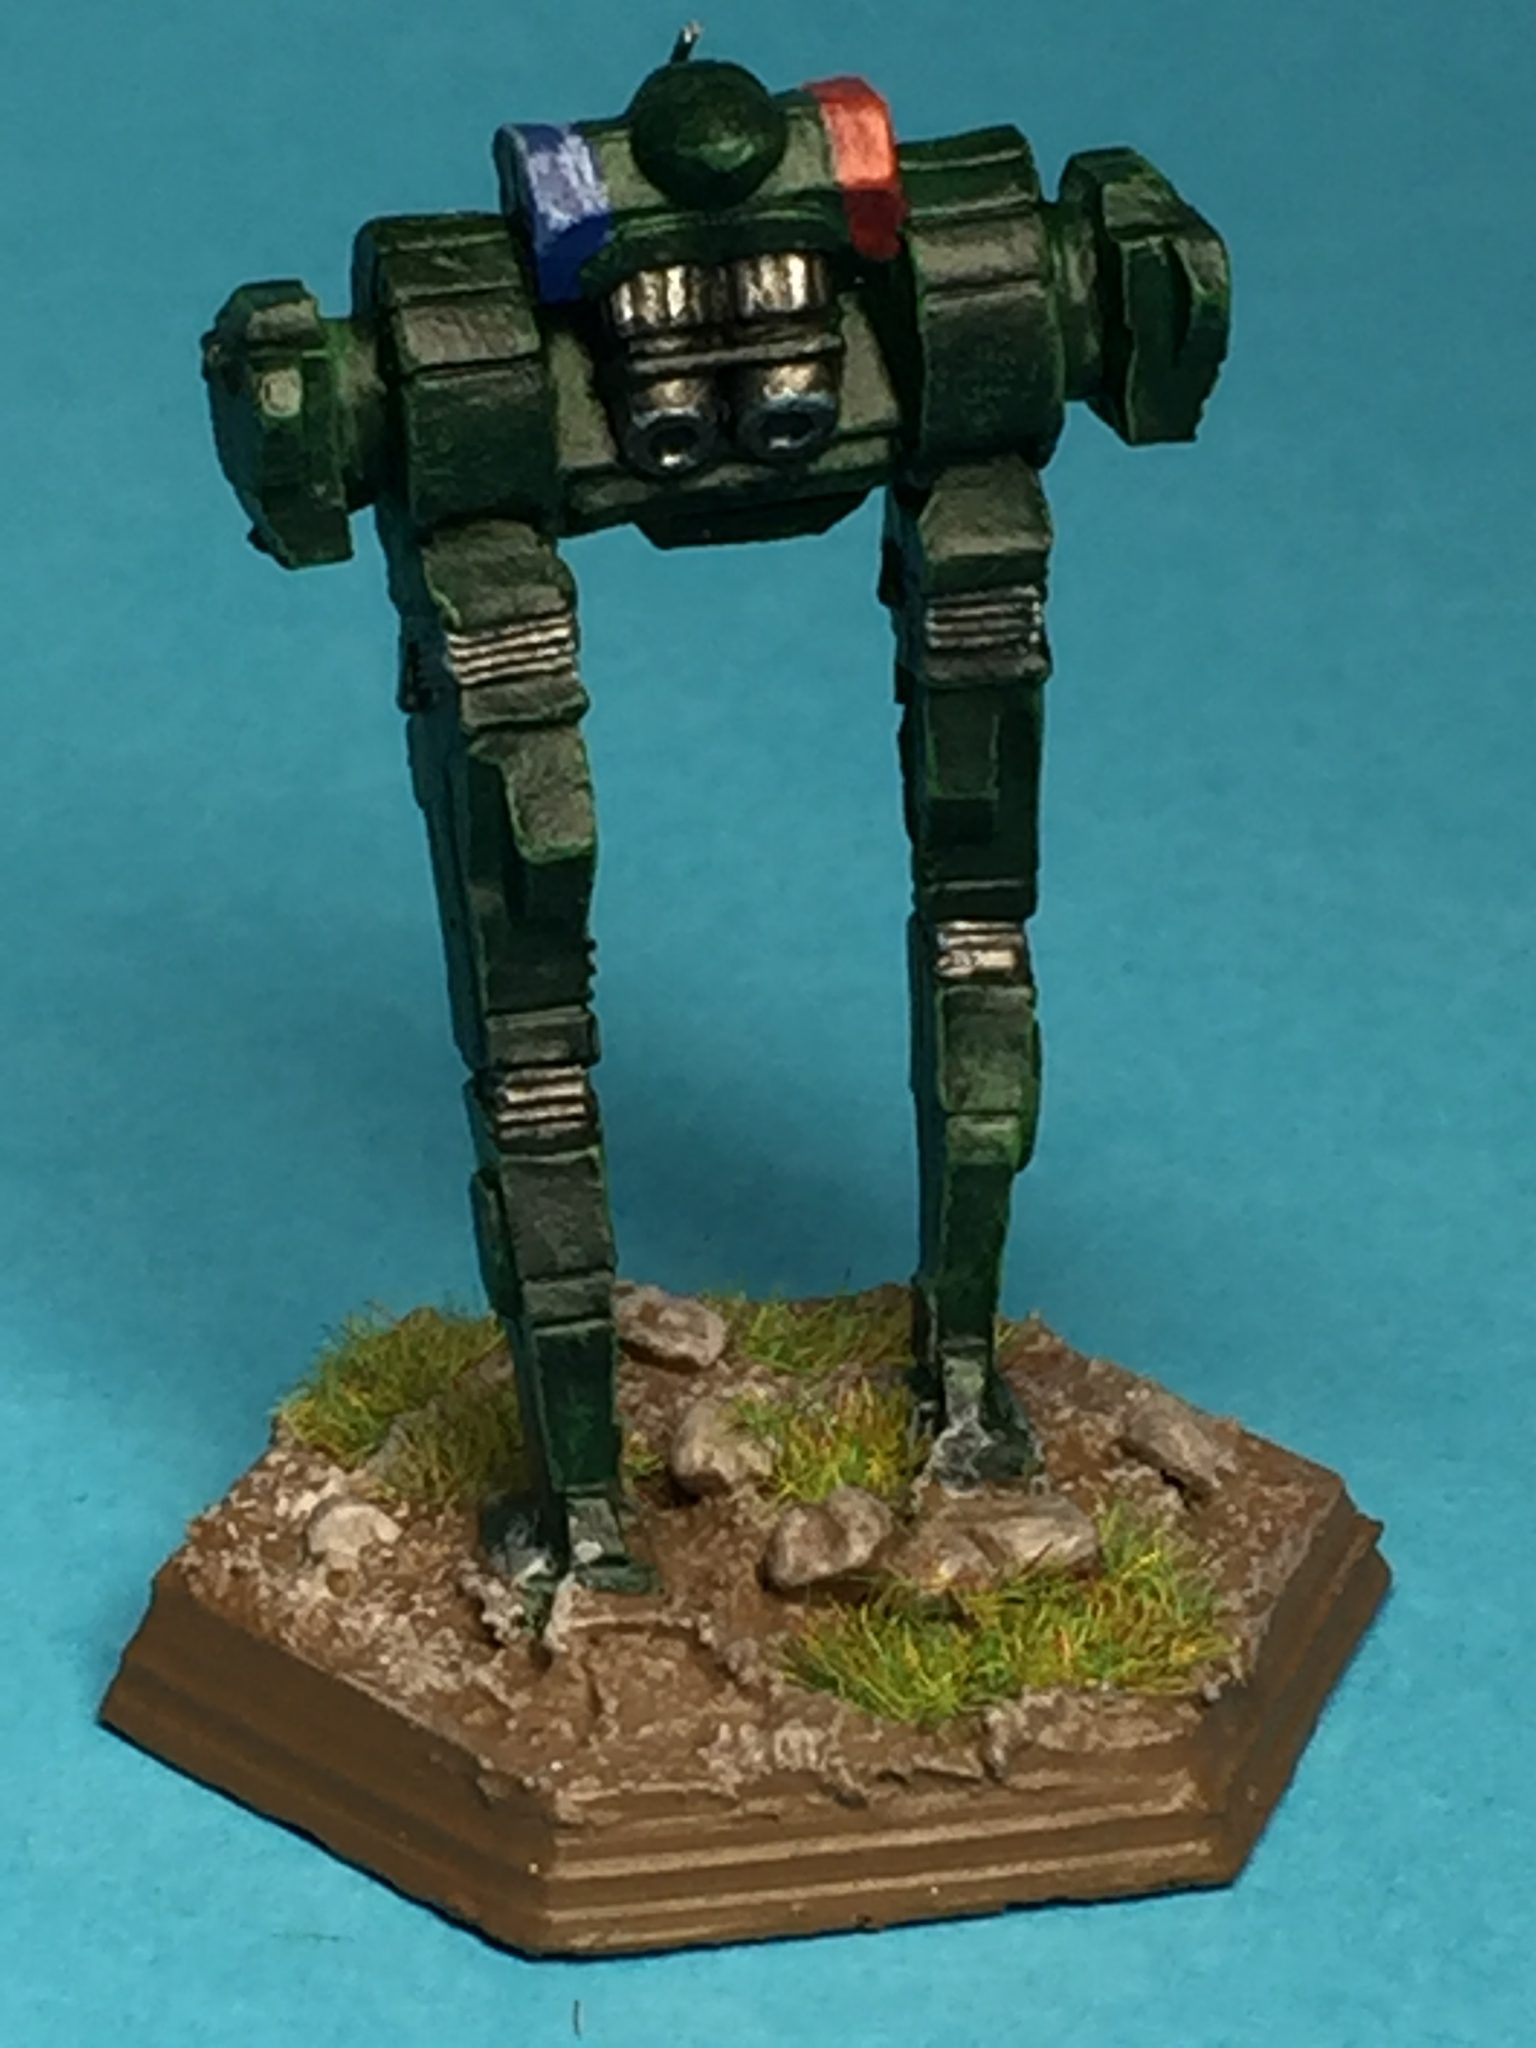
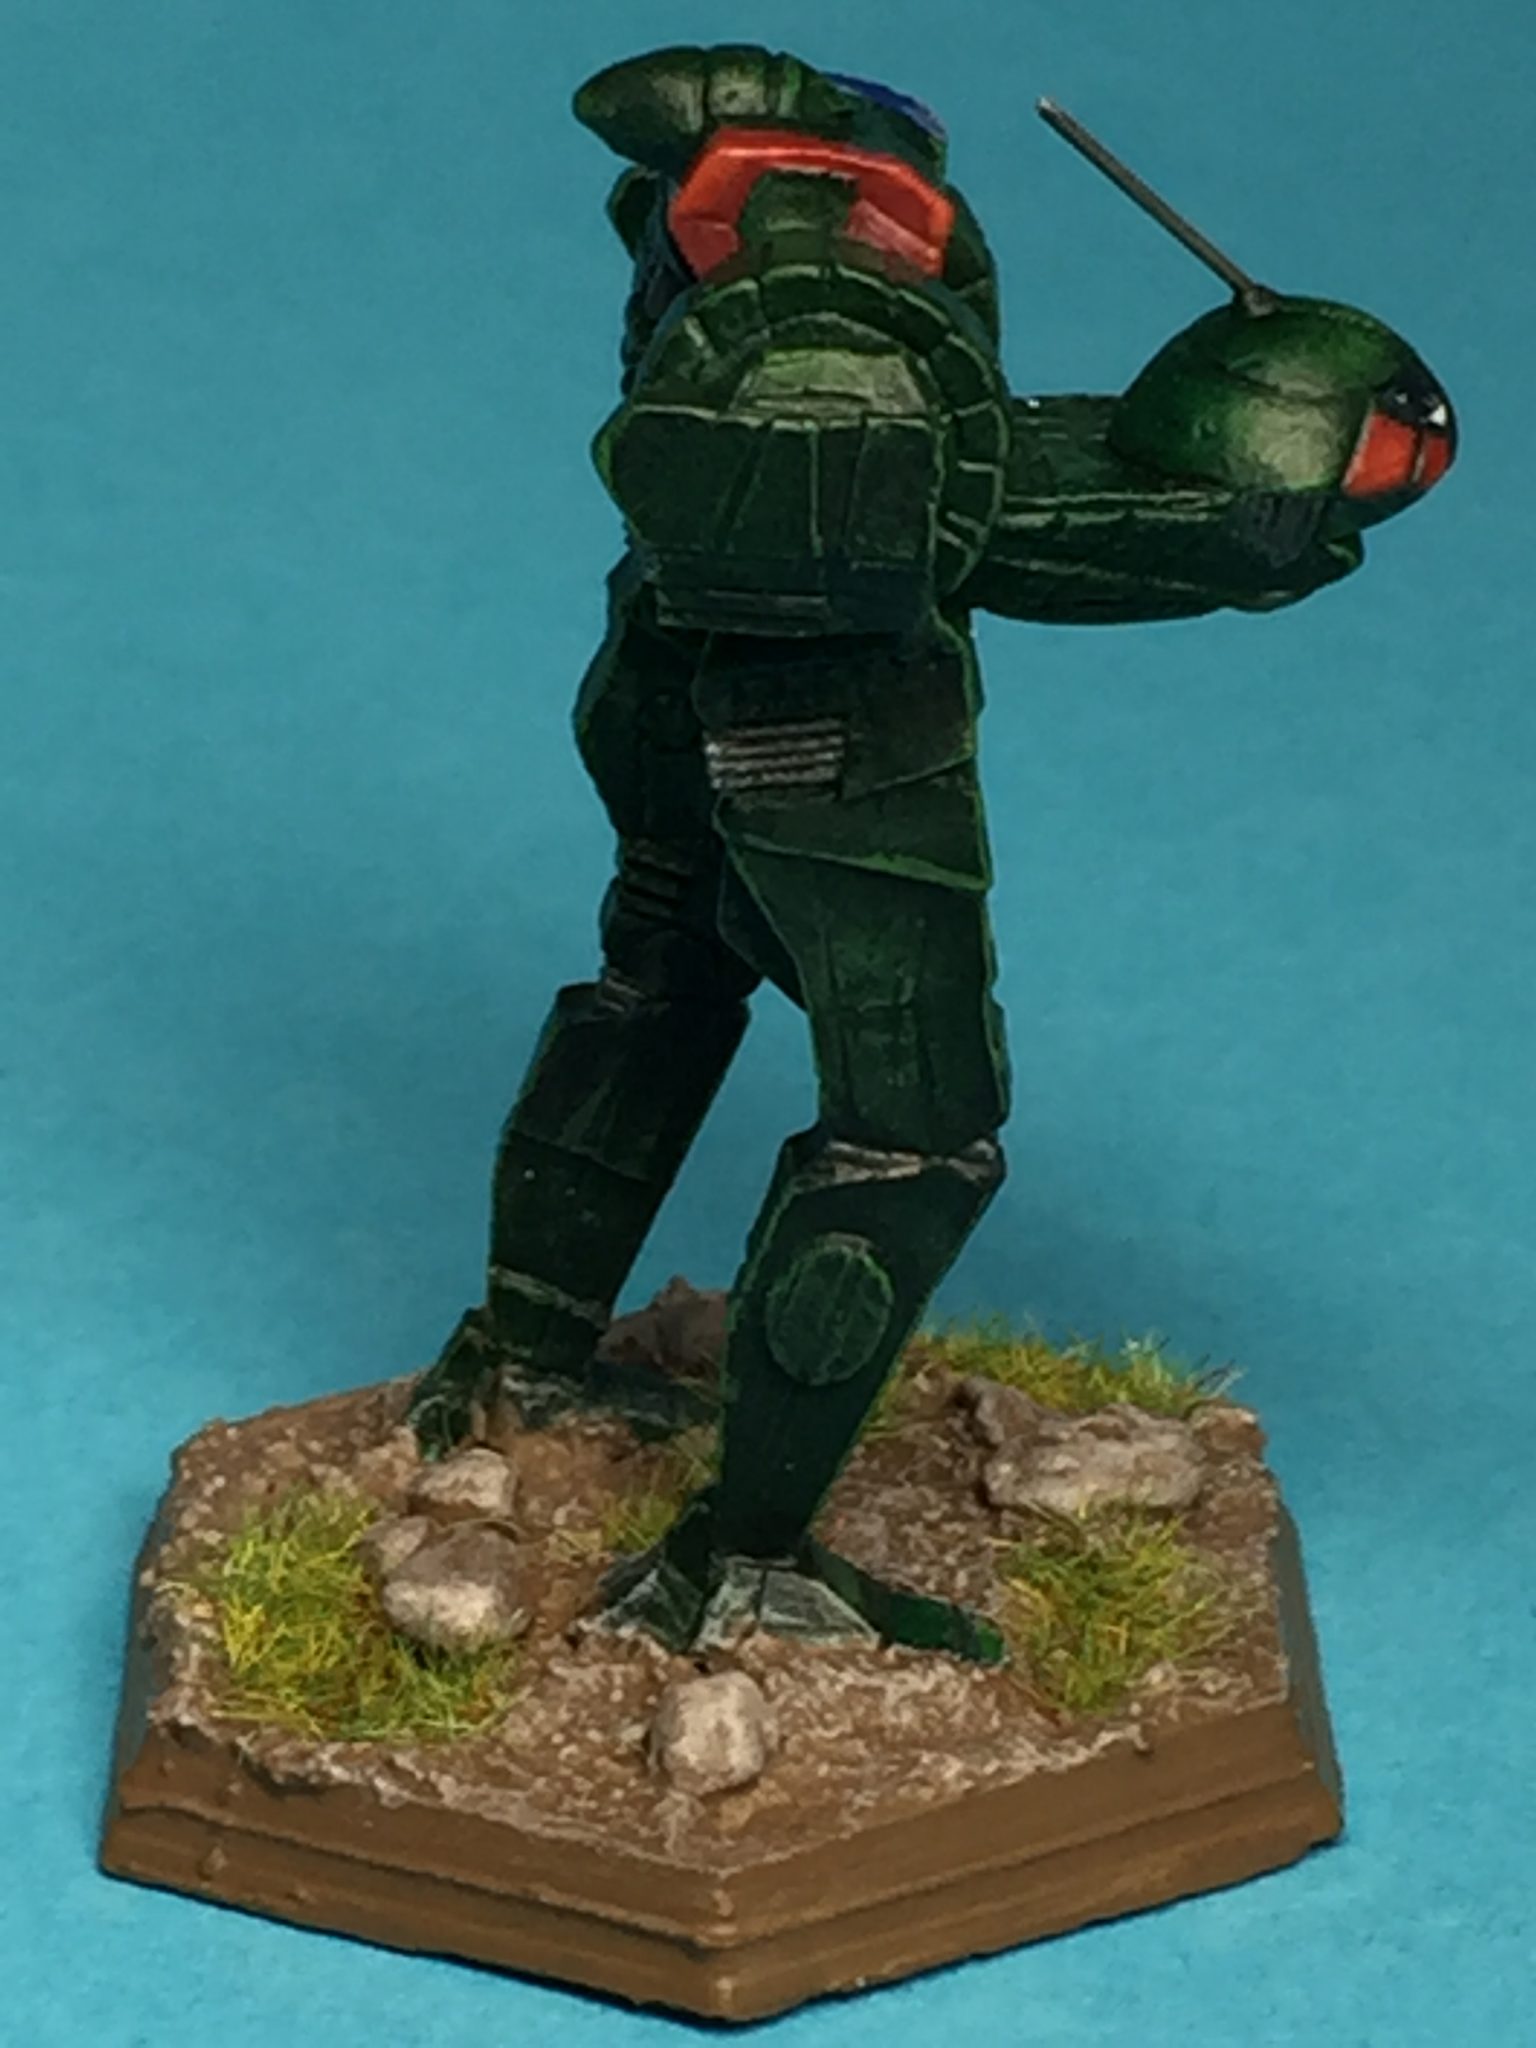
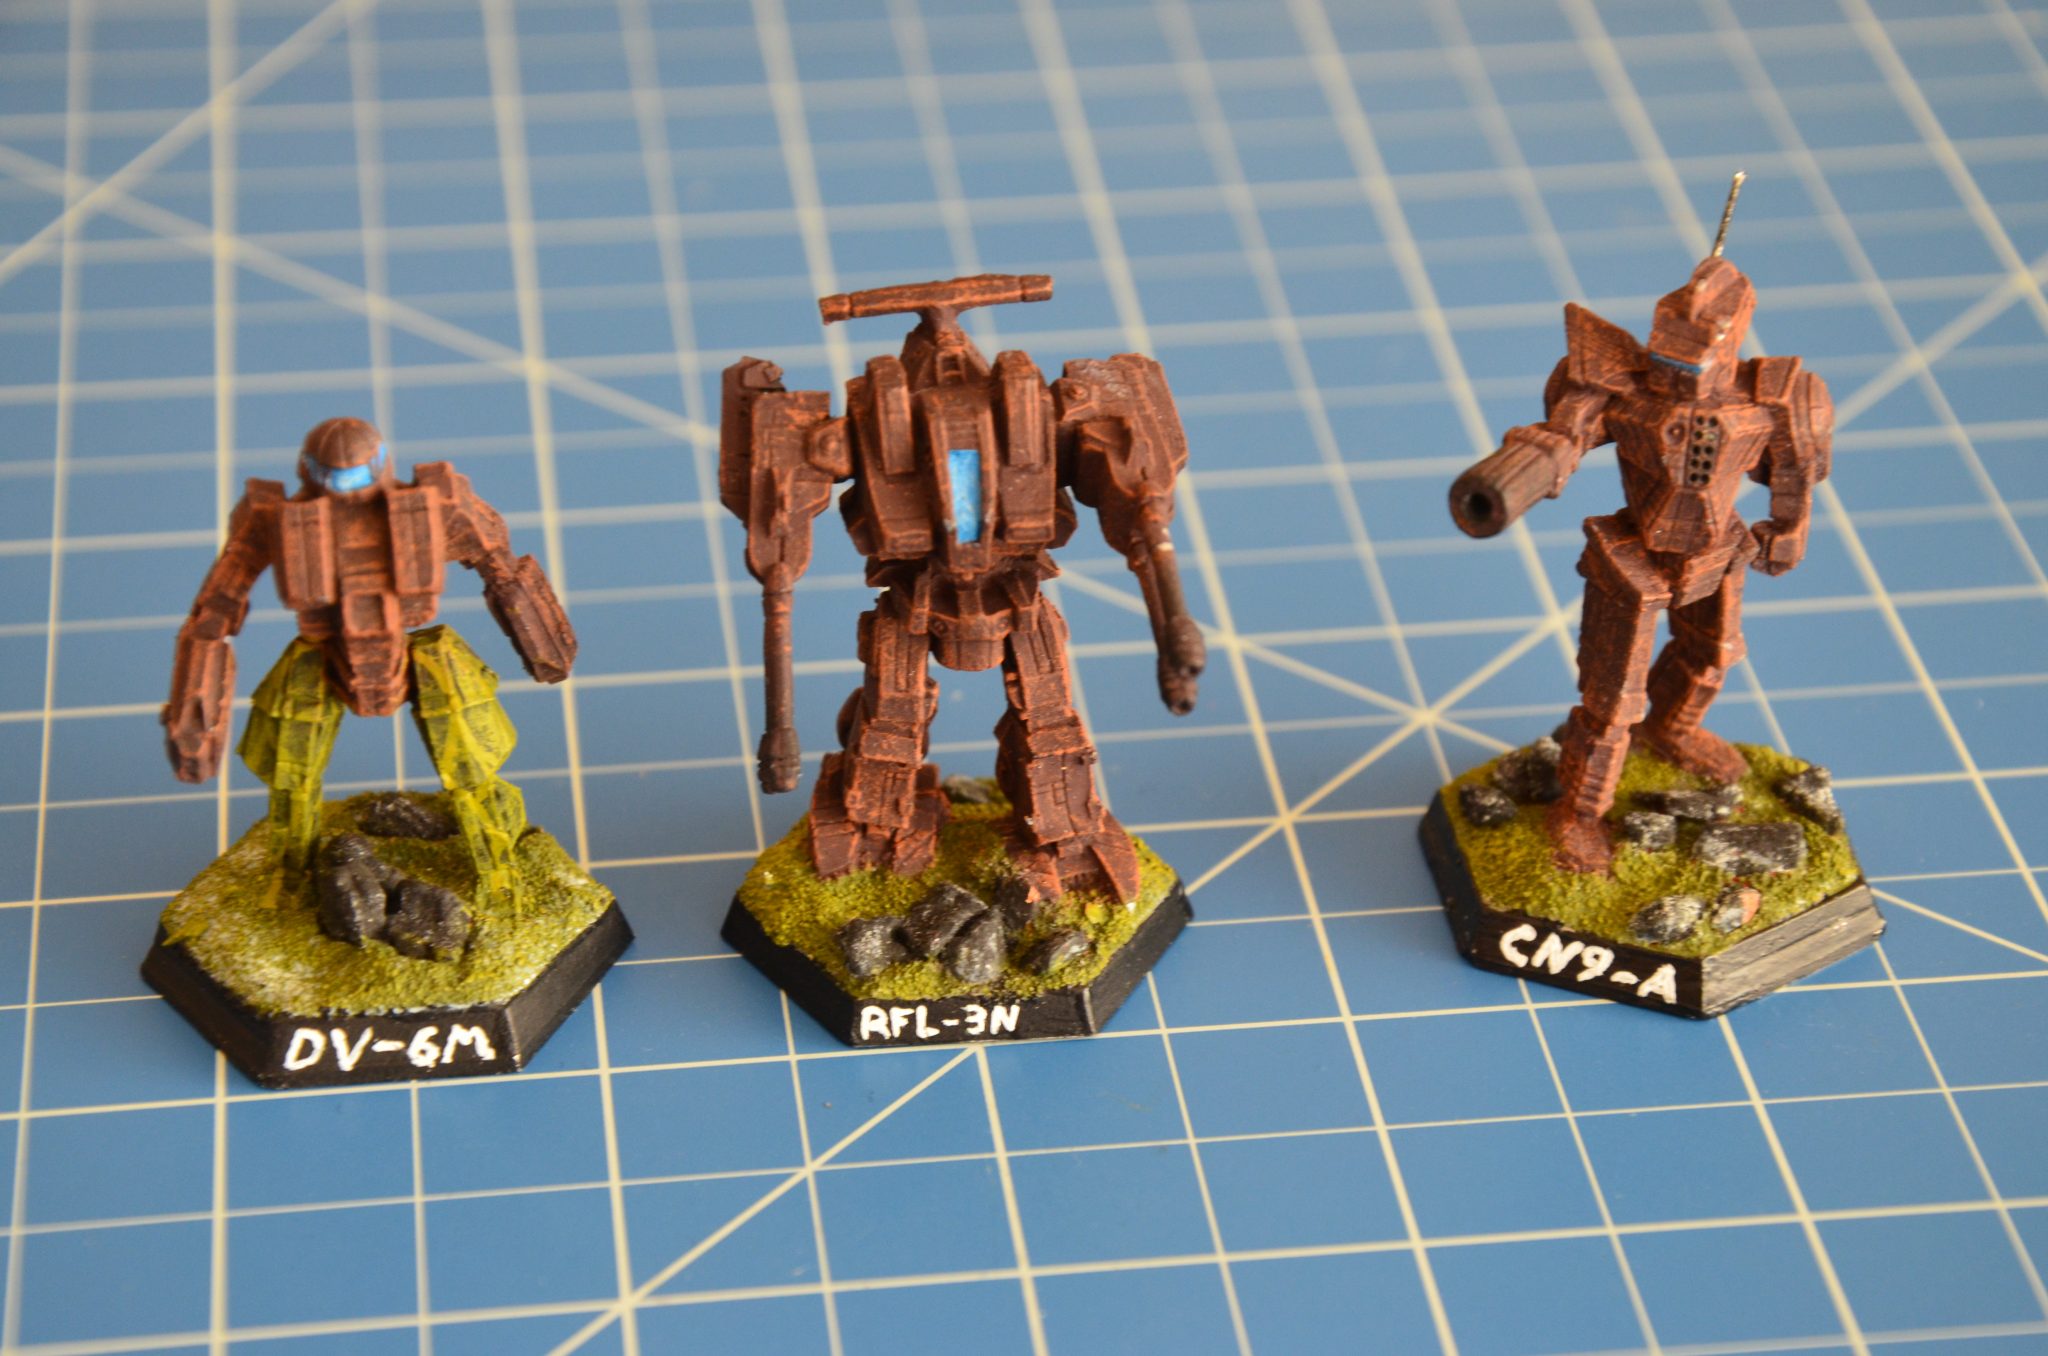
The Jenner always reminded me of a turtle on legs. That’s probably why it was always somehow „green“ to me. The colour scheme is similar to the one I already used on dozens of Dark AngelsSpaceMarines. So painting went fairly easy.
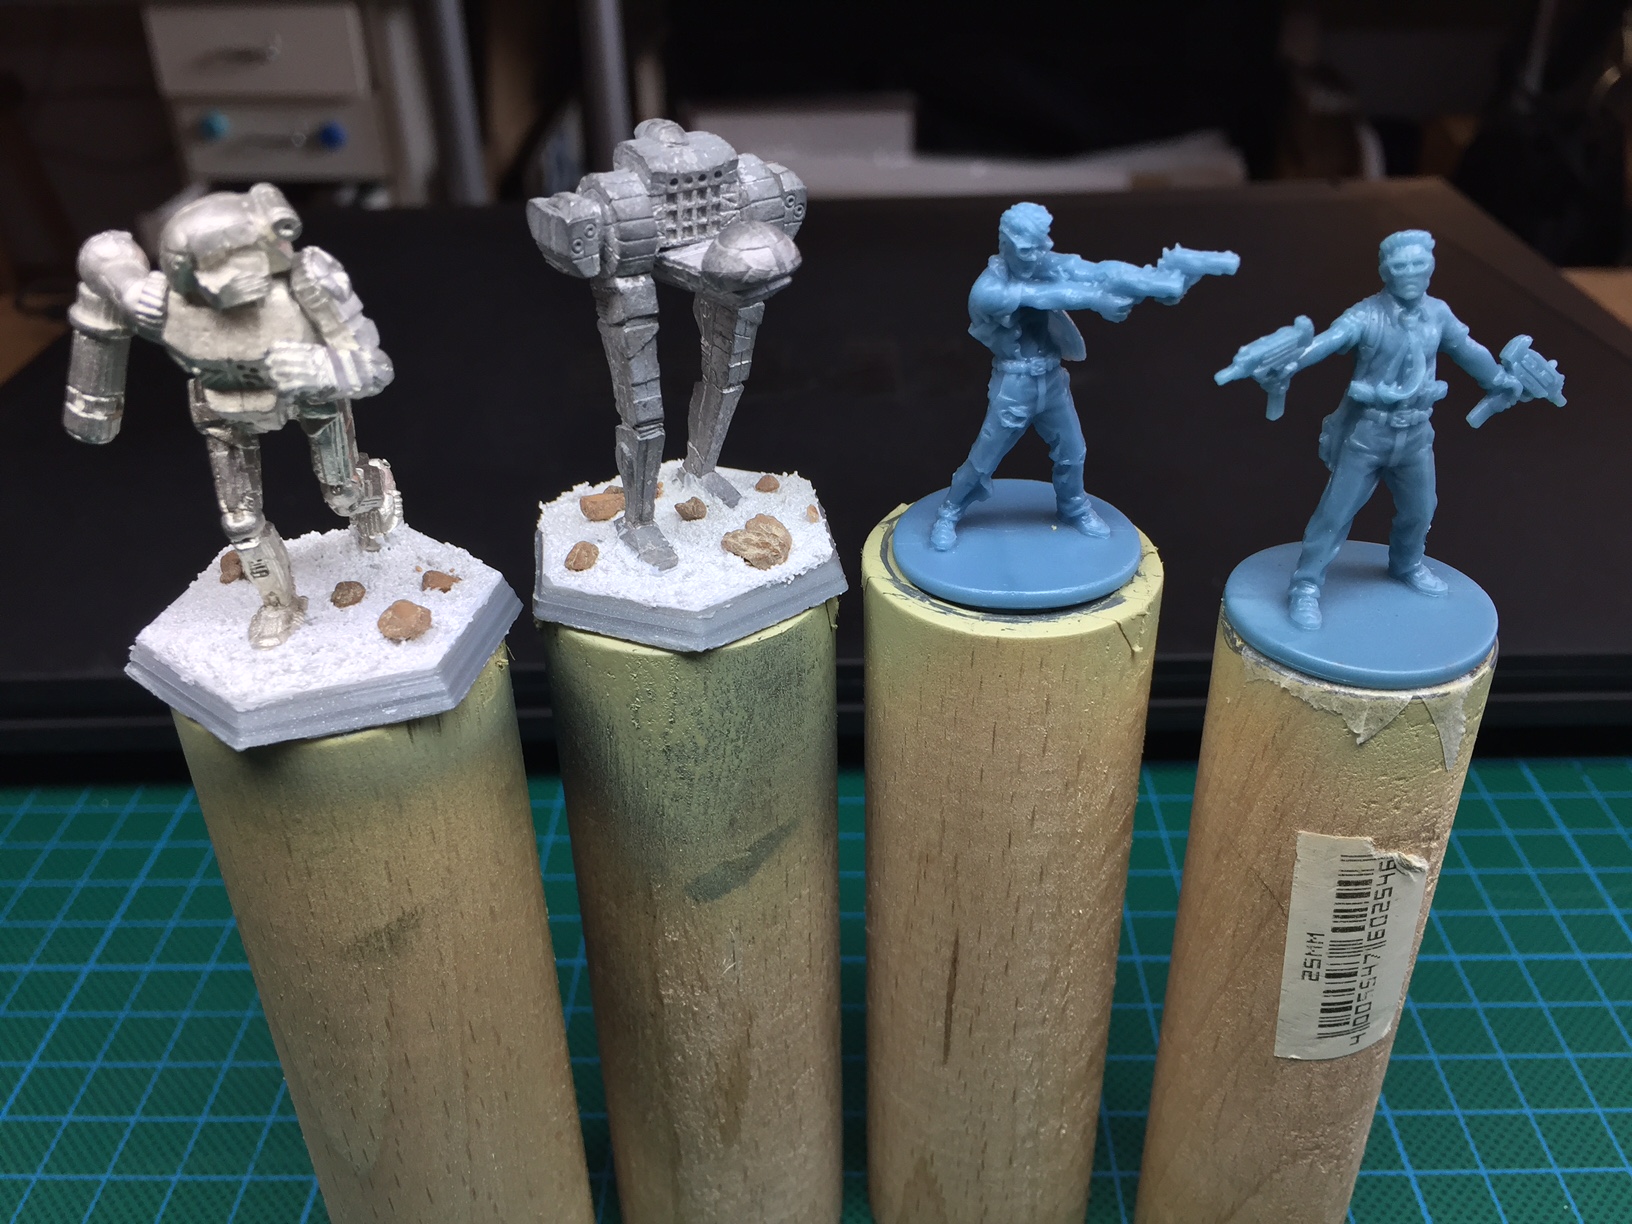
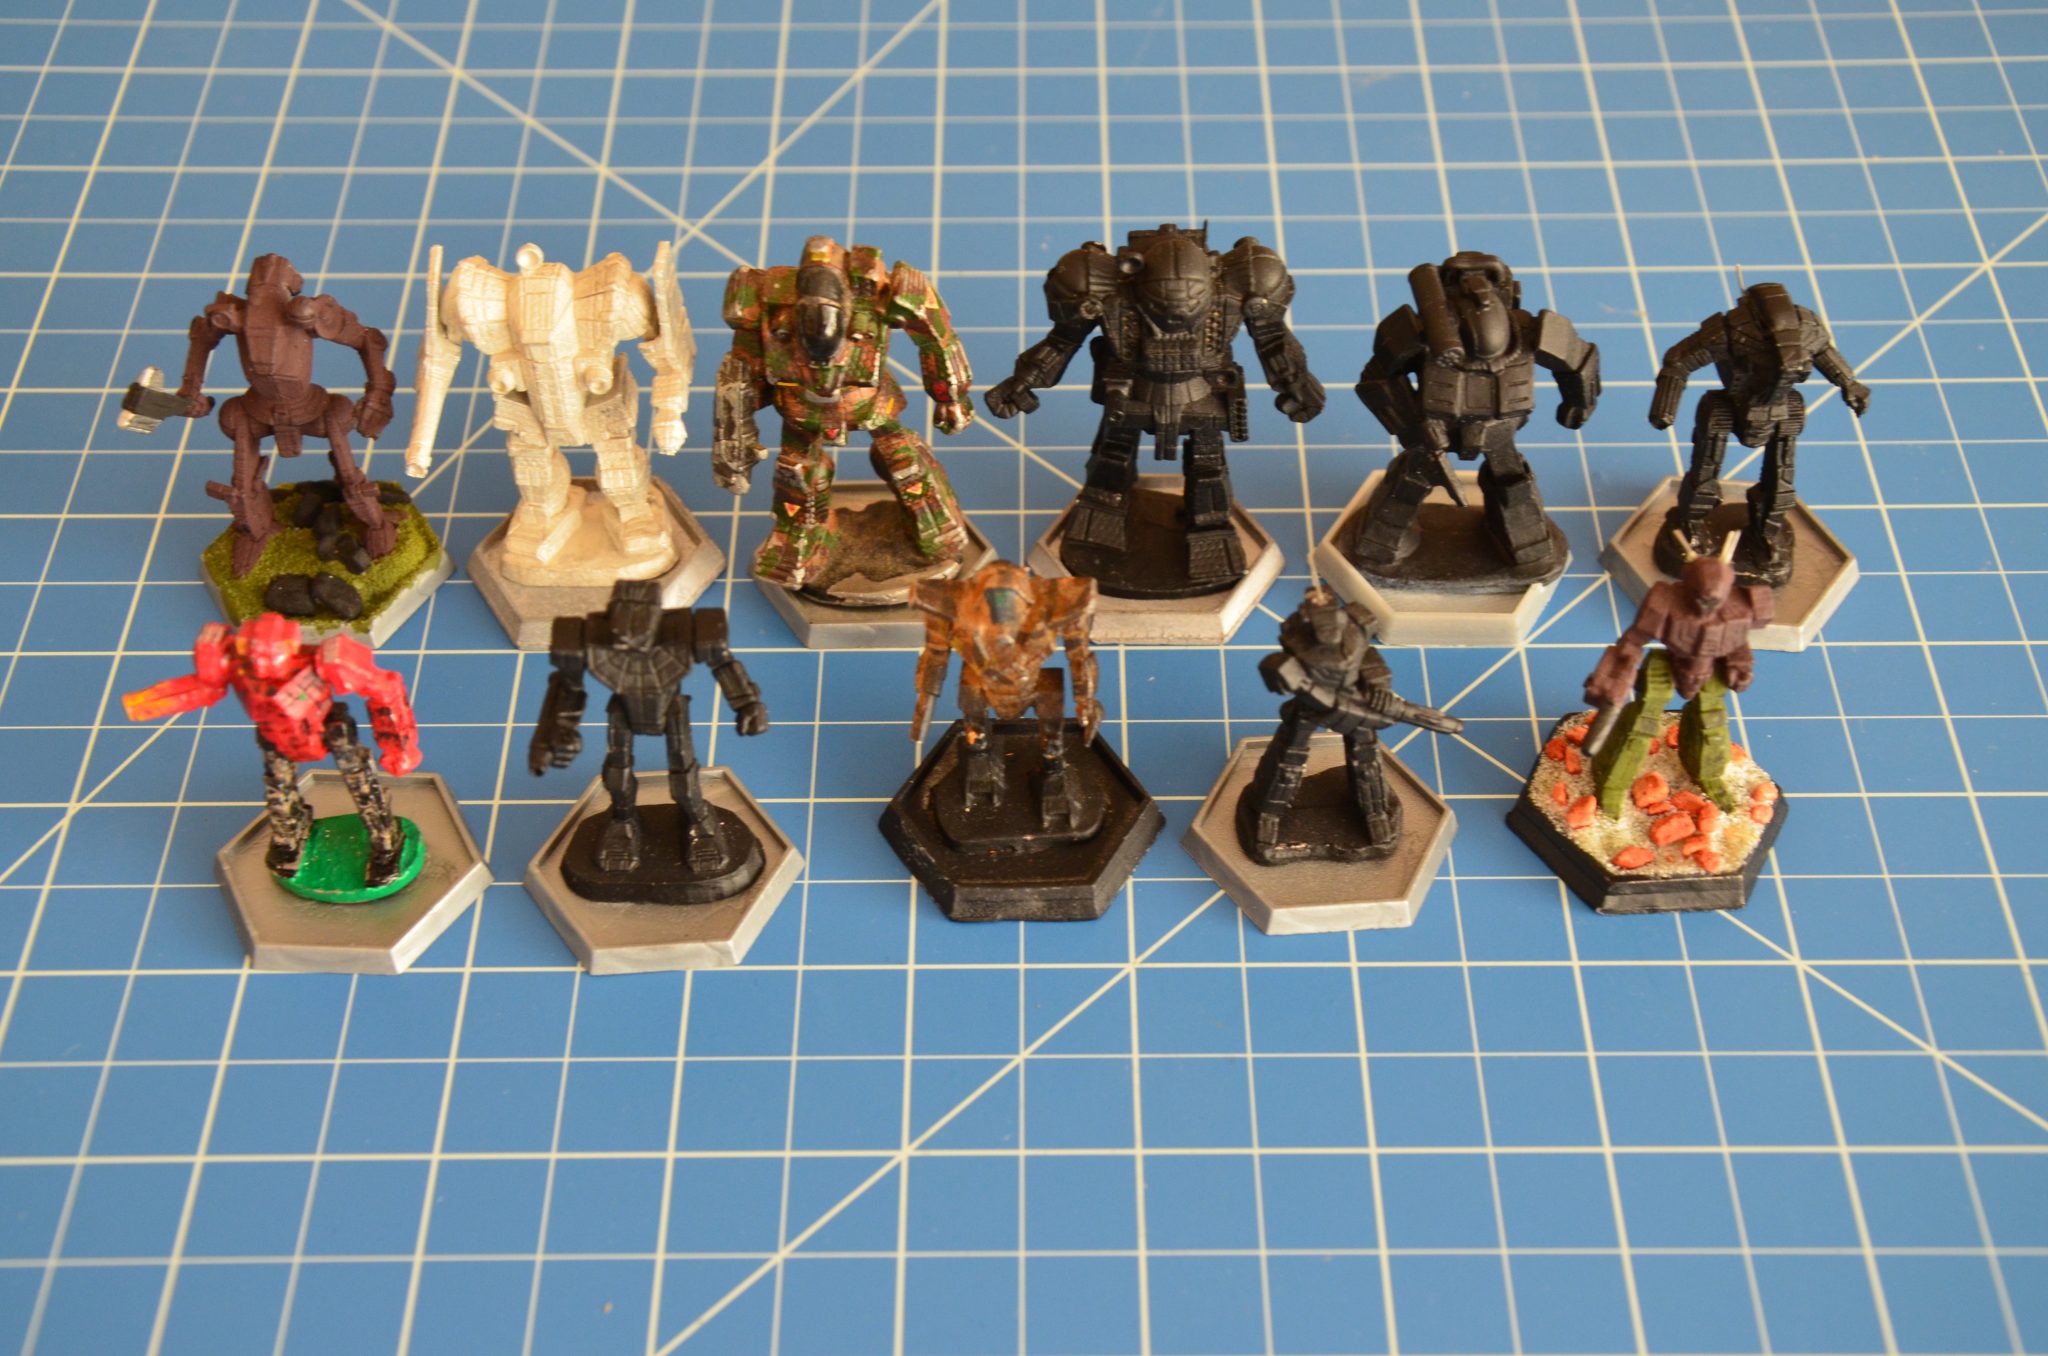
It’s my plan for the next few days to finish this somehow weird mix of minis:
A Vindicator and a very old Jenner. Zombivor and Survivor Doug.
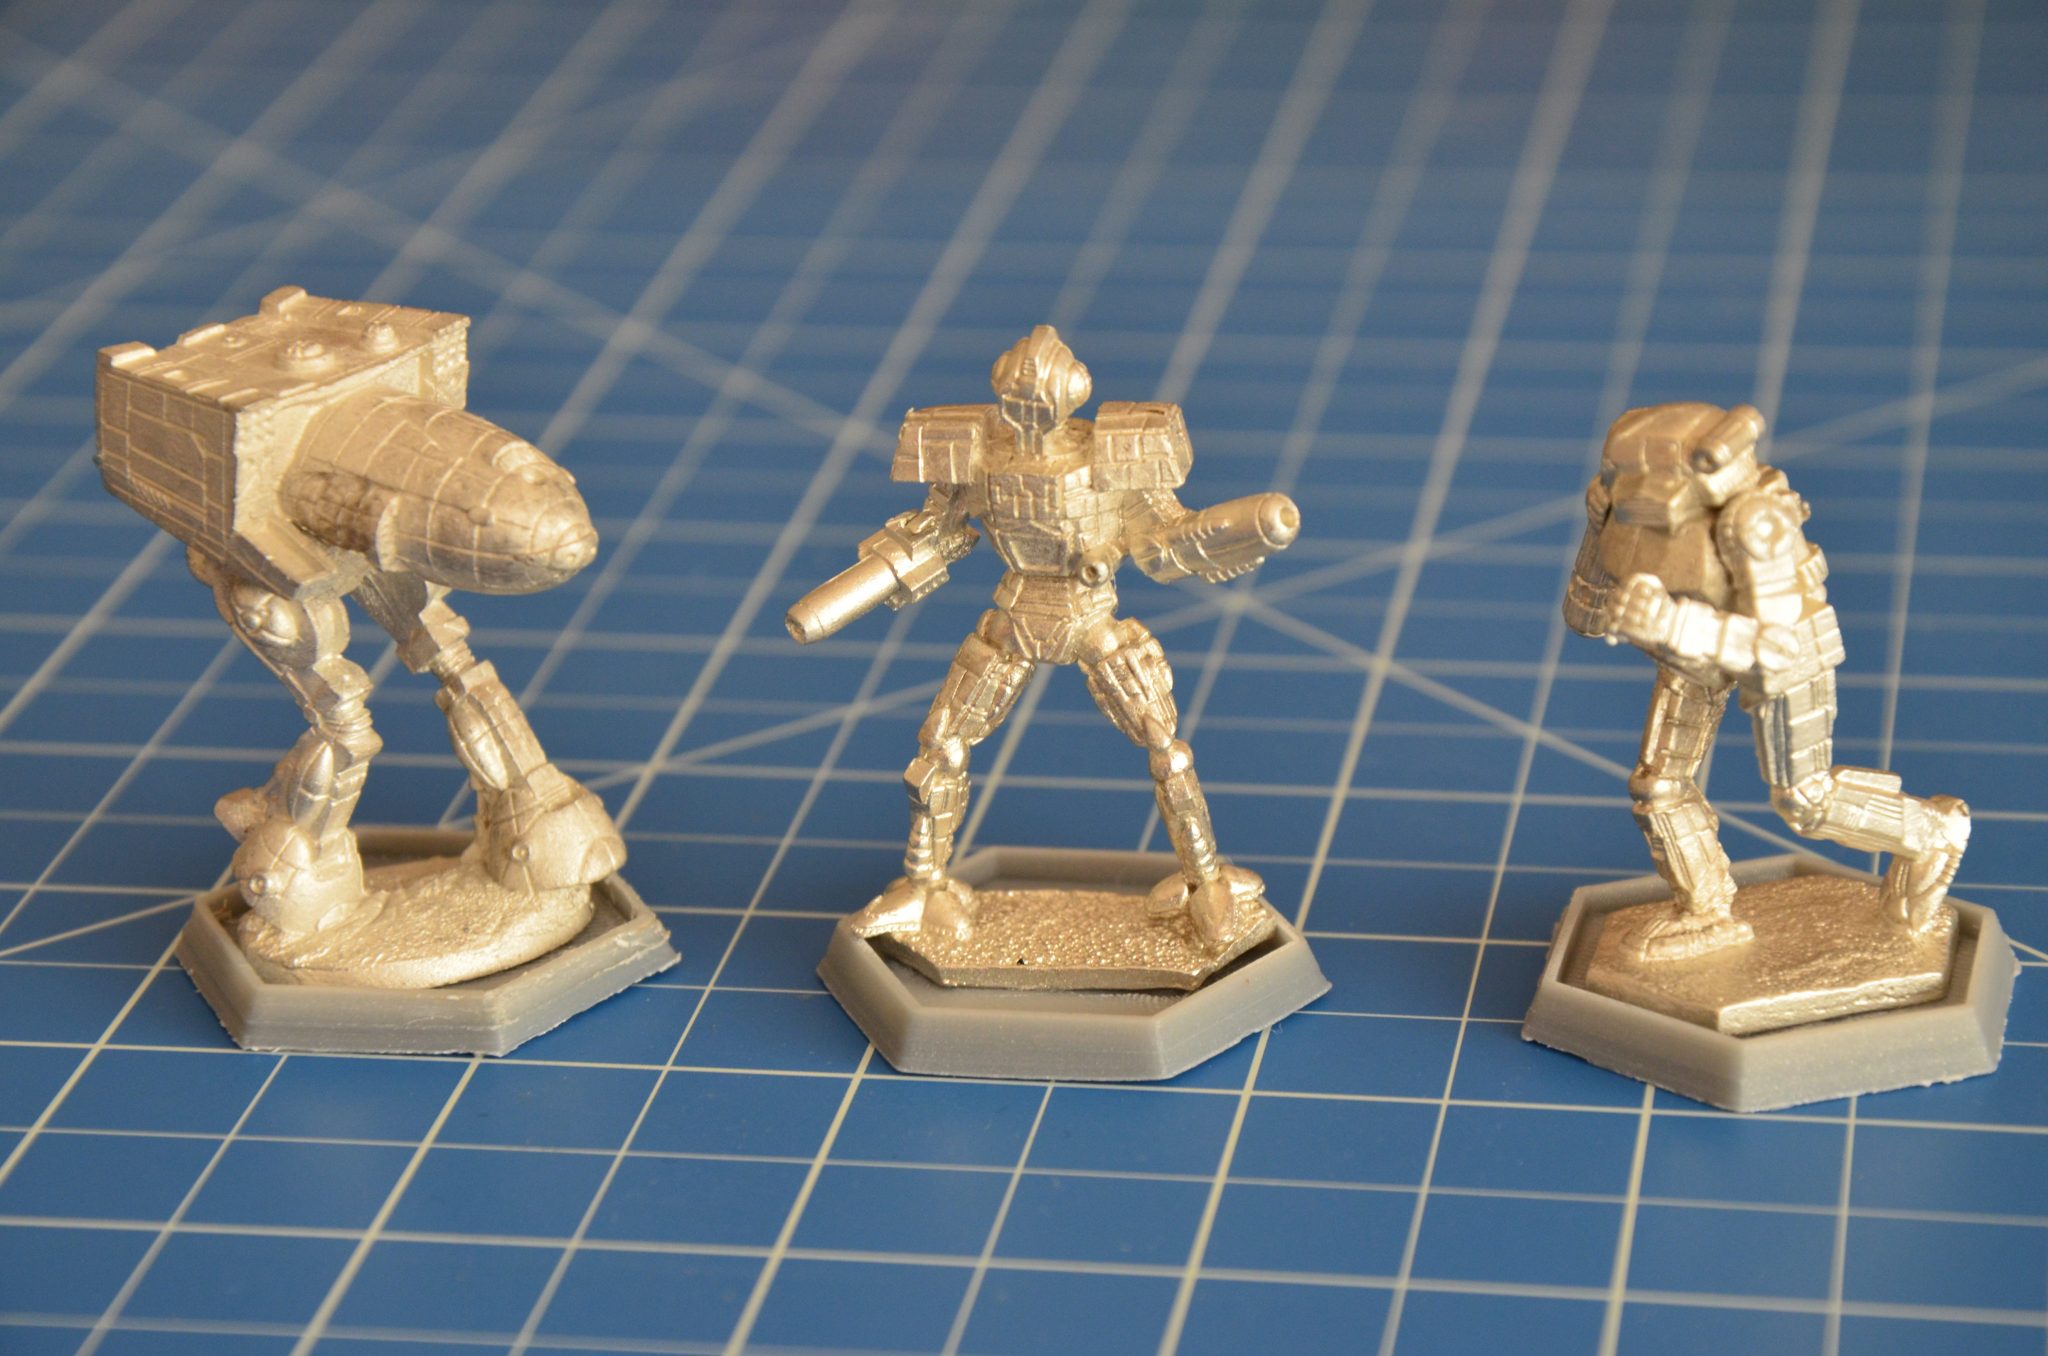
All painting patterns are going to be fairly simple so I hope this project will not need much time. The Mechs‘ bases are already prepared with white pumice and some stones. The bases were 3D-printed with grey PLA filament. The Jenner is a 30 year old model which comes from a sealed box. Despite of this, the model looks fairly oxidized and I wonder how the colour will look like.
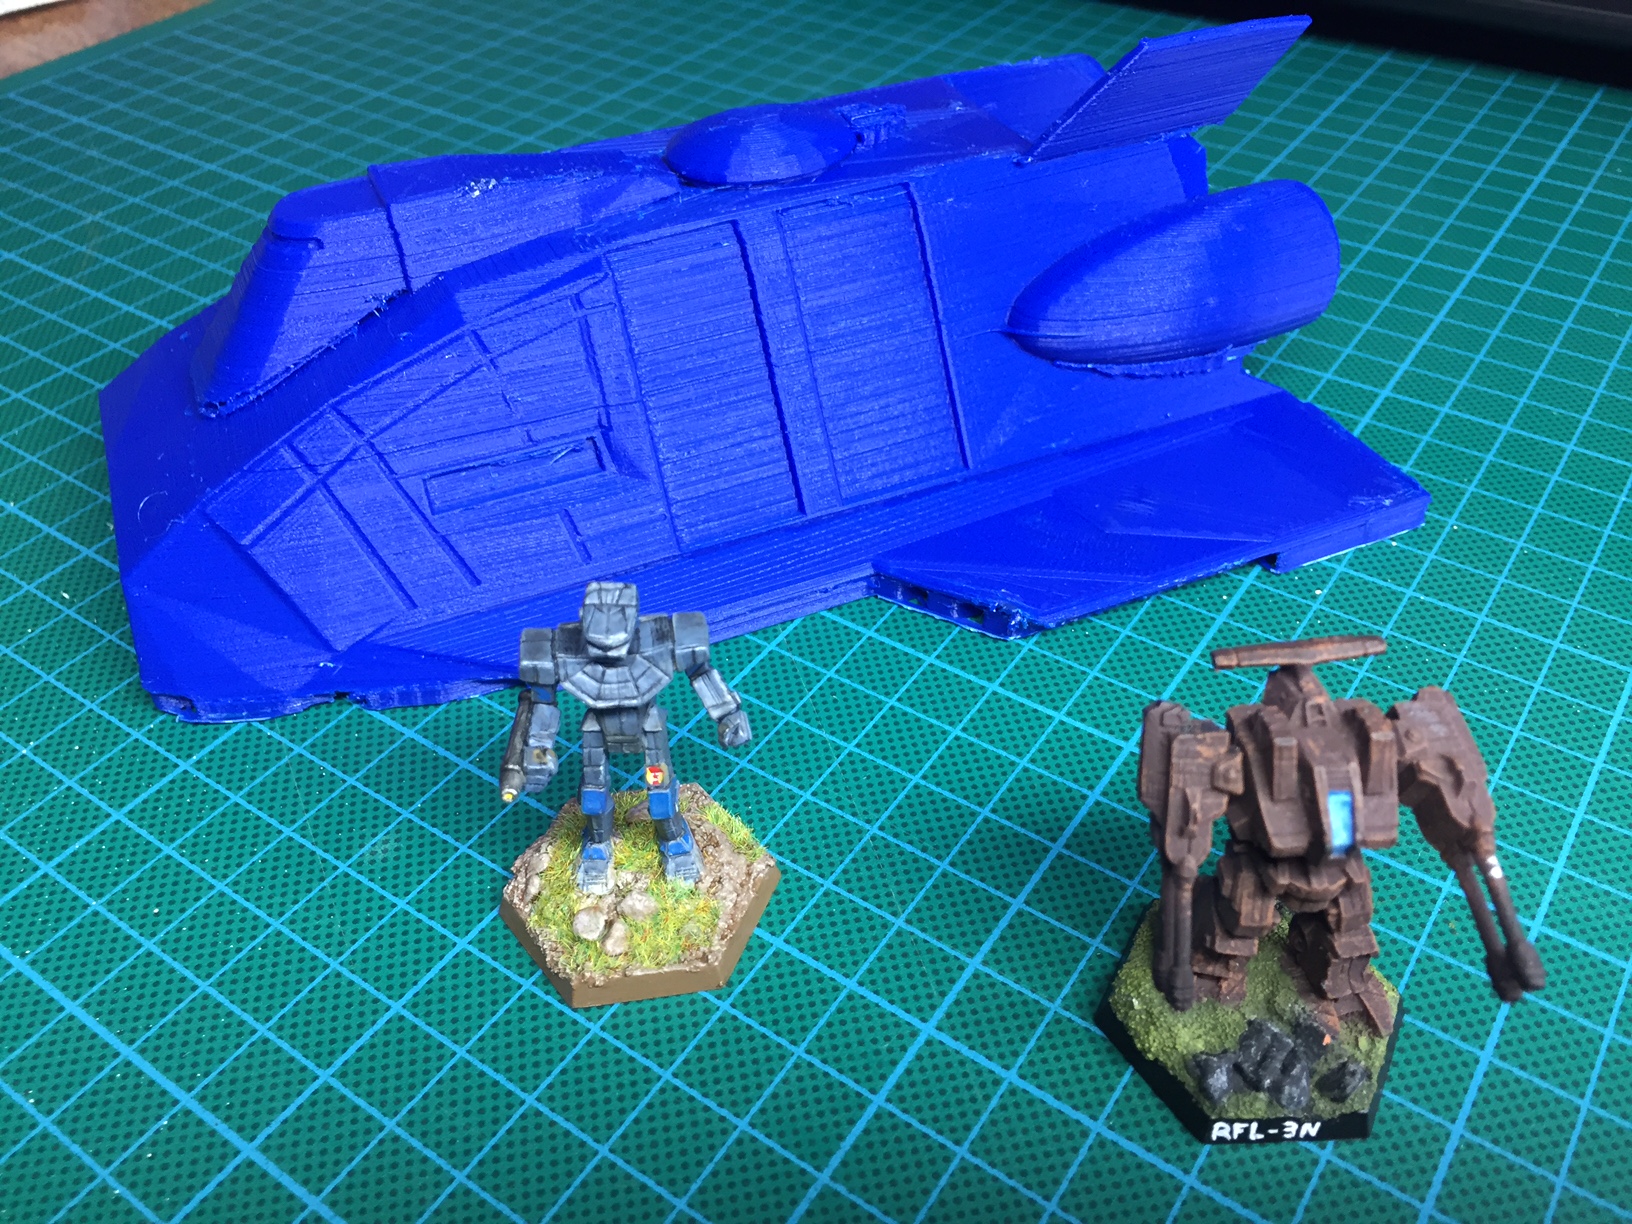
So, this was a try to 3D-print a Leopard dropship for BattleTech. It was printed in one session and to save time I changed the settings to a lower resolution than recommended. Still, printing took more than twelve hours but it turned out resolution was much too low.
The Leopard can carry up to four Mechs into Battle.
Additionally, the bright blue colour of the filament does not really fit the topic and gives it a rather cheap toyish look. However, I still think, with some paint on it, it will still do the job as a scenic craft that came down just too hard in the midst of battle and lost a fin in the process.
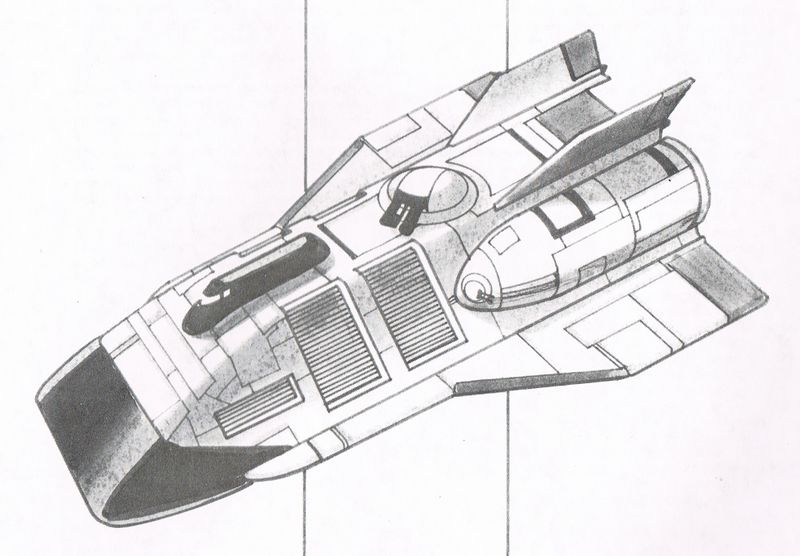
The Leopard dropship as shown in Technical Readout 3025.
Again,thingiverse was the treasure chest where I found this 3D-model. Models for Orion and Overlord can also be found there but I’m not so sure if I will give it a try.
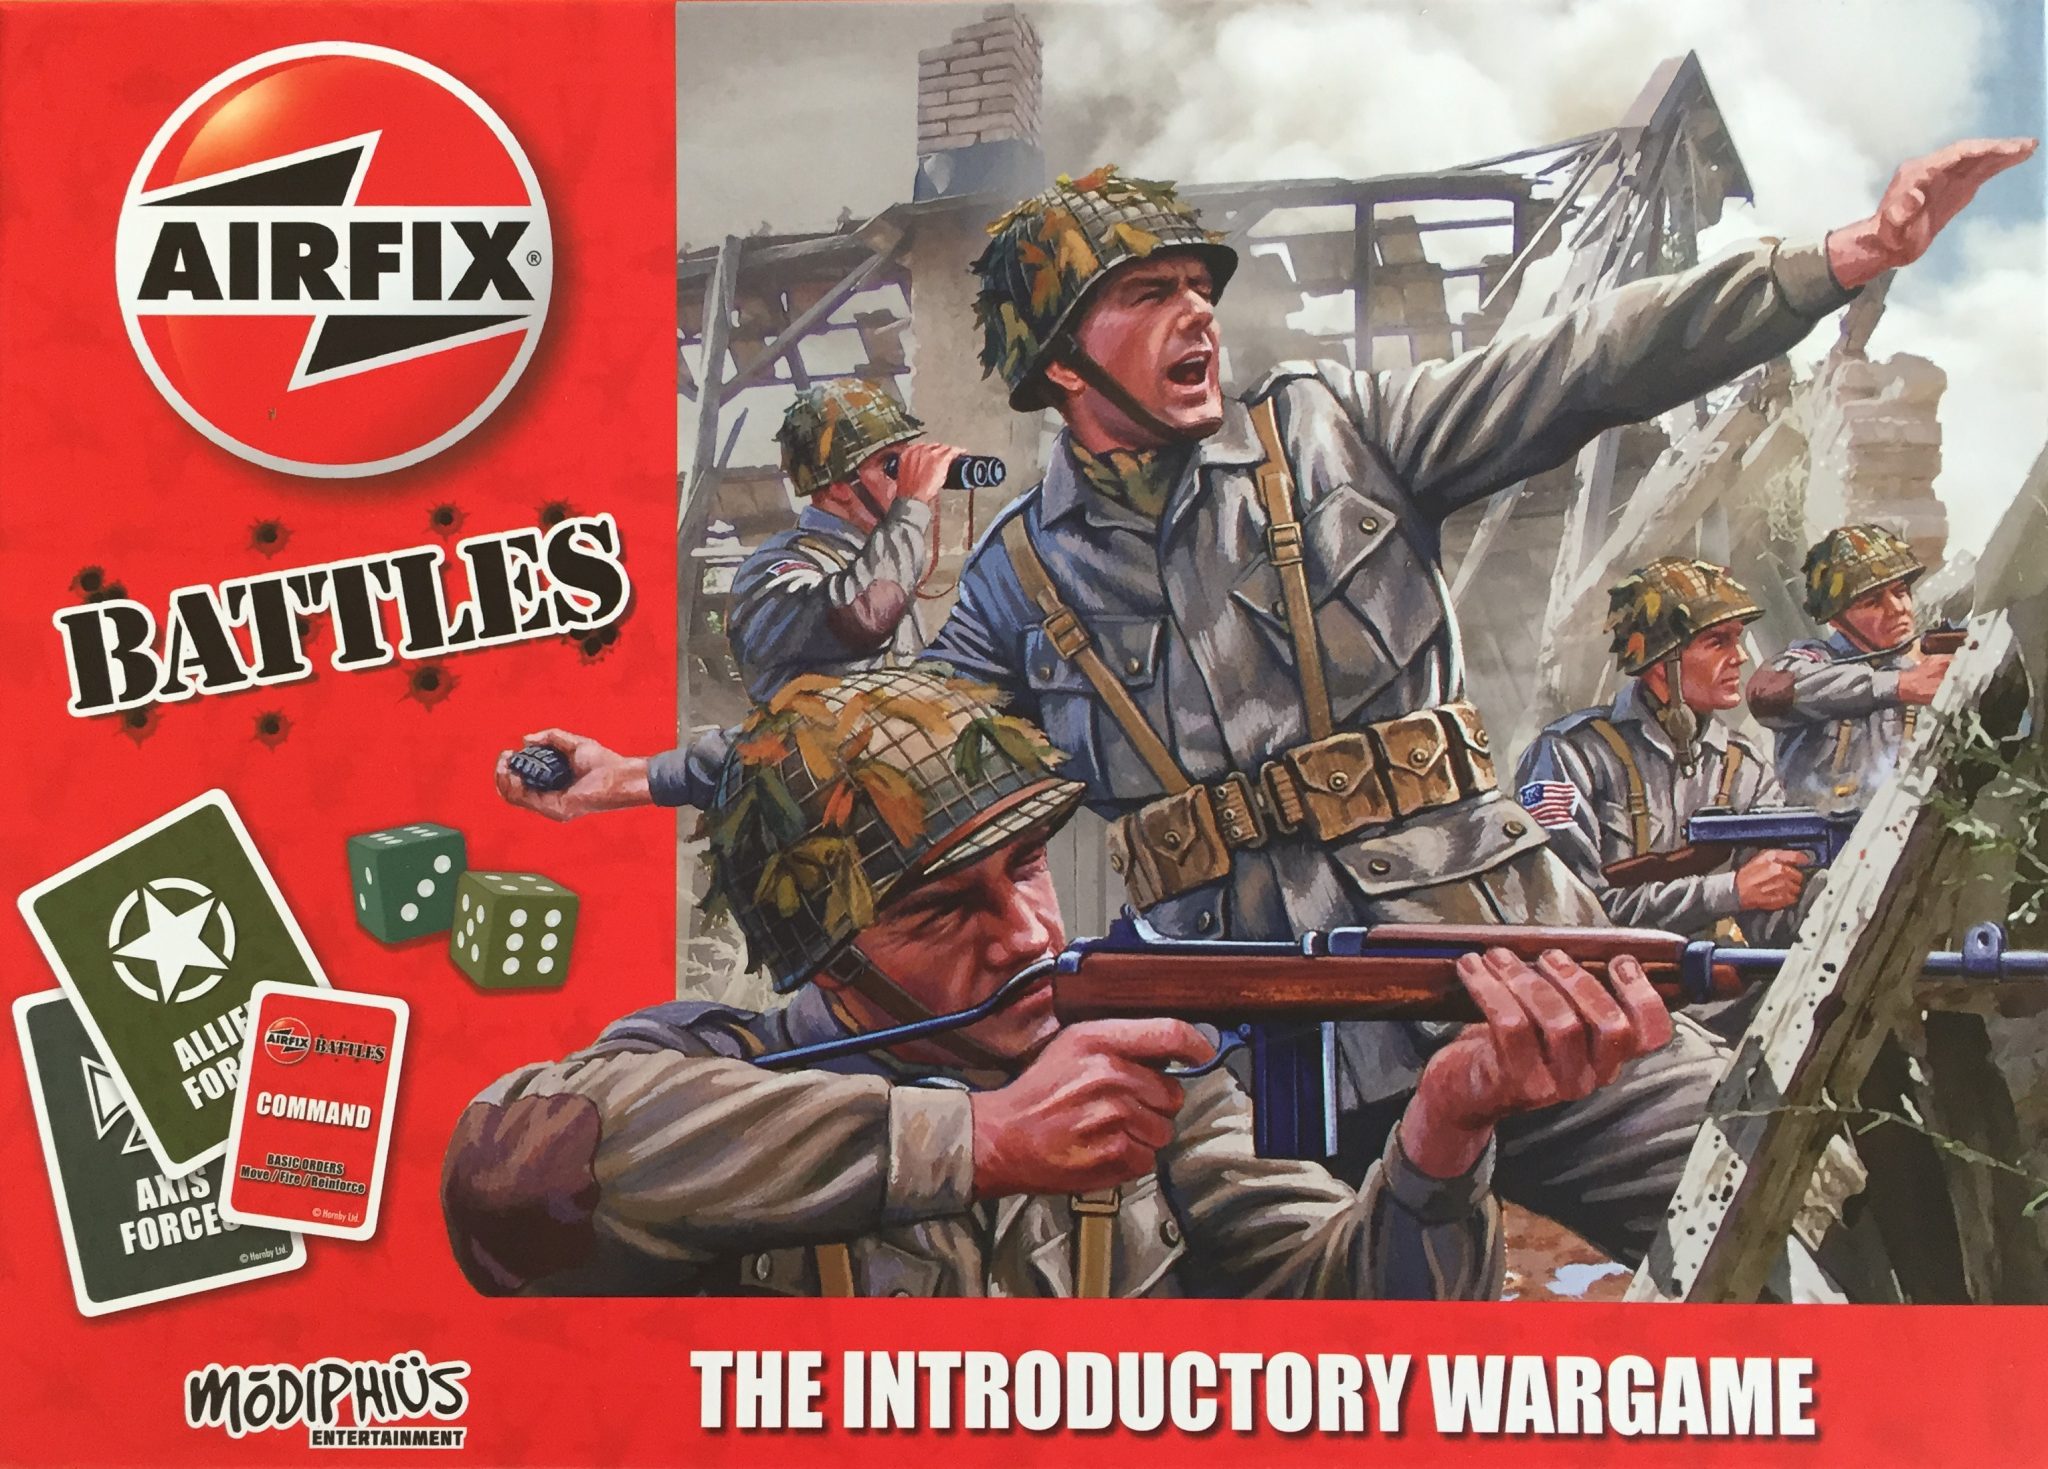
Airfix? Wargame? Maybe playing a wargame with your old plastic figures and tanks from old childhood memories? That was my first thought when I read about Airfix Battles for the first time. Well, this is not exactly it but it comes close enough.
First of all, Airfix Battles is not really Airfix but Modiphius, probably better known for roleplaying games. Maybe the producers were just clever to use the Airfix logo on their game to get more attention. (It worked!) Otherwise, Airfix Battles could be just another wargame which would work quite well without the logo. But as the author, Chris Birch, once said in an interview, he also had thoughts about childhood memories when he created the game.
For several decades the brand Airfix was a synonym for the hobby of scale modelling. I think in most boys‘ rooms there were Airfix-planes, -ships, -tanks or -figures. But during the 80s their success declined as scale modelling became less popular. Only in recent years, Airfix was sold to another company, the brand is more on the go. Maybe this a reason why they let Modiphius use their logo on their Introductory Wargame.
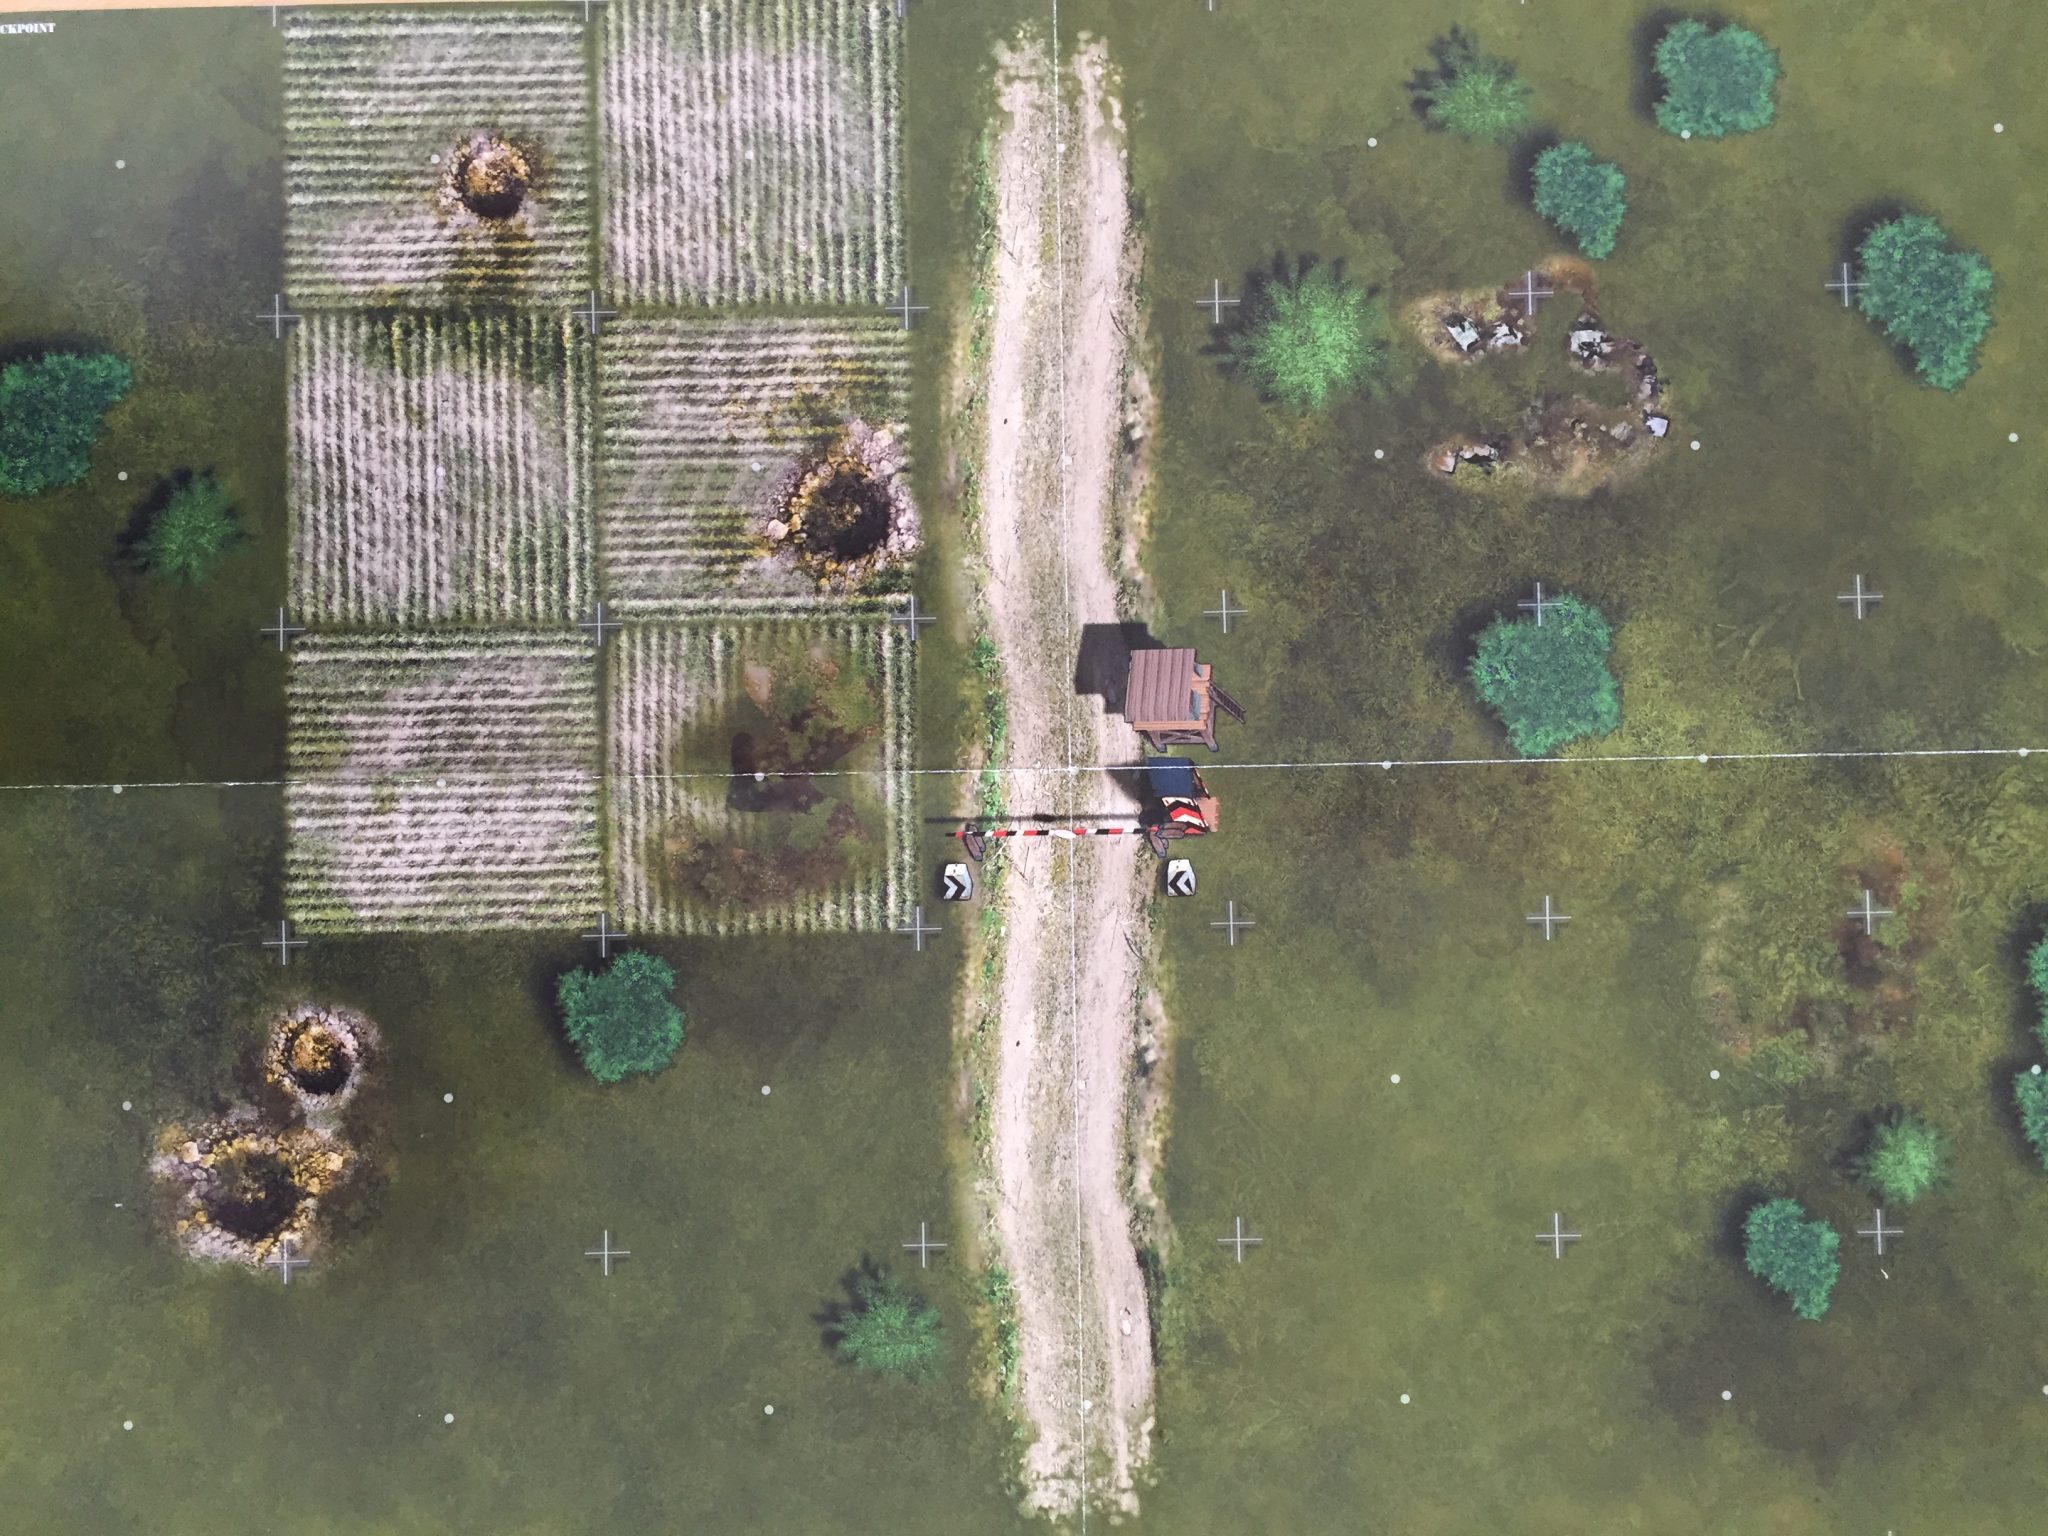
One of two double-sided maps in the box.
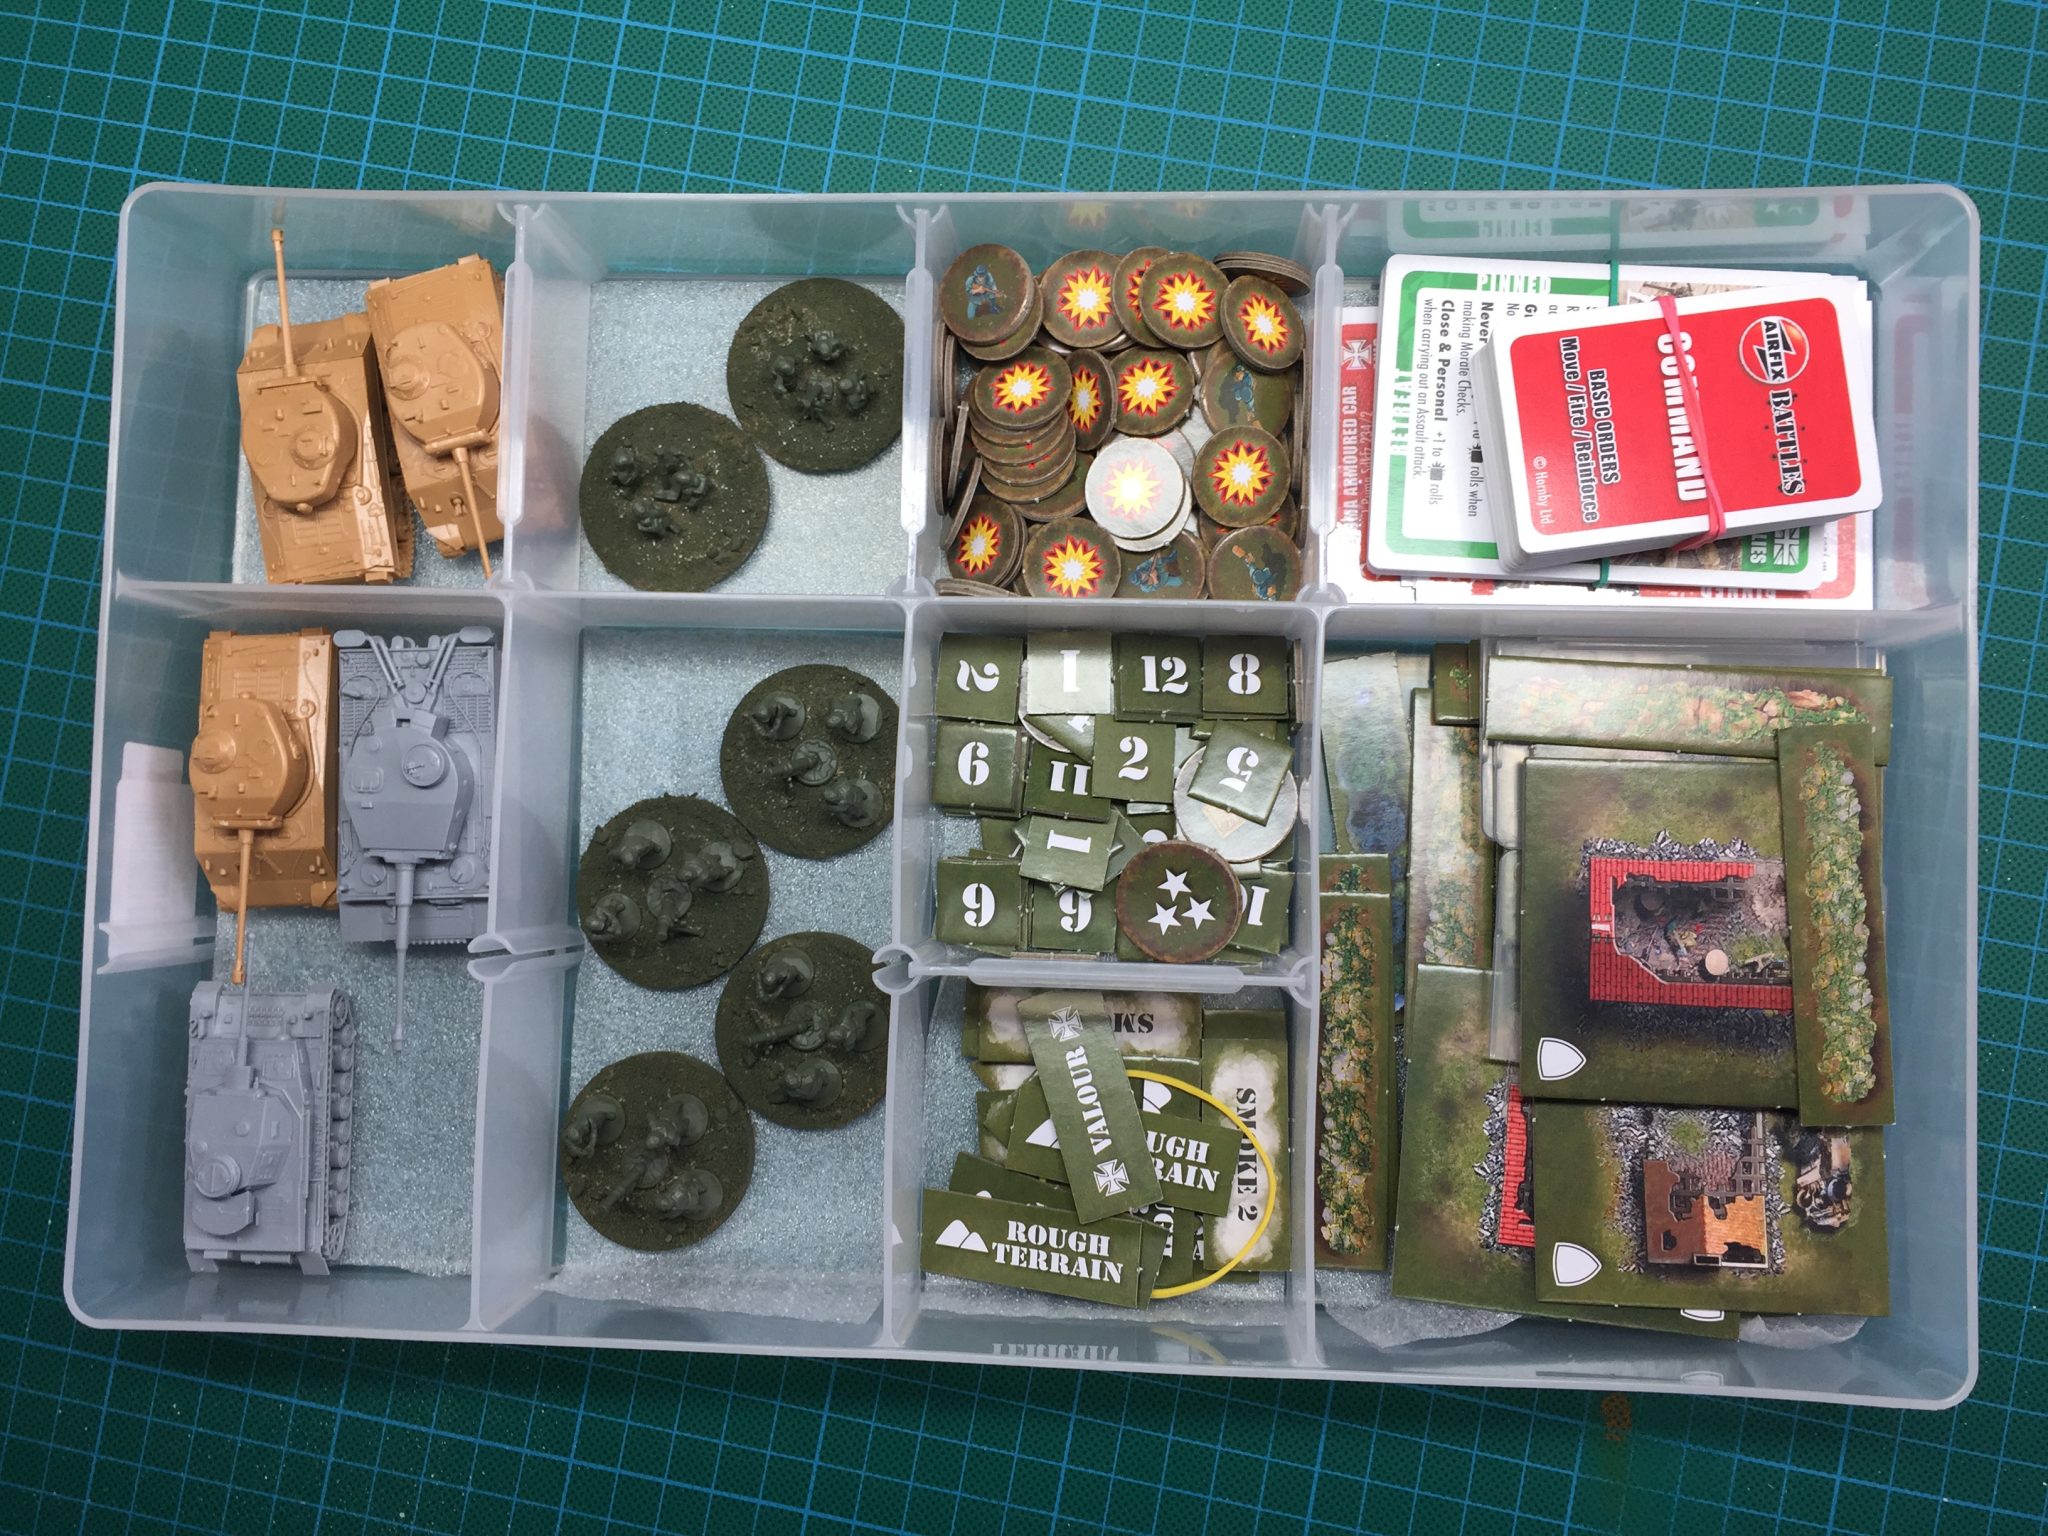
Airfix Battles is a simple to learn wargame which can either be played with the cardboard counters from the box or with plastic soldiers and tanks from any company. Of course Airfix figures in 1/72 scale (20mm) are recommended but I made another choice, which I will explain later. The game includes two 59,0 x 41,5 cm two-sided poster-maps on thick paper as well as buildings and obstacles on cardboard counters. All information about units are printed on so-called Force Cards, which go to the players‘ hand. This way stats and special abilities don’t have to be kept in mind. Preparation for a typical game takes only a few minutes time.
A complete game set-up. The US infantry has to hold the house.
The rules are easy to learn with a scenario-based tutorial system. Ideal if you want to play with kids (As long as they know enough English!) or people who don’t have much experience with wargames. But also experienced wargamers will have a lot of fun with Airfix Battles. However, some limits of the gameplay will become obvious after a while if you are used to more complex games. A lot of reviews are already around on the net (e.g. boardgamegeek.com). No need to repeat that but here are two aspects of the game I would like to single out.
Command Cards
This is not a new idea in a game but adds a lot to the fun of Airfix Battles. Usually a player knows the opponent’s possible moves and by counting and calculating can plan his own moves. Command Cards bring the element of surprise. Each player has a certain number of these cards which grant Special Orders, which are unknown to your opponent. This brings more tactical options, for example, some cards give the option to move further or move AND shoot, what is usually not allowed. Some cards work as Interupts and can be used any time during your opponent’s move. This way the usual ‚I-go-you-go‘-conecpt is broken up. But of course, that means, luck and coincidence play an even greater part in the game.
Valour Counter
The Valour Counter is only a small detail in the game but the idea is genius! Only one player can own the Valour Counter at a time. If you have it, you can decide to re-roll a roll of any number of dice. After that the counter goes to your opponent, who has this option now. The second roll has to be accepted. In our games the Valour Counter already contributed to a lot of fun. When bad luck strikes again there is at least a second chance.
Figures and models
Airfix Battles is recommended to be played with the cheap and easy to get figures from Airfix, Revell or similar companies. Using figures adds a lot of fun and depth to the game. However, I felt 1/72 (20mm) is too big a scale for the maps. The houses look too small in contrast to figures, tanks would use up more than a single square on the map. As a cosequence I decided for 1/100 scale (15mm) models. A nice side effect: When storing the game components, they use much less space.
For infantry I use figures from The Plastic Soldier Company, which offers a wide array of choices for a reasonable price. For tanks and vehicles Zvezda offers very nice models in 1/100 scale for their own World War II wargame. These are cheap, easy and fast to build and do not necessarily have to be painted. The choice of models in this range is limited but it is growing and if still not available, models can still be purchased from The Plastic Soldier Company or Flames of War.
Game components, models and figures in a plastic box.
New Material
Airfix Battles is open for a lot of expansions which will hopefully come. Additional Force and Command Cards are available from Modiphius and new material was published in Modiphia, Modiphius‚ new free house-magazine. The first two editions offered new scenarios and cards for home-printing. Modiphia is available by download via drivethrurpg in pdf-format.
Conclusion
Airfix Battles is a great game. It brings back memories from a long time ago. Frankly, a lot of childhood memory revivals end up in disappoinmtent (e.g. TV shows, ice cream). Airfix Battles did not disappoint me and brings new worthwhile memories and fun in form of building new models and having great gaming sessions.
Experienced players will definitly see the limits of the game mechanics but, nevertheless, playing can still be fun when there is no time for larger games. Airfix Battles could also be a nice choice for fathers and sons to find a common interest and for introducing friends to the world of wargames, who did not have the luck to play such games, so far.
The Panther is one of my favourite Mechs. Not only because it is essentially a fast moving PPC which can even jump but because the design looks great. My first idea for a color scheme was a blueish grey. A lot of inspiration for painting BattleMechs can be found on www.camospecs.com and indeed I found a great scheme there which worked as my guideline.
Step 1 – Basing and Priming
The model was already partly primed in black when I got it. For decoration I filled the base with White Pumice (Vallejo), put in some small stones and left it to dry for overnight.
Next day I primed the base and the rest of the model with a brush in Chaos Black (GW).
Step 2 – Basecoating
The armor plates were painted with Sombre Grey (Vallejo GC48) while leaving out the inner parts of the joints (knees, arms, neck), the PPC and the panel lines of the armor as good as possible. I did not mind to achieve an even coloured surface on the armor plates. A tall construct like a BattleMech will never look brand anyway new in times of fighting and an uneven color adds to the effect.
The inner parts of the joints, SRM frontplate, the „balls“ on the backside (Whatever their purpose might be!) and the PPC were painted in Boltgun Metal (GW). The base got a layer of Graveyard Earth (GW).
Step 3 – Shading
The model was given a generous coat of Army Painter Quickshade „Dark Tone“. These washes are great to achieve a quick good looking effect of depth.
From this point on you already have a nice looking miniature. Give it a coat of varnish, glue some green on the base and it would be ok for any gaming table.
Step 4 – Basecolours
To break up the monotony of the basic grey, I painted certain armor plates with Enchanted Blue (GW). The eyes were painted Mechrite Red as a base colour, covered by Blood Red and with a tiny spot of White in the corner of each eye. The PPC got some Sunburst Yellow (all colors GW) in its muzzle.
Step 5 – Highlights
In order to save time I usually do only one layer of highlights. To my mind this is enough for gaming purposes. In this case, highlighting was a mixture of painting the edges and drybrushing. Armor was highlighted/ drybrushed with Space Wolves Grey (GW). For the metal highlights I used Chain Mail (GW).
Step 6 – Final Steps
The base was drybrushed mit Dheneb Stone (GW). I didn’t mind when the Mech’s feet „got dirty“ with the colour. This adds to the realness because Mechs in combat should have a dirty look about them, anyway. After that the margin of the base got a second layer of Graveyard Earth to achieve an even surface and mask some excess of Dheneb Stone. Finally, as a test, I put on Army Painter Quickshade „Soft Tone“ on the „sand“ to give the base some more depth.
Finally, to give it some more life, I added two decals from my bits box, a unit symbol and a number. Before adding decals, I put on some gloss varnish on the spots where I will put them. This way they will stick better. After putting the decal on, I use some decal softener for better adhesion.
After drying I painted the Panther with Matt Varnish (Vallejo GC 70). In this case I put on a second layer, as matt varnish has a reputation of being less protective than gloss varnish. I can’t explain if this is true but I read it somewhere and better safe than sorry. I think this Kitty will be touched quiet a lot.
Some static grass glued on the base – done!
Conclusion
A rather basic style of painting but done in a reasonable amount of time. Generally I am satisfied with the result although some more highlights would probably have been nicer. After all, it’s done for playing and not displaying.
A tabletoper’s little bargain in good old England…
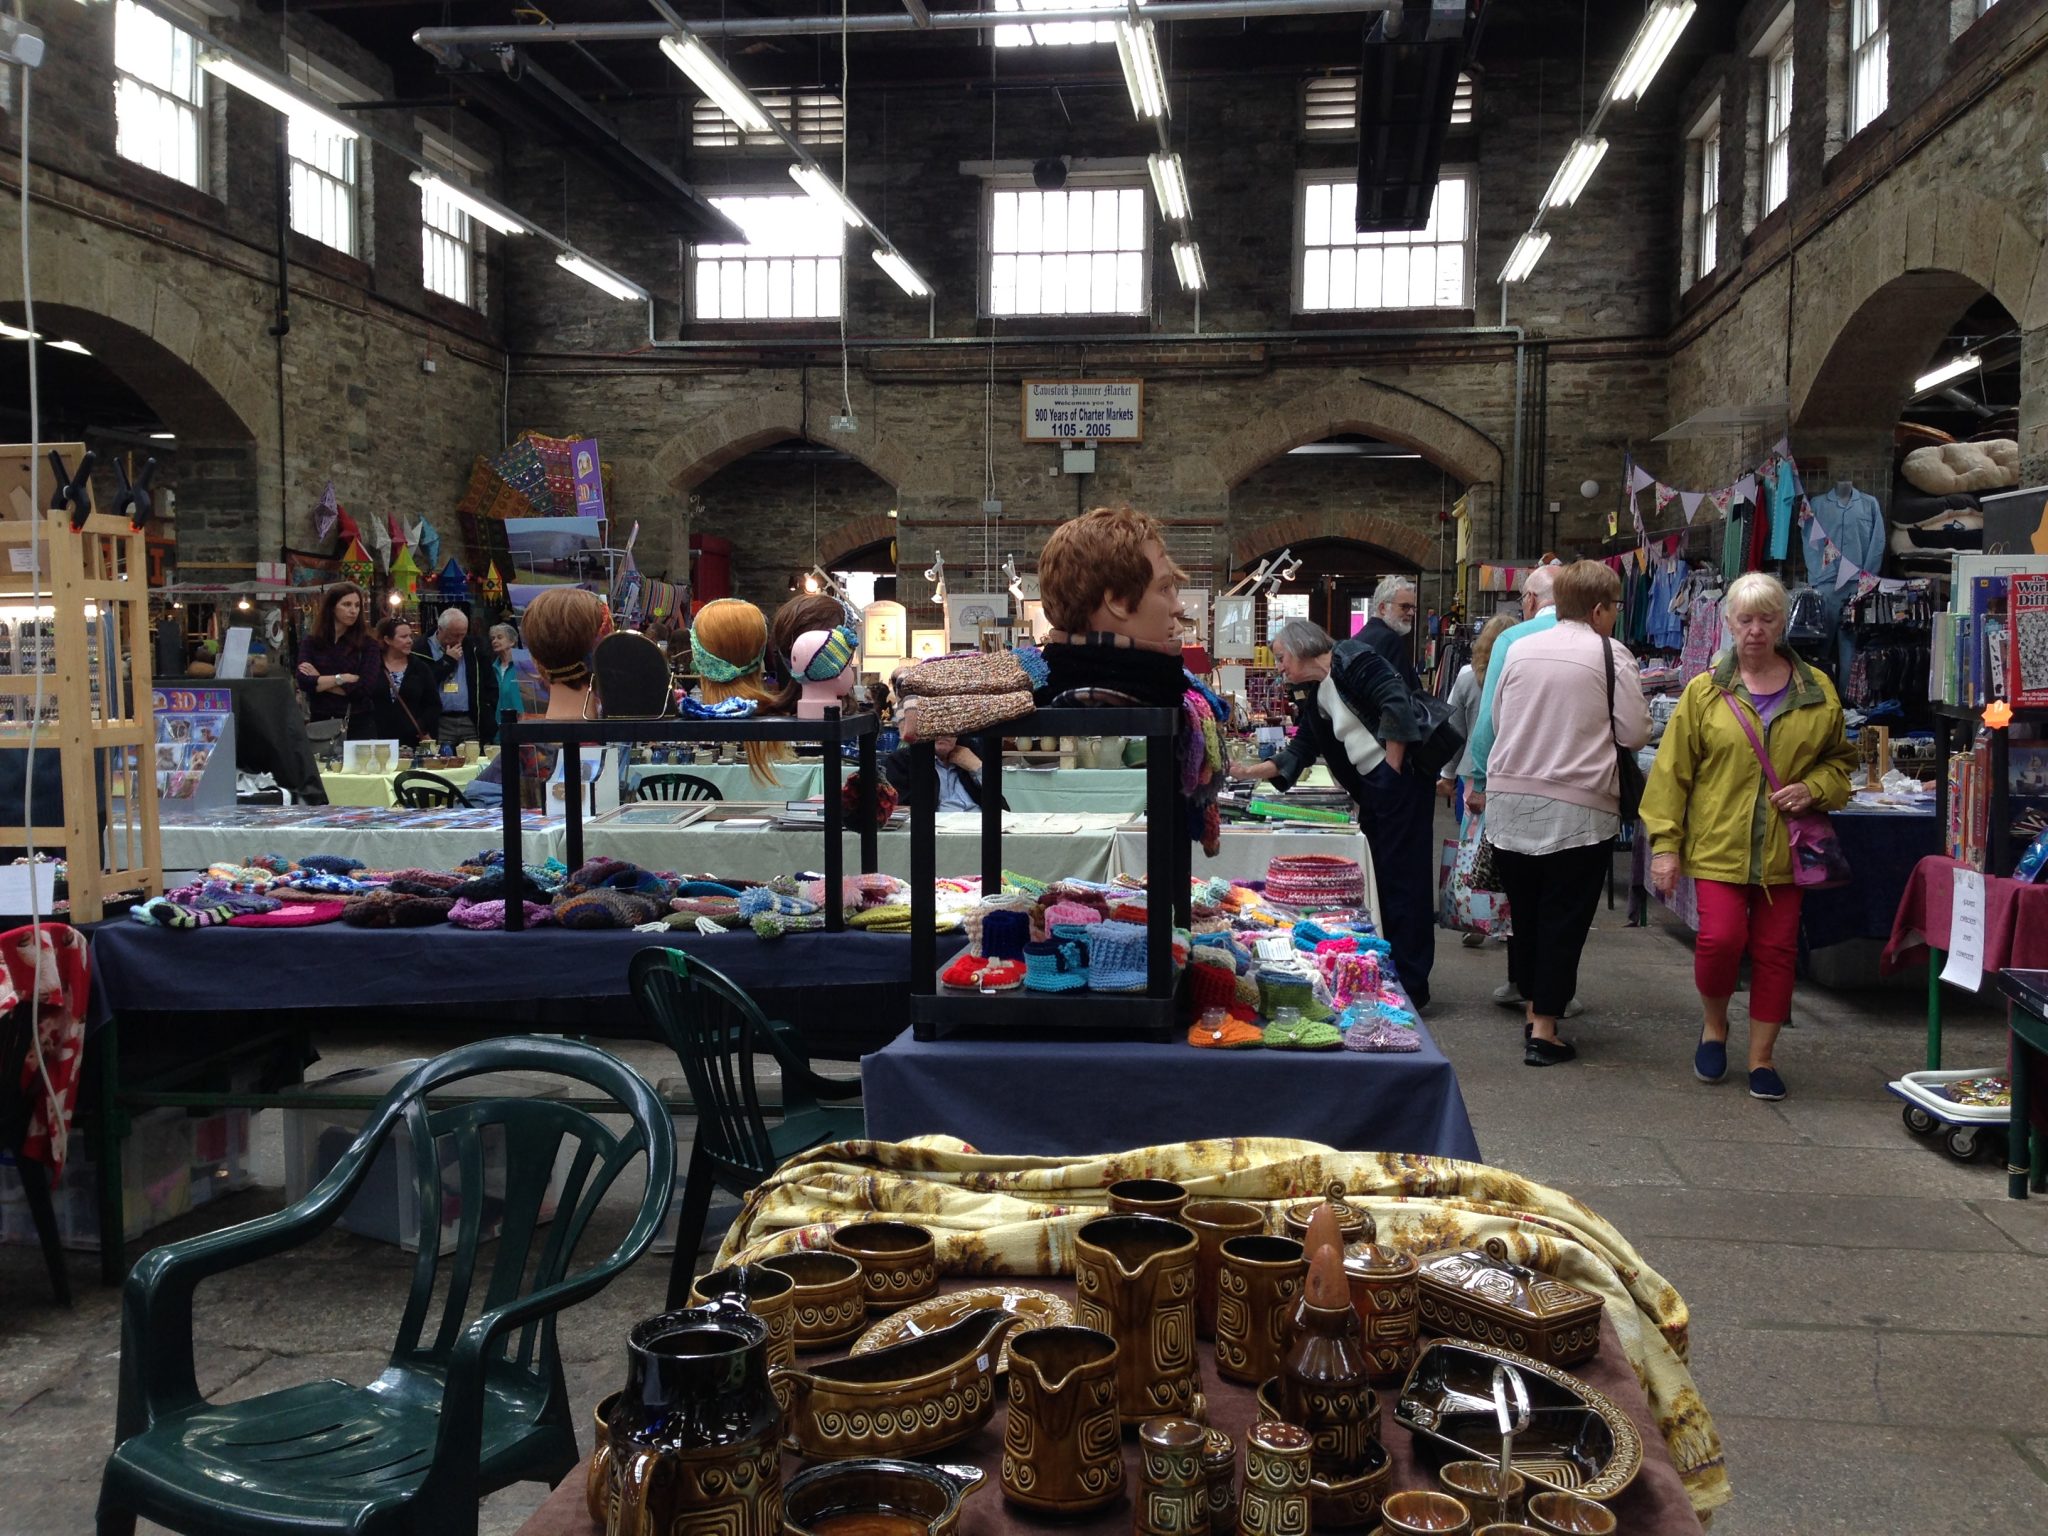
On our vacation trip this summer we came to Dartmoor. Dartmoor intrigues me for its barren landscape but there are also wonderful historical villages and towns. Tavistock is one of these towns at the edge of the Moor. For me the best about Tavistock was the old Pannier Market, an indoor market which looks back on a more than 900 year old tradition. On certain days even private tradespeople can offer their goods there.
As I’m always drawn to flea markets and jumble sails, this was definitly a highlight for me on the trip. And I did not leave with empty hands!
In Pannier Market I found an old unopened Warhammer box and got it for 16 pounds in a small scale model shop. With 16 minis in the box that is 1 pound each (ca. 1,10€) for great minis . That is what I call a bargain! 🙂
In the past I owned some High Elves and Skaven but never played the game and sold the stuff later. Nevertheless I felt some loss when GW discontinued the line. After all, Warhammer Fantasy Battle is the mother of modern tabletop! (IMHO).
Now, these guys in the box will become useful for me for Fabled Realms, the fantasy skirmish game which will be released in about a year by 4Ground. I took part in the Kickstarter and hope it will arrive in time. To shorten the waiting time, I can build and paint the archers now. And maybe there are some more bargains ahead. 🙂
Frankly, I didn’t like playing BattleTech that much when I first did so in the early 90s. However, I deeply enjoyed the fluff around it. Pictures of Mechs and background stories in Technical Readout 3025 and 3026 interested me much more than game values. I devoured the classic novels, like the Saga of the Gray Death Legion and Warrior triology. And still I think that Heir to the Dragon is one of the most enjoyable novels I ever read. In regard to gaming, BattleTech computer adaptions were a different story and Mechwarrior 2 is probably one of the computer games I played the most, up into the new millenia. But playing the boardgame never really got me hooked.
That changed until recently when I played BattleTech again after a long pause, more because a friend wanted to than expecting a good gaming session. But this is probably the story: Expect the least and you get the most. My mate owns a lot of the old metal Mechs, in contrast to the paper counters we played with in the early 90s. We had quiet some fun playing several games and so the feeling grew in me to get my own BattleMech army.
BattleTech – For me that is the first edition published in 1986, what is now called Classic BattleTech. Unfortunately, the old miniatures are not so easy to get. They are either used and can look worn or they can be very expensive. Modern sculpts are available from Iron Wind Metals for a reasonable price but sometimes it’s only the old RalPartha models which seem to be… well… right. And so the shopping tour started.
Batch 1
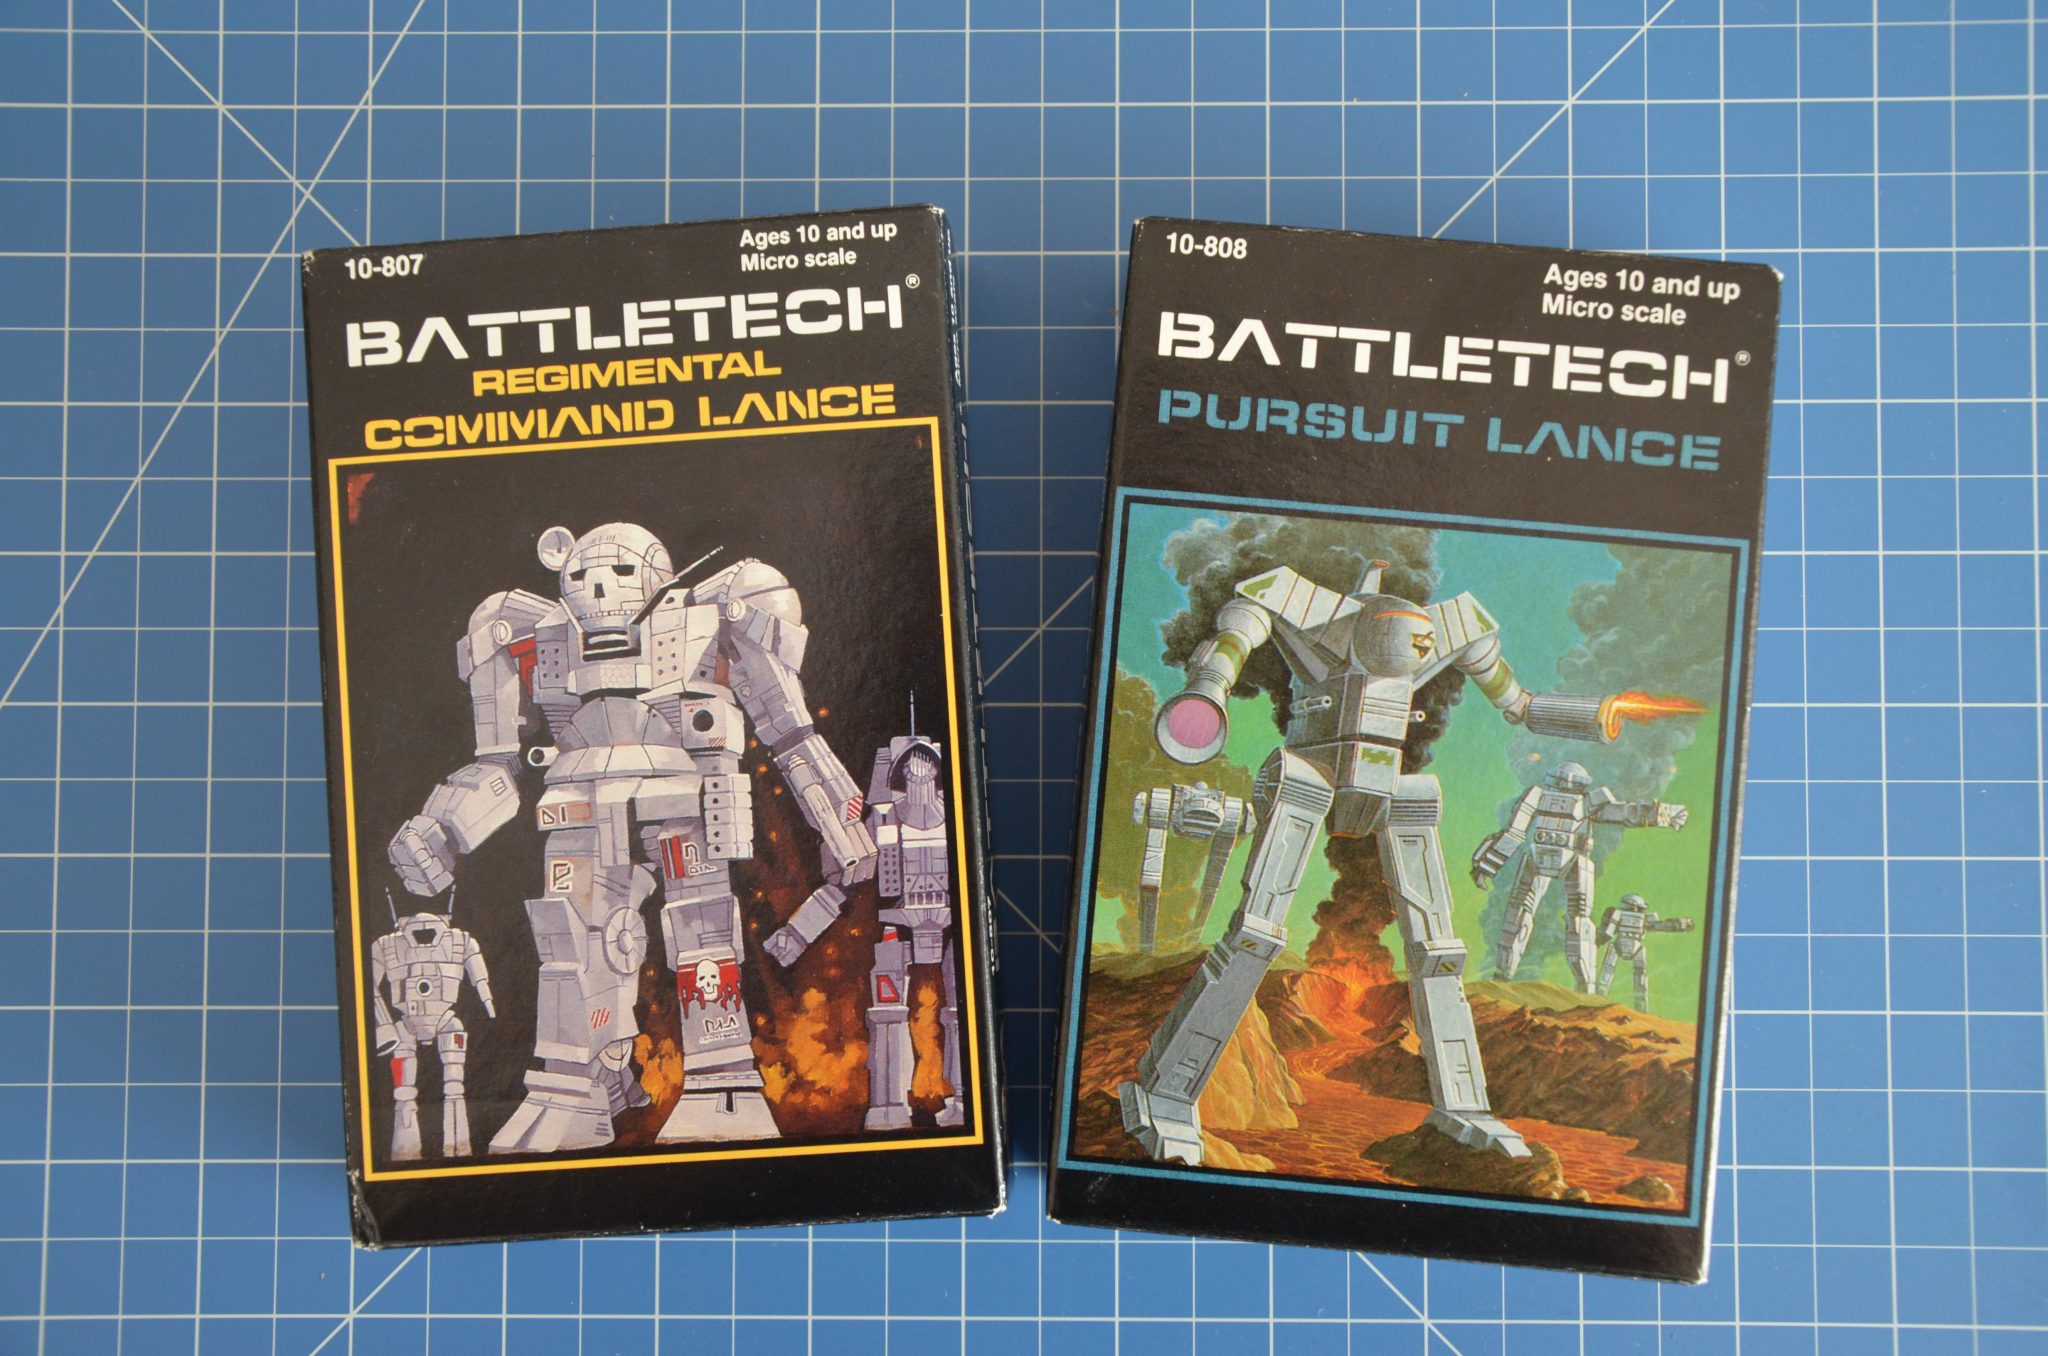
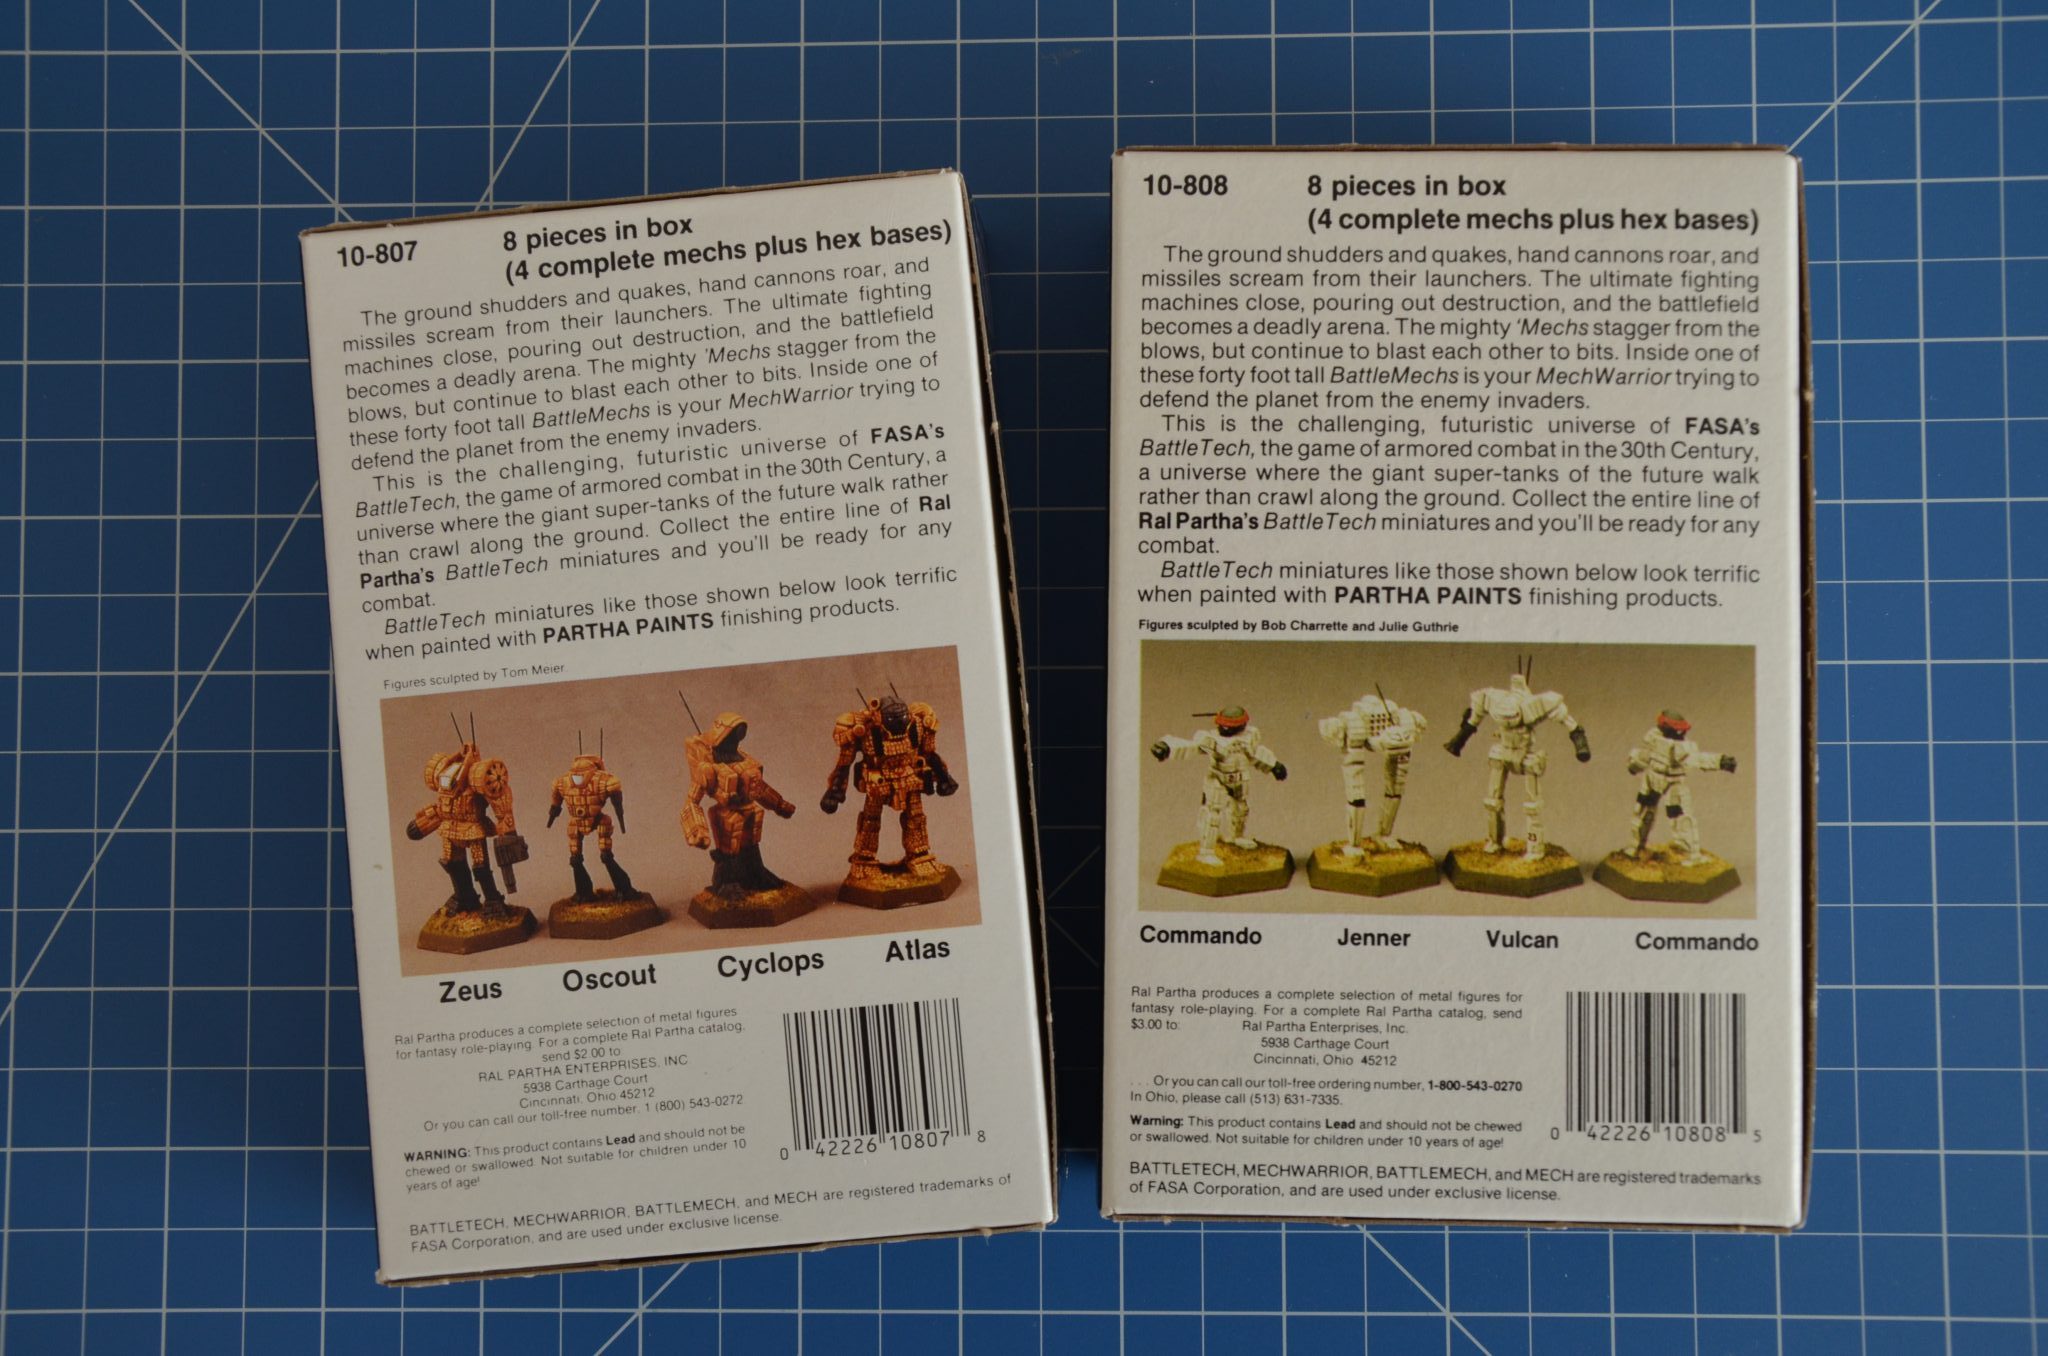
On Ebay we found several old blisters and boxes for a reasonable price. There were also some boxes for unreasonable prices, especially if you go for iconic „unseen“ Mechs, like Warhammer or Marauder. My mate and I we purchased the „Regimental Command Lance“ (Zeus, Oscout(!), Cyclops, Atlas) and „Pursuit Lance“ (2x Commando, Jenner, Vulcan).
Front cover of the boxed sets from 1987.
Back of the boxed sets.
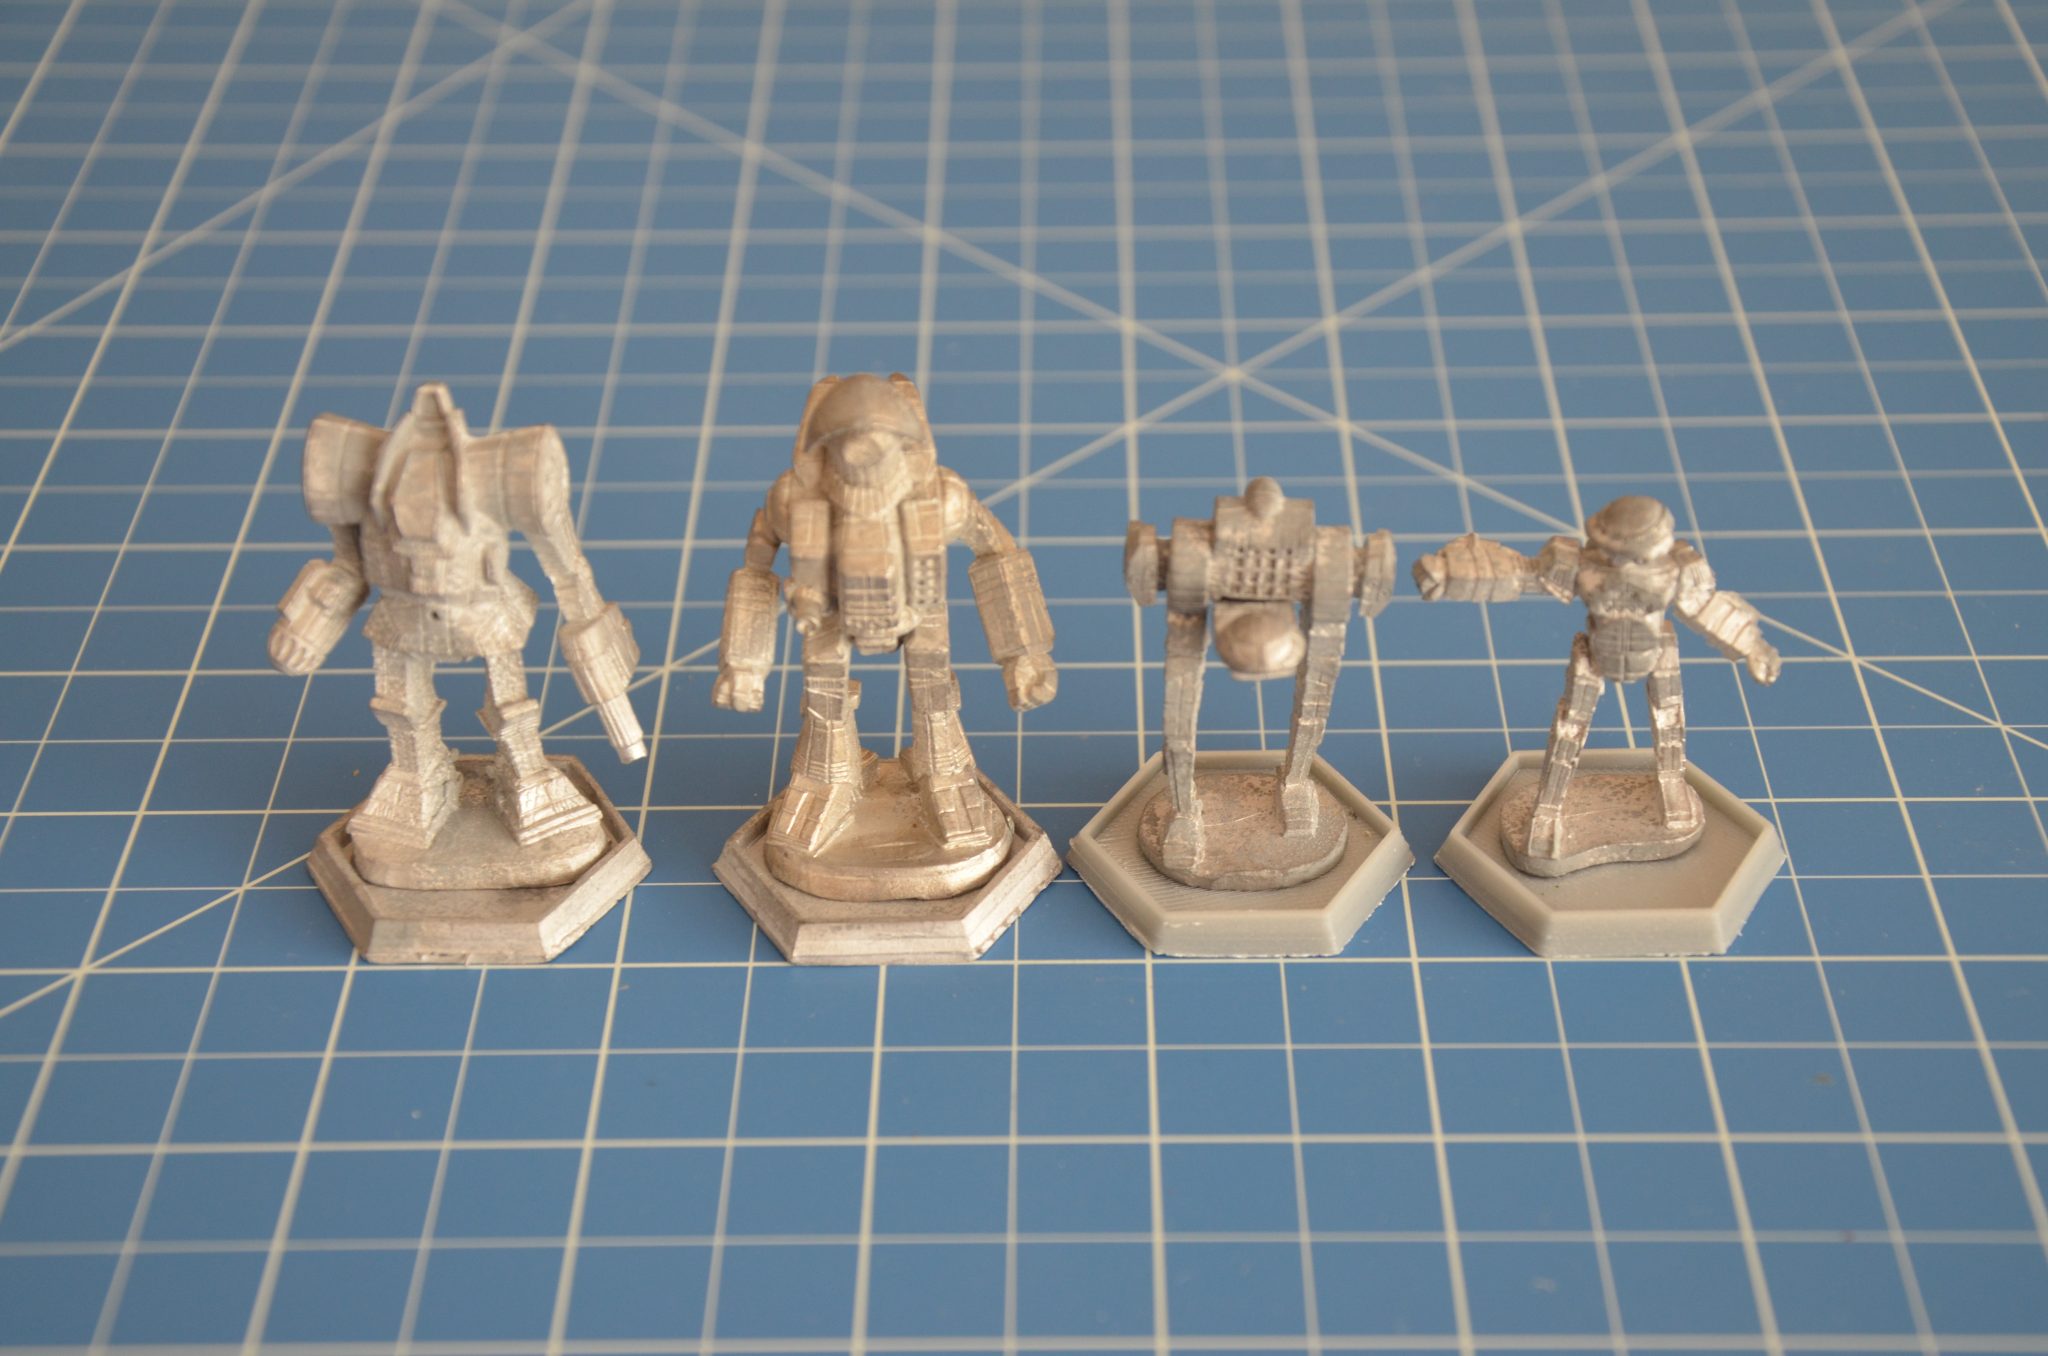
It’s a strange feeling to open boxes which were packed and sealed about 30 years ago. One might call them antiques. What makes them antique is that they still contain lead and the metal looks highly unhomogeneous. Even for 80s standard, the material was not of a high quality, I think. However, we shared the content and this is what I chose:
From left: Zeus, Cyclops, Jenner, Commando
Batch 2
The second batch I ordered from a friend’s shop, where I once worked. The shop is closed since some years but online-business goes on and he still has a lot Mechs on his list. Suitable for Classic BattleTech I found an Enforcer, Vindicator and a Stalker. All of them new in blister then.
From left: Stalker, Enforcer, Vindicator.
All models are resculpts from Iron Wind Metals. The Enforcer and especially the Vindicator have a nice dynamic pose, something that I miss in the old models very often. This creates a rather static und undramatic atmosphere in games. Mechs seem to be mere weapon platforms which can hardly move while, „in fact“, a 30 tonne Spider has a maximum speed of 130 km/h. Even an Atlas moves its 100 tonnes with up to 54 km/h. The metal here looks „fresher“ than the material from the boxed sets (Which were also sealed the last 30 years!!!) and has a lower density. A nice side effect if you carry your army around.
Batch 3
Back on Ebay I found a guy who sold his collection of Mechs after 15 years in basement. Prices were reasonable and some very useful Mechs were on offer which are all still in good shape.
Rifleman, Centurion and Dervish are even nicely painted though they would need some repair here and there. I really have to think it over if I will repaint them. The Awesome was still in blister. Several others are primed, what means that the ravages of time couldn’t damage the old metal a lot. Strange thing: The Griffin’s base is so big that it doesn’t fit into the hexbase and I had to cut away some of the base’s edge.
As some of the models from all batches came without hexbase, I printed them with a 3D-printer. Again I found everything I needed on thingiverse.
Conclusion
Not bad for the beginning. However, some of the classic Mechs are still missing. 🙂
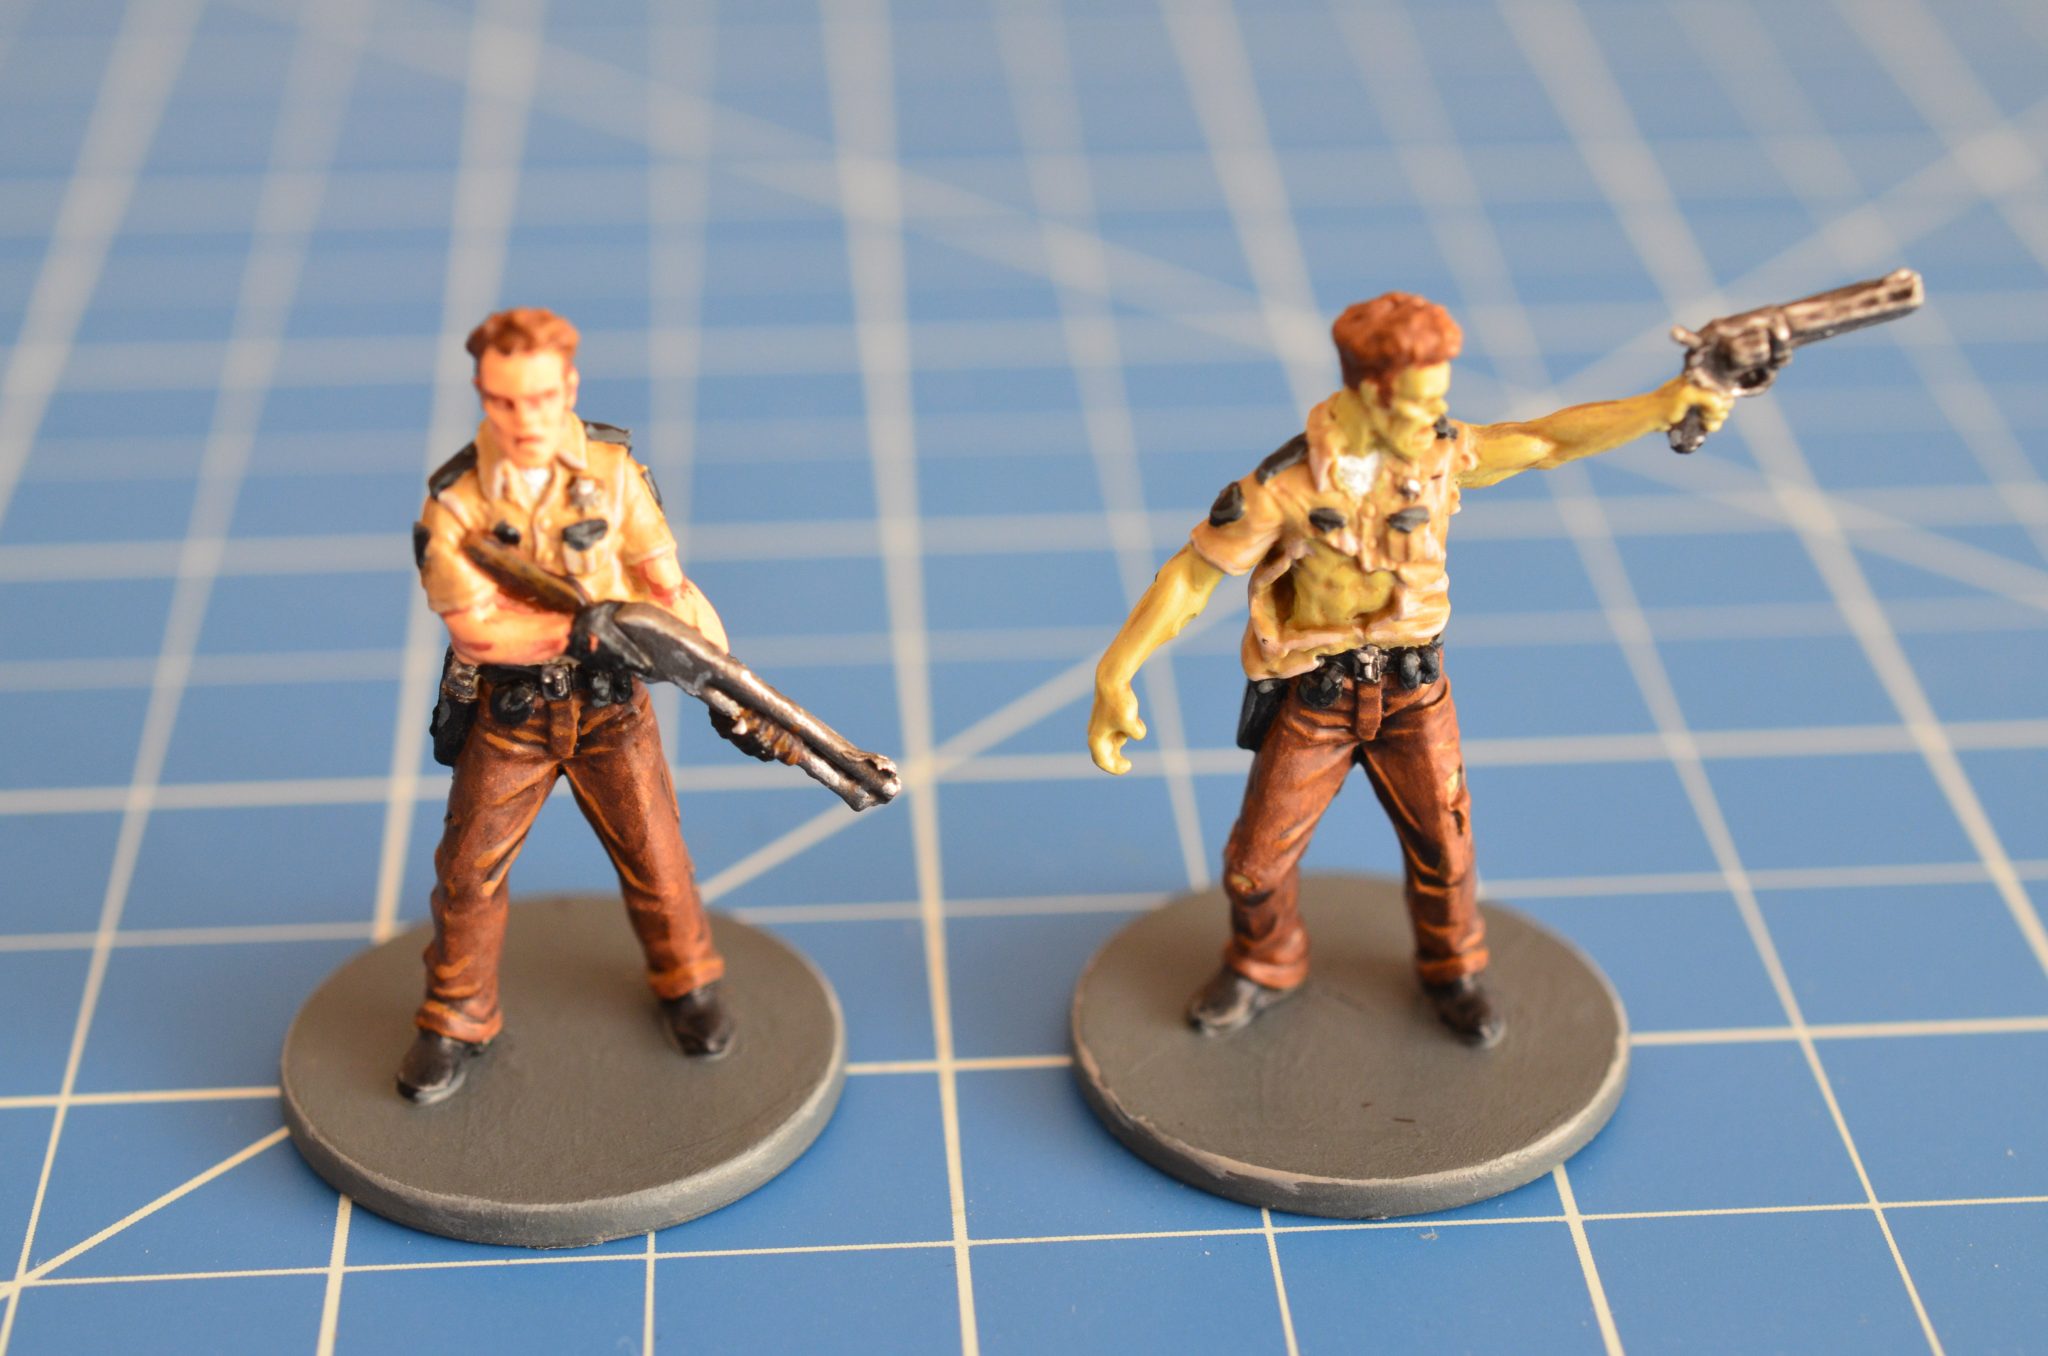
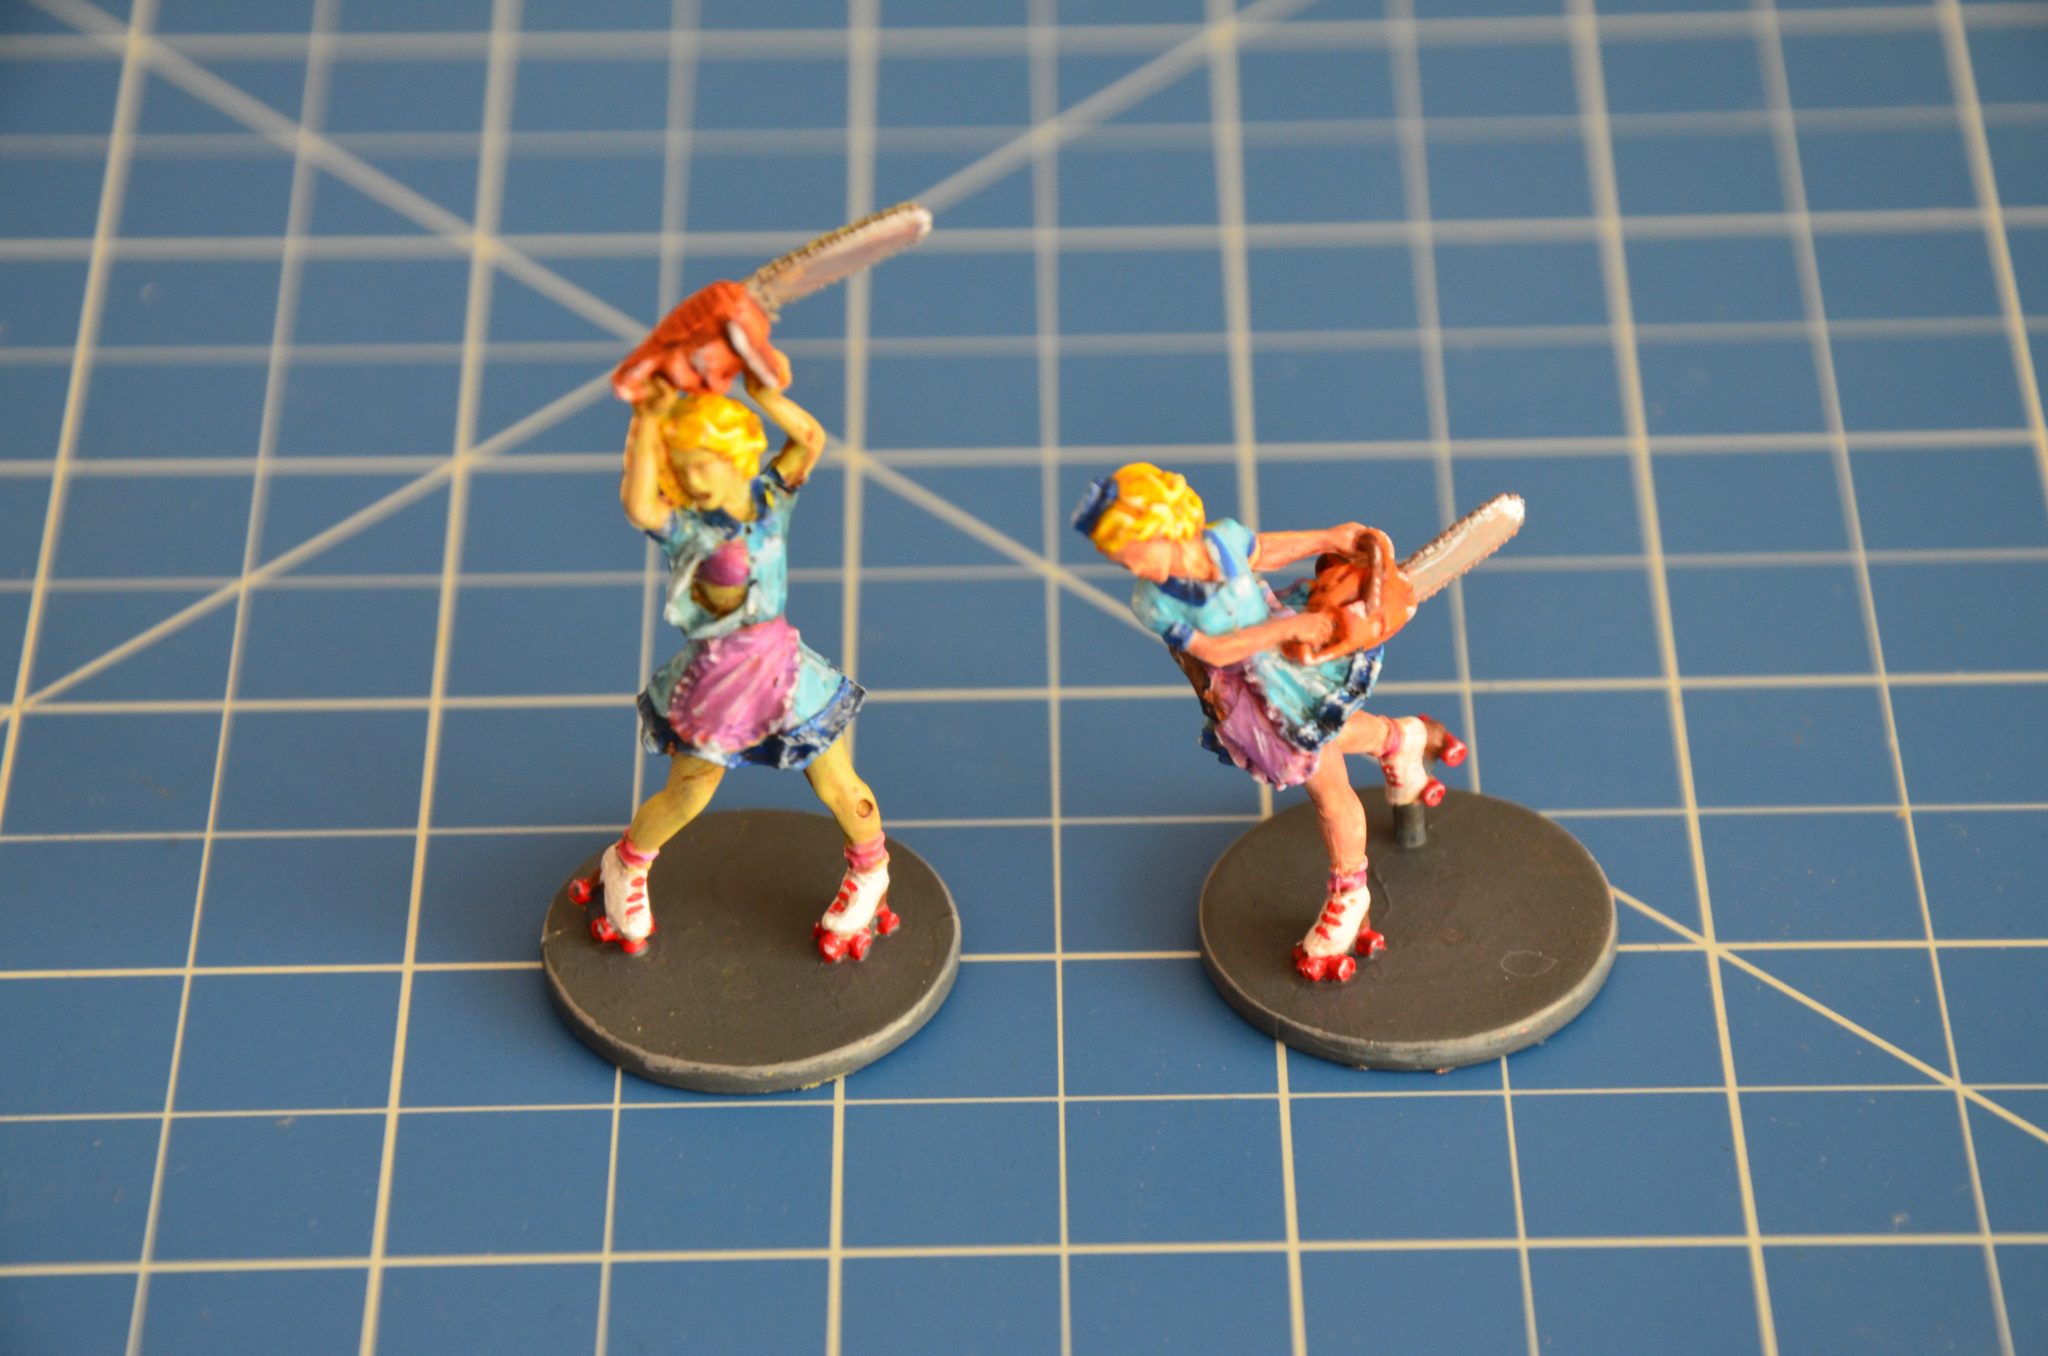
Zombicide – Wanda and Phil finished… eventually!!!
This paintwork already started several weeks ago and after a long pause I added the last streaks of paint and varnish last night to get it finally done. Usually I don’t like longer pauses between painting sessions on one project because you start to lose „the feeling“ for the miniature. However, this time it just happened due to several reasons. Now we are generally satisfied with the result.
Survivor Phil and his deader counterpart.The undead proof: Zombivors can skate.
These are the first Survivors and Zombivors we finished for Zombicide. We, that is my better half and I, started to paint all Zombicide-minis in our possession at the beginning of this year – our first joint painting project. 🙂 We started with the zombies from Prison Outbreak and went on with the zombies from the core box. With one exception: we saved the Mutants for a later time. Nevertheless, that is nearly a hundred zombie-minis so far.
The inspiration for colours and painting techniques came from different youtube-videos. It’s astonishing how artistically some people are able to paint miniatures and how much effort they put into producing videos about it. Thanks, guys!
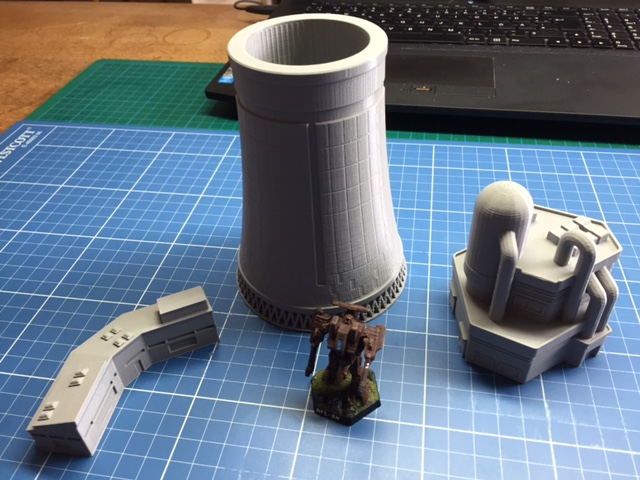
The printing files for this outstanding piece of wargaming terrain are available on thingiverse.com along with several other very nice models for small-scale wargames like BattleTech or Epic. FOR FREE!!! So a big thank-you to all the designers who share their models with people who are not so gifted in computer-aided design (CAD).
The Nuclear Power Plant consists of three different buildings: an office building, a reactor facility and a cooling tower. 3D-printing can sometimes be tricky. The reactor facility took me three attempts unless I had a finished model, however, the office building and the tower caused no problems at all. The cooling tower alone is a massive thing, more than twice as tall as a BattleMech on the field.
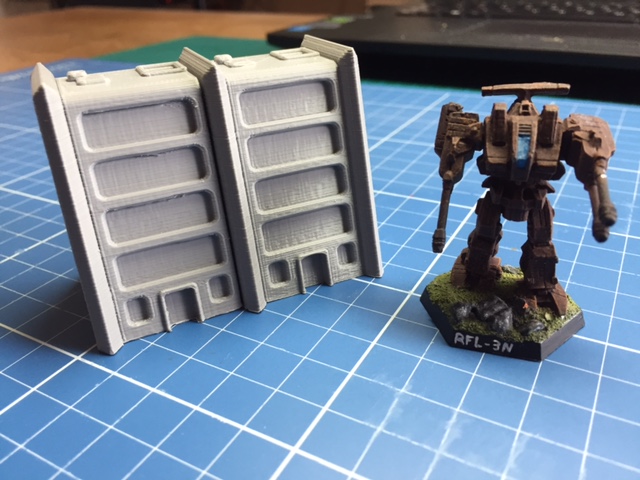
While the cooling tower has the definite eye-catching ability, smaller and simpler designs help to make the terrain much more diverse and to bring more tactial options to the game. The Expendable Office Building is only one example of many simpler designs which can be found on thingiverse.
One building takes one to two hours to print and can be expanded with additional printouts. In the picture you see one main building and one expansion attached to it. I can already see complete city blocks made of these. Printed in grey filament it is not really necessary to paint them, I think, but glueing them on some hex bases might be a good idea. But for now they are awaiting their first battle…